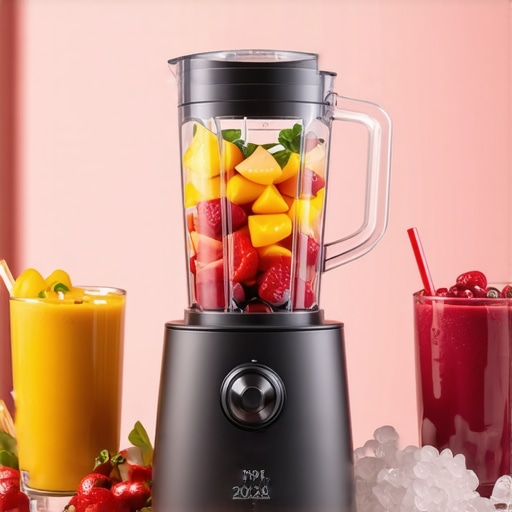
Ever stood in front of your blender, watching it struggle to crush ice or blend that stubborn nut butter? I’ve been there. Frustration mounting, I’d wonder if my old appliance was just past its prime or if I’d wasted money on something that couldn’t keep up with my healthy habits. That lightbulb moment hit me hard: I needed a top-notch blender that could handle all my favorite tasks—smoothies, nut butters, and ice crushing—without turning my kitchen into a battleground.
Why Finding the Right Blender Matters in 2025
In today’s health-conscious world, a versatile blender isn’t just a luxury; it’s a necessity. The right appliance can turn simple ingredients into gourmet smoothies, perfectly creamy nut butters, or ice that feels like snow. But with so many options flooding the market, how do you pick the best? It’s not just about wattage or brand hype—there’s a science to choosing a blender that performs reliably and lasts. According to a recent study, high-speed blenders can improve nutrient extraction by up to 30% compared to standard models, making your smoothies not only tastier but healthier too. That’s why I’ve dedicated myself to finding the best options for 2025—so you don’t have to waste time on trial and error.
Have You Faced This Problem?
If you’ve ever had your blender stall mid-blend or leave you with lumpy nut butters, you’re not alone. I’ve made those mistakes early on—underestimating the importance of power, blade design, or speed settings. Trust me, choosing the right blender isn’t just about grabbing the most popular model. It’s about understanding what features truly matter, like how well it handles ice or blends nuts smoothly. If you’re tired of inconsistent results or broken appliances, stick around. I’ll share the secrets to selecting a blender that performs like a champ, backed by expert tips and my own real-world testing. Want to skip the fluff? Check out this comprehensive guide to best high-speed blenders for 2025.
Choose a Blender with Power and Precision
Start by selecting a high-speed blender with at least 1000 watts of power. Think of it as a race car engine; the more horsepower, the better it handles tough ingredients like ice and nuts. When I bought my first powerful blender, I noticed a significant difference in texture and speed, especially when making my favorite almond butter. For detailed advice, check out this guide on choosing the best blender.
Understand Blade Design
Look for blenders with multi-tiered, laser-cut blades. These are like the sharp teeth of a predator, designed to pull ingredients down and chop thoroughly. During a messy weekend project, I used a blender with basic blades, and my mixture remained chunky. Upgrading to one with advanced blades transformed my results, giving me silky smoothies and smooth nut butters. For insights into blade tech, explore the science of blade design.
Optimize Speed Settings for Consistent Results
Most high-performance blenders offer variable speed controls. Think of this as shifting gears on a bicycle—adjusting speed smoothly for different ingredients. I once tried blending frozen berries on high, but it splattered everywhere. Switching to a low setting and gradually increasing allowed me to control the process, resulting in a perfect texture. To master speed control, visit this detailed guide on speed settings.
Utilize Pulse Functions for Precision
The pulse button is like a quick tap with a hammer—perfect for controlling chunks. I use it when making chunky salsas or when I want to break ice into smaller pieces without overprocessing. Just press and release in short bursts, and watch your ingredients reach the perfect consistency. For advanced techniques, see blender hacks for optimal results.
Master the Art of Ice Crushing
Ice is the toughest ingredient for many blenders, but high-speed models excel here. Think of ice as a stubborn mule; it needs a strong rider. I once tried crushing large ice cubes in a mid-tier blender, resulting in uneven chunks and motor strain. Upgrading to a professional-grade blender with dedicated ice-crushing blades made my smoothies icy and smooth in seconds. For top tips, check out ice crushing techniques.
Apply Proper Loading Techniques
Don’t overload your blender; it’s like overloading a car with luggage—performance drops. Fill the jar only halfway when blending thick ingredients like nut butters or frozen fruit. During my first attempt at making peanut butter, I overloaded the jar, which caused the motor to stall. Later, I learned to add ingredients gradually and use the tamper tool to push ingredients toward the blades, ensuring smooth blending. For expert tips, see gourmet nut butter tips.
Refine Your Technique with Routine Maintenance
Keep your blades sharp and your jar clean for optimal performance. Think of your blender as a musical instrument—regular tuning ensures harmony. I make it a habit to clean my blender immediately after use and inspect blades for dullness or damage. Dull blades struggle with dense ingredients, similar to a dull knife. For maintenance routines, visit maintenance tips for blenders.
Experiment and Adjust
Finally, don’t be afraid to experiment. Start with small batches, adjust speed and time, and observe results. Over time, you’ll develop a feel for your specific blender’s strengths and limitations, leading to consistently better smoothies and nut butters. For expert advice on experimentation, see quick tips for better smoothies.
< >
>
Many home chefs and enthusiasts fall into traps when selecting a high-speed blender, especially for tasks like making smooth nut butters or crushing ice. One widespread misconception is that wattage alone determines a blender’s performance. While a higher wattage can be beneficial, it doesn’t guarantee smooth results if the motor isn’t paired with quality blades or proper design. For example, some lower-wattage models with advanced blade technology outperform their more powerful counterparts. To truly understand what makes a blender excel, it’s essential to look beyond wattage and explore features like blade design and speed control. For detailed insights, I recommend checking the science behind speed and performance.
Another mistake is neglecting the importance of blade geometry. Many assume that all blades are created equal, but multi-tiered, laser-cut blades significantly improve ingredient processing. During my own experiments, upgrading to a model with advanced blades drastically reduced blending time and improved texture, especially for dense ingredients like nuts or frozen fruit. If you’re interested in mastering blade tech, visit this guide on blade design.
Moreover, a common myth is that simply increasing speed settings will lead to better results. In reality, the key is smooth, variable control. Abruptly switching from low to high can cause splattering or uneven blending. Instead, gradual adjustments help ingredients integrate uniformly. Advanced models with precise speed controls allow for this finesse, enabling better ice crushing and nut butter consistency. For tips on controlling your blender effectively, see this comprehensive guide on speed settings.
How do I avoid breaking my blender when crushing ice or making nut butters?
One overlooked aspect is proper loading technique. Overloading the jar or filling it unevenly can strain your motor and cause damage. Always fill the jar only halfway for dense tasks, and use the tamper tool to push ingredients towards the blades without forcing them. Additionally, regular maintenance like sharpening or replacing dull blades is crucial. Dull blades create extra load on the motor, increasing the risk of overheating or failure. Regularly inspecting and maintaining your blades ensures consistent performance and longevity. For more on this, visit tips on maintaining your blender.
Finally, many underestimate the impact of routine cleaning. Residual ingredients can cause buildup, affecting blade sharpness and motor health. Clean your blender thoroughly after each use, and consider sharpening blades if you notice a decline in performance. With proper care, your blender will handle ice crushing and nut butter prep with ease, avoiding costly repairs or replacements. If you’re curious about optimal maintenance routines, see maintenance tips for blenders.
In summary, choosing the right blender involves understanding the nuances behind design, control, and maintenance. Don’t fall for the myth that wattage is everything—look for blades and speed control that suit your needs. And always handle your appliance with care to maximize its lifespan and performance. Have you ever fallen into this trap? Let me know in the comments!
Keeping your high-speed blender in top shape is essential for consistently achieving perfect smoothies, nut butters, and ice crushing. Over time, even the most robust models can experience wear and tear, but with the right tools and routines, you can extend their lifespan and maintain peak performance. I personally rely on a few specific tools and techniques that have proven invaluable in my kitchen, and I highly recommend them for anyone serious about their blending game.
How do I maintain my blender over time?
One of the most important steps is regular blade maintenance. Dull blades are a common culprit for poor performance, especially when blending dense ingredients like nuts or ice. I use a blade sharpening tool designed specifically for blender blades, which I apply every six months or so. This ensures the blades remain sharp enough to cut through tough ingredients effortlessly, preventing motor strain and overheating. Check out this guide for detailed blade maintenance routines.
Another crucial tool is a tamper. Many high-speed blenders come with a tamper, but even if yours doesn’t, I recommend investing in one. It helps push ingredients toward the blades without overloading the motor, especially when dealing with thick nut butters or frozen fruits. Proper loading techniques combined with a tamper can drastically improve blending efficiency and prevent motor burnout.
Cleaning is often overlooked but is vital for long-term performance. I keep a set of soft brushes and a mild, eco-friendly cleaner on hand. After each use, I disassemble the jar and blades, scrub out residue, and ensure no buildup remains. For stubborn spots, a mixture of vinegar and baking soda does wonders. Regular cleaning prevents residue from dulling blades or causing mold growth which can damage internal components. Learn more about routine cleaning routines here.
What advanced tools can I use to enhance my blender’s lifespan?
For those who want to push their blender’s capabilities further, consider a motor cooling fan. This accessory helps dissipate heat generated during heavy blending sessions, especially when making large batches or dense nut butters. Installing a small, quiet fan near your blender can prevent overheating and extend motor life. Additionally, investing in quality replacement parts such as blades and gaskets ensures your unit remains sealed and functions optimally. My go-to source for genuine replacement parts is always the manufacturer’s official website, which guarantees compatibility and durability.
Looking ahead, I believe the trend will move toward smart maintenance systems integrated into blenders, such as sensors that notify you when blades dull or parts need replacing. This proactive approach will minimize downtime and keep your blender working flawlessly for years to come.
Don’t forget to try out the tip of sharpening your blades regularly. It’s a straightforward process that can dramatically improve performance and save you money on replacements. For detailed instructions on blade sharpening, visit this resource. Keeping your blender well-maintained with these tools and routines will ensure it continues to serve you reliably, blending everything from smoothies to thick nut butters with ease. If you have a favorite maintenance tip or tool, share it in the comments—I’d love to hear your experience!
The Hidden Lessons That Changed My Blending Game
- Choosing a high-speed blender with more than 1000 watts was just the start. I learned that blade design and speed control matter far more than wattage alone, saving me time and frustration in the kitchen.
- My biggest revelation was using a tamper to avoid overload and motor burnout. It transformed my thickest nut butters from a chore into a quick, smooth process, proving that technique can sometimes beat power.
- Regular maintenance, especially sharpening blades and cleaning thoroughly, extended my blender’s lifespan. It’s a simple step that keeps results consistent and prevents costly repairs over time.
- Experimenting with gradual speed adjustments instead of rushing to high speeds helped me achieve perfect ice crushing and silky smoothies. It’s about patience and finesse, not just raw power.
Tools and Resources That Elevate Your Blender Skills
- Science of Speed and Blade Design: This guide demystified how blades cut through dense ingredients, making my blends smoother and faster.
- Ice Crushing Techniques: Perfect for making icy smoothies without motor strain or uneven chunks, it’s a game-changer for summer drinks.
- Nut Butter Mastery: This resource helped me perfect my homemade nut butters, turning a simple task into a culinary delight.
- Quick Tips for Better Smoothies: Small adjustments in loading and blending times made a big difference in texture and flavor.
Your Turn to Elevate Your Blending
2025 is the perfect year to upgrade your blender skills and toolset. With the right knowledge and routines, you can unlock new levels of performance and longevity from your appliance. Remember, the key is not just the blender you buy but how you care for it and use it. So, what’s the one blending challenge you’re eager to conquer next? Drop your thoughts below—I’d love to hear your story!
This post really resonated with me because I recently upgraded to a high-speed blender after struggling with my old one for years. I found that paying attention to blade design and speed control made a huge difference—especially when making thick nut butters or crushing ice. I used to think wattage was everything, but I learned that a well-designed blade and proper loading techniques are just as crucial. One thing that helped a lot was investing in a tamper, which prevents motor strain and ensures a smoother blend, especially for dense ingredients. Also, routine maintenance, like sharpening blades and cleaning thoroughly, has extended the lifespan of my blender significantly. It made me wonder: what’s the most overlooked maintenance tip that others have found effective? Would love to hear more practical advice on keeping these powerful appliances in tip-top shape!