I remember the exact moment I lost my patience with my old blender. It was a quiet Sunday morning, I was eager to whip up a batch of creamy almond butter, only to be greeted by a grinding noise that sounded more like a tractor than kitchen equipment. Frustrated, I watched my once-smooth nut mixture turn into a gritty mess, sending tiny nut pieces flying everywhere. I realized my trusty old blender just couldn’t handle the job anymore, and my hopes of making fresh, homemade nut butters were dashed for the day.
Why Your Nut Butter Dreams Keep Getting Crushed
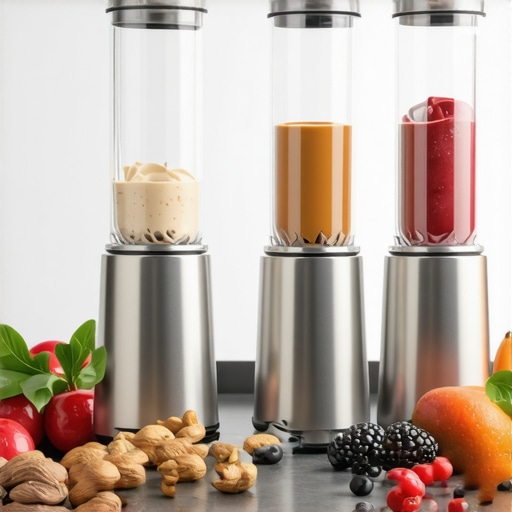
Years ago, I thought all blenders were created equal. If it could handle smoothies, surely it could manage nut butters, right? Wrong. The truth is, not every high-speed blender is designed to tackle the thick, oily consistency of nut butters—especially when dealing with roasted or oily nuts. I learned this the hard way after frequent jams, overheating, and disappointing textures. And I suspect many of you have faced similar frustrations, maybe even beyond nut butters—like crushing ice or blending frozen fruits—where the machine just doesn’t cut it. After countless trial and error, I finally discovered a handful of models in 2026 that truly buck the trend and can handle heavy-duty nut prep without breaking a sweat.
Are All Blenders Created Equal for Nut Butter?
Early on, I made the mistake of assuming that a powerful motor alone would guarantee perfect nut butter. I went for the most wattage, expecting smooth spreads. But I overlooked vital features like blade design, torque capabilities, and ease of maintenance. Turns out, a blender with raw power can still struggle if it lacks the right engineering—leading to overheating or burning out. For a deeper dive into what makes some blenders stand out, check out the science behind speed and performance. Trust me, understanding these principles has saved me money and frustration.
So, if you’re tired of spending more time fixing jams than enjoying your homemade nut butters, stick around. In the following sections, I’ll introduce you to the top 4 nut butter blenders ready to serve you well in 2026 and beyond—blenders that actually work, don’t overheat, and deliver consistently creamy results without the fuss.
Prep the Nuts Properly to Unlock Creaminess
Start by roasting your nuts at 350°F (175°C) for 10 minutes to release oils and enhance flavor. Let them cool completely before blending to prevent heat buildup. Use a high-power blender designed for nut butters for optimal results. I once forgot to cool the roasted almonds, and the sudden hot oil caused my blender to stall early, so cooling is key for consistency and motor protection.
Layer Ingredients Strategically for Smooth Results
Place the nuts at the bottom of the jar, adding a splash of oil or honey to facilitate mixing. Keep in mind that oil helps achieve that silky texture, especially with dense nut types like cashews or macadamias. When I made a batch of peanut butter, I added a tablespoon of oil mid-spin, which prevented the mixture from becoming gritty. This method also minimizes strain on your blender’s motor.
Use Optimal Speed Settings and Techniques
Start blending at low speed to break down nuts into smaller pieces, then gradually increase to the highest setting. Refer to this comprehensive guide on speed functions for precise control. During my first attempt, starting slow prevented overheating and blade wobbling. If your blender has a dedicated nut butter mode, use it to maintain consistent operation without manual adjustments.
Employ Tamping Method for Heavy Loads
If your machine struggles or stalls, use a tamper to push nuts toward the blades. Never open the lid mid-process; instead, stop, add a little more oil, then resume blending. I once used a wooden spatula to gently press dense nuts, which kept the blade engaged and prevented jams. Some high-end models specialize in jam-free operation— consider these if jams are frequent.
Monitor, Pause, and Scrape for Uniform Texture
Pause blending periodically to scrape down sides with a spatula, ensuring all nuts are evenly processed. Use interrupts to let the motor cool down if overheating signals appear. Once a crumbly pasty phase emerges, continue blending until smooth and creamy. I found that patience and monitoring prevent gritty or oily textures in the final product.
Handle Consistency Fluctuations with Adjustments
If your nut butter becomes too thick or begins to heat up, add small amounts of oil or a splash of water to loosen it. For super dense batches, a pulse or two at high speed can break down stubborn chunks. Remember, frequent pauses not only give the motor a break but also help control the final consistency.
By following these precise steps and techniques—like layering ingredients correctly, leveraging optimal speed settings, and using proper tamping—you can produce smooth, delicious nut butters with less frustration. Mastery comes from understanding your blender’s unique features and applying these core methods consistently, turning a sometimes messy process into a satisfying craft.
Many enthusiasts believe that simply owning a powerful blender guarantees perfect nut butters or flawlessly crushed ice. However, this assumption often leads to frustration, as users overlook critical nuances that can make or break your blending success. One common myth is that high wattage alone ensures smooth textures; in reality, the engineering of the blades and motor torque play a vital role in handling dense, oily ingredients without overheating or stallings. Understanding the science behind blender speed and torque reveals why some models excel with nut butters or crushing ice, while others fail despite boasting impressive specs.
Are You Falling for the Overpower Trap?
Many believe bigger motors prevent jams, but excessive power can generate heat that damages components or alters flavor profiles in delicate recipes. The real trick involves a balanced mix of motor strength, blade design, and container shape to achieve optimal performance. Avoid the pitfall of rushing into buying the highest wattage model without assessing these factors—fidelity to true performance matters more than raw numbers.
Another overlooked aspect is the importance of blade sharpness. Dull blades increase strain on the motor, elevate temperatures, and cause inconsistent textures. Regularly sharpening or replacing blades ensures efficient processing, especially when dealing with tough nuts or trying to crush ice into fluffy snow. Some top-rated ice-crushing blenders in 2026 incorporate specialized blade geometries designed to generate cyclone-like vortexes, maximizing efficiency.
Advanced users might ask, “How does container design influence blending outcomes?” Better-designed jars minimize air pockets and provide uniform mixing, critical for achieving that silky-smooth nut butter or smoothie texture. Choosing containers with optimized shapes can reduce the need for frequent pauses or stirring. This detail often goes unnoticed but can significantly improve consistency.
Finally, don’t underestimate the impact of operational techniques. Starting at low speeds, applying appropriate tamping, and pausing intermittently to scrape sides all contribute to superior results. Even with a top-tier blender, neglecting proper blending methods can lead to gritty or uneven final products.
In conclusion, mastering blends involves more than focusing on power—it’s about understanding and optimizing the intricate nuances of machine design, ingredient prep, and technique. Do you know how your blender truly operates beneath the surface? If not, you might be missing out on the full potential. Have you ever fallen into this trap? Let me know in the comments.
Keep Your Blender in Peak Condition with Proper Maintenance
Maintaining your high-speed blender is crucial for long-term performance and consistent results, especially when tackling dense nut butters and frozen ingredients. Regularly inspecting blades for dullness and sharpening or replacing them ensures optimal cutting power. I personally rely on blade sharpening services every year to maintain efficiency. Additionally, keeping the motor vents clean prevents overheating, which can drastically reduce your blender’s lifespan. I reserve a few minutes after each use to clean the outer shell and air vents, minimizing dust buildup that hampers cooling.
Tools That Save Time and Frustration
If you’re serious about blending consistently perfect nut butters or crushing ice, investing in a quality tamper is worthwhile. A blender tamper helps push dense ingredients toward the blades, reducing strain on your motor and avoiding stalls. I use mine to gently press stubborn nuts during extended blends, especially with models prone to jam on oily ingredients. Also, consider a dedicated cleaning brush for blades; I find it speeds up maintenance and prevents residue buildup that could cause uneven blending or bad odors.
Why Long-Term Results Depend on Solid Tools
Choosing the right accessories and tools isn’t just about convenience—it’s about ensuring your blender can handle continuous use without overheating or wearing down prematurely. Upgrading to a high-quality jar with an innovative shape can improve ingredient circulation, resulting in creamier nut butters and smoother smoothies. Trend forecasts suggest that future blender designs will incorporate smarter cooling systems and more durable materials, pushing the boundaries of heavy-duty kitchen appliances. Keeping abreast of these technological advances can be a game-changer for enthusiasts.
Questions to Ask About Your Blender Maintenance Routine
How do I maintain my blender’s motor and blades over time? Regularly inspecting blades for dullness and sharpening or replacing them as needed is key. Also, ensure that the motor is cooled properly after each use—don’t forget to clear dirt or dust from vents and consider adding more oil or checking the bearing lubrication if your motor emits strange noises. External components like jar gaskets and seals wear out too; replacing them prevents leaks and maintains suction.
Incorporate these practices into your routine and you’ll extend your blender’s lifespan significantly. Plus, using sturdy tools like a tamper can dramatically improve blending consistency and reduce your overall prep time. For detailed tips, check out this guide on blender maintenance. Why not test your skill today by trying the tamper tip next time you blend those thick nut butters—experience smoother results and less frustration!
Over the years, I’ve realized that the journey to perfect homemade nut butters isn’t just about picking the most powerful blender on the market. It’s a nuanced craft that demands knowledge, patience, and the right techniques. From my own missteps—like overheating due to Dull blades or chasing the illusion of wattage dominance—I’ve gathered lessons that can save you time and frustration. Remember, understanding your blender’s unique features and how ingredients respond during blending transforms a messy process into a delightful kitchen ritual. These insights are the result of hands-on experimentation and a willingness to learn beyond the surface, leading to smoother, creamier nut butters every time.