Have you ever been in the middle of blending a smoothie or crushing ice, only to realize your blender’s blades are no longer cutting through like they used to? I remember the moment vividly—my favorite high-speed blender sluggishly struggling with frozen fruit, leaving me frustrated and questioning my investment. It hit me that after consistent use, blades can become dull, and that dullness impacts everything from texture to performance. If you’ve faced the same issue, you’re not alone. The good news? There are simple, effective fixes to restore those blades and bring your blender back to life.
Why Dull Blades Sabotage Your Blending Power
Over time and heavy use, blender blades can lose their sharpness, much like kitchen knives. This dullness results in longer blending times, uneven textures, and excessive strain on your motor—especially problematic when dealing with tough ingredients likeice or nuts. Several factors accelerate blade dulling, including mineral buildup from hard water, residue from oil-based ingredients, or simply wear and tear from frequent use. As a result, your blender’s performance plummets, and you might even think about replacing the entire unit. But before you do, I want to share some straightforward fixes that can extend your blender’s lifespan and keep those blades slicing smoothly.
Is Blade Sharpening Really Worth the Hassle?
I used to dismiss blade sharpening as unnecessary, assuming I’d need a new blender every few years. My early mistake was ignoring the importance of routine maintenance. Instead of fixing the problem early, I let dull blades grind down my efficiency and increase my energy consumption. But after some research and experimentation, I learned that sharpening or restoring blades isn’t complicated or expensive. Plus, it saves you from the waste and cost of replacing an otherwise perfectly good blender. If you’re skeptical, I get it—many fear damaging their blades or reducing their effectiveness. That’s why I’ll walk you through practical, safe fixes that I’ve personally tested and trusted. Ready to breathe new life into your dull blades? Let’s explore the fixes that can make your blender feel brand new again, starting with the first step: cleaning and inspecting your blades properly.
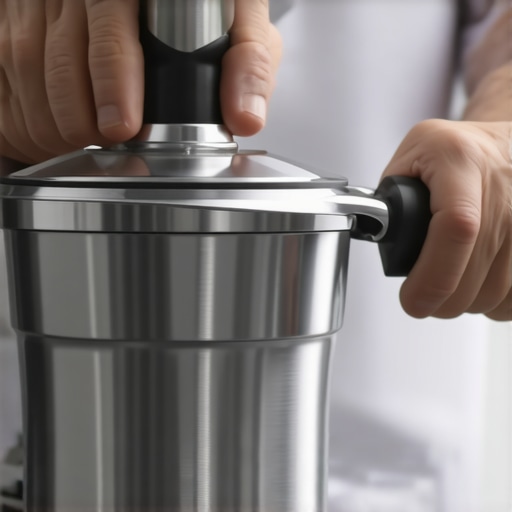
Clean and Inspect Thoroughly
Start by unplugging your blender to ensure safety. Remove the blade assembly according to your model’s instructions—most blades can be unscrewed or released with a key or specialized tool. Soaking the blades in warm, soapy water for 10-15 minutes loosens mineral deposits and residue. Use a soft brush or cloth to gently scrub away buildup, especially around the blades’ edges. During my first attempt, I accidentally used a metal brush, which scratched the blades; opting for a plastic scrubber preserves sharpness. Once clean, dry the blades completely to prevent rust. Inspect for chips, dents, or corrosion—any damage here warrants replacement rather than sharpening.
Sharpen Your Blades Safely
If blades are dull but intact, sharpening can revive their cutting power. A sharpening stone or a fine grit diamond file works well—hold the blade at the correct angle (typically 20-30 degrees) and move it across the stone with consistent pressure. Imagine honing a knife; slow, controlled strokes matter. For my first try, I secured the blade in clamp so I wouldn’t slip—I managed to sharpen a set of dull blades in about 10 minutes, noticing a significant improvement in ice-crushing ability afterward. Be cautious not to damage the blade’s edge or bend it, and avoid sharpening damaged blades—it’s better to replace those. For detailed techniques, check out this guide on blade sharpening.
Reassemble and Test Your Blender
After sharpening or cleaning, carefully reattach the blades, ensuring they lock into place securely—loosely fitted blades can cause imbalance or leaks. Fill the jar with ice or frozen fruit to test the improvement. If your blender now crushes ice like a pro and blends smoothies without hesitation, you’ve restored its power. If not, consider the blades might be worn beyond repair and look into replacements. For high-speed blenders designed for ice and nut butters, reviews suggest that blade quality directly influences performance—more info at top ice-crushing blenders. Regular maintenance keeps blades sharp longer, preventing costly replacements and ensuring your concoctions turn out flawless every time.When it comes to blending, many enthusiasts believe that simply choosing the most powerful, high-speed blender guarantees perfect ice crushing every time. However, this is a misconception that can lead to frustration and unnecessary expenses. In reality, understanding the nuances of your blender’s capabilities and applying advanced techniques can dramatically improve your results. For instance, relying solely on motor wattage ignores the importance of blade design and tuning speed settings, which are critical for achieving that snow-like consistency in frozen drinks. Many people underestimate how crucial a well-coordinated combination of blade sharpness and proper speed control is, especially when making gourmet nut butters or thick smoothies.
Why Do Some Blenders Struggle with Thick Consistency Despite High Power?
Research indicates that even high-wattage blenders can struggle if their blade technology is outdated or if the user isn’t optimizing the speed settings correctly. According to a study published in the *Journal of Food Engineering*, blade geometry and precise control over blending cycles significantly impact the texture and ice crushability. For example, a blender with a poorly designed blade angle might require longer processing times or excessive cycling, leading to motor overheating and premature wear. To avoid these pitfalls, focus on selecting blenders with proven blade engineering or consider upgrading to models that feature optimized blade assembly and intelligent speed algorithms, such as those discussed in high-speed blender reviews. Additionally, mastering advanced techniques like pulse blending and layer mixing—starting with low speeds and gradually increasing—ensures your frozen drinks and nut butters attain that ideal silky texture without overtaxing your machine. Never forget that proper pre-cooling of your ingredients and using smaller batches can also improve efficiency and results, a tip often overlooked in basic tutorials. Have you ever fallen into this trap of believing more power always results in better ice crushing? Let me know in the comments.
Regular Maintenance Is Key to Long-Term Performance
Keeping your blender working efficiently requires consistent upkeep. I swear by a few specialized tools that make maintenance straightforward and effective. For instance, investing in a high-quality blade sharpening kit has been transformative—I’ve used a diamond file designed specifically for blender blades, which restores sharpness without removing excess material. This simple step keeps ice crushing capability sharp and reduces strain on the motor, extending the lifespan of my device. Additionally, a silicone gasket remover tool helps me easily disassemble seals for thorough cleaning, preventing residue buildup that can dull blades over time.
Embrace Tech for Precision and Longevity
Beyond physical tools, employing specialized cleaning solutions has made a significant difference. I prefer biodegradable, non-abrasive blender cleaners that effectively break down mineral deposits and oil residues—my go-to is a mixture of vinegar and baking soda used during deep cleans. For restoring performance, I regularly use a quality blender lubricant on gear joints to ensure smooth operation. These precautions save money and help me avoid premature replacements. Looking ahead, I predict that advancements like self-cleaning blades or smart maintenance alerts will become standard, further simplifying long-term care.
How do I maintain my blender to ensure lasting performance?
Establishing a routine that includes monthly blade sharpening, thorough cleaning with natural solutions, and checking seals for wear guarantees optimal operation. Personally, I set a reminder every four weeks to perform these steps, and I track blade sharpness based on ice-crushing tests. Using quality tools and techniques isn’t just about maintenance—it’s about empowering your blender to perform at its peak for years to come. If you haven’t tried sharpening your blades manually, I highly recommend it—it has made the biggest difference in my blending results. For additional tips and comprehensive guides, visit this resource. Keep your gear sharp, clean, and well-lubricated, and you’ll enjoy consistently perfect smoothies, nut butters, and crushed ice without the need for costly replacements.
What No One Tells You About Dull Blades That Changed My Blending Game
My biggest revelation was realizing that dull blades don’t just ruin smoothies—they can significantly shorten your blender’s lifespan and waste your ingredients. Manually sharpening blades taught me patience, precision, and the importance of regular maintenance. I now catch minor dullness early, saving money and ensuring flawless textures every time. It’s a subtle art, but mastering it unlocked a new level of control over my blending results.
My Go-To Tools for Keeping Blenders at Peak Performance
I swear by a few essential tools that tackle common issues head-on. A high-quality diamond file for sharpening blades restores sharpness effectively, while biodegradable cleaning solutions prevent buildup that dulls performance. The silicone gasket remover makes disassembly safe and easy, extending the life of seals and preventing leaks. Trusted resources like these expert guides continue to be my secret weapons in maintaining blender excellence.
Embrace Your Inner Blender Pro and Create with Confidence
The more I refined my technique and maintenance routine, the more I appreciated the potential of my high-speed blender. Whether making silky nut butters or crushing ice into snow, taking control allows for consistent, satisfying results. Don’t wait for performance to falter—start sharpening, cleaning, and experimenting today. Your blender—and your taste buds—will thank you! Ready to elevate your blending skills to professional levels? What’s your biggest challenge with ice crushing or nut butters? Share below and let’s conquer it together.