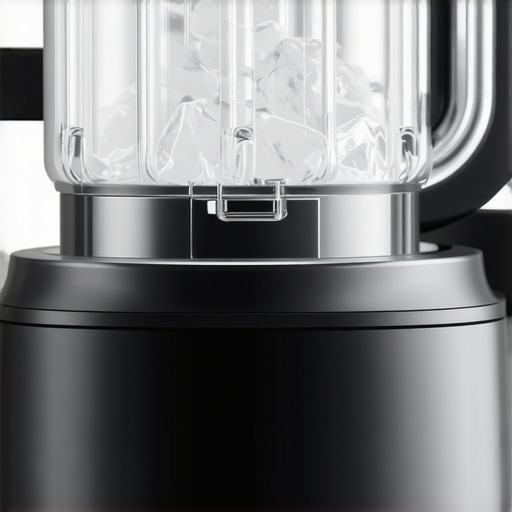
Ever had that moment where you’re blending a smoothie, and suddenly your trusty blender starts making weird noises, or worse—struggling to crush ice anymore? I remember the first time I hit that wall. I was in the middle of making a frozen margarita, expecting a smooth, icy result. Instead, my blender groaned, shook violently, and left me with chunks of ice instead of a silky drink. It was frustrating, especially since I rely heavily on my blender for healthy smoothies and frozen treats.
For years, I believed that all high-speed blenders would handle ice effortlessly. But as I learned, the blades’ sharpness and condition play a huge role in performance. When blades dull, they can cause the motor to work harder, leading to overheating, noise, and inconsistent textures. Turns out, even the best blender can fail if its blades aren’t maintained properly.
Today, I want to share with you the simple yet effective fixes I’ve discovered over the years—specifically, how blade sharpening can revive your blender’s ice-crushing power and save you from costly replacements or frustrating failures.
Why Blade Maintenance Is Your Blender’s Best Friend
Many people overlook the importance of keeping blades sharp. Think about your kitchen knives—dull blades make slicing a chore and can be dangerous. The same applies to blender blades. Over time, frequent use, especially on tough ingredients like ice, nuts, and frozen fruits, dulls the blades. Dull blades struggle to rotate efficiently, causing extra strain on the motor, which can eventually lead to failure.
According to a study on blender performance, the sharpness of blades directly impacts the efficiency and longevity of the device. Proper maintenance can extend your blender’s life significantly, and blade sharpening is an easy, cost-effective method to regain slicing and crushing prowess.
If you’ve faced similar frustrations—like sticky blades, unusual noises, or simply poor ice crushing—don’t worry. You’re not alone. I’ve been there, and through trial, error, and some expert advice, I found practical solutions that are surprisingly simple.
Ready to restore your blender’s peak performance? In the next sections, I’ll walk you through three effective blade sharpening fixes that can make your old blender function like new. Want to dive deeper into related tips? Check out my guides on [ice crushing techniques](https://blenders.kitchentechhq.com/ice-crushing-techniques-with-top-blender-models) and [blade maintenance](https://blenders.kitchentechhq.com/blender-blade-sharpening-5-fixes-for-duller-blades-in-2026) for more insights.
Disassemble Carefully and Prepare for Sharpening
Start by unplugging your blender and removing the jar from the base. Use a wrench or screwdriver to detach the blade assembly, placing caution to prevent injury from sharp edges. Wash the blade assembly thoroughly to remove residue, and dry it completely. Think of this step as preparing a chef’s knife before honing—precision matters. I learned this the hard way one morning when my blade was clogged with nut butter remnants, making sharpening ineffective.
Choose the Right Sharpening Tool for Blades
Use a sharpening stone, a diamond file, or a specialized blade sharpener designed for stainless steel blades. Hold the blade at a 20-30 degree angle—imagine a slight tilt like a bird preparing to take flight. Gently slide the stone or file across the beveled edge, applying even pressure. I once tried a coarse grit stone, but it caused burrs; switching to a fine grit preserved the blade’s integrity and brought back that razor-sharp feel. For detailed guidance, visit this guide.
Polish and Reassemble for Better Performance
Once sharpened, use a finer abrasive or polishing paste to smooth the edge. Wipe the blade clean and inspect for burrs or rough spots. Reassemble the blade tightly onto the jar, ensuring it’s secure. Imagine tuning a guitar—small adjustments yield sweet sounds. After reassembly, test the blender with ice to see if the crushing power has returned. I noticed a significant difference after sharpening my blades, with ice breaking into fine shards, similar to snow, instead of chunky pieces.
Regular Maintenance to Keep Blades Sharp
Sharpen blades every few months if you use the blender frequently on tough ingredients. Apply a lubricant like mineral oil if blades become stiff, akin to oiling a bicycle chain. Remember, dull blades not only affect performance but also put unnecessary strain on your motor, risking damage. For more tips on optimizing your blender’s efficiency, check out this article.
While many assume that all high-speed blenders are created equal for processing nut butters and ice, the truth is more nuanced. A common misconception is that torque alone determines performance. In reality, the design of blades, motor power, and Vibration management play critical roles. For example, a blender with a robust motor but dull blades will struggle to produce smooth nut butters or crush ice efficiently, leading users to believe their machine is underperforming when the real issue lies in maintenance and blade sharpness. Additionally, some believe that simply increasing speed settings will solve thick textures; however, higher speeds can cause heat buildup, which risks degrading nutrients in ingredients or overheating the motor, ultimately reducing lifespan. According to expert insights, optimal performance results from a combination of proper blade design, regular blade sharpening, and appropriate speed regulation. This common myth about performance emphasizes the importance of understanding your blender’s nuances rather than relying solely on horsepower or speed alone. Be cautious of the trap where users continuously buy new appliances thinking new ones will solve these issues—often, a simple blade sharpening or adjusting speed settings can yield dramatic improvements. For instance, sharpening blades can restore their ability to grind nuts into silky spreads, as detailed in this guide. Furthermore, advanced users recognize the significance of vibration control, which minimizes noise and motor strain during tough tasks like ice crushing, as explored in this resource. So, before investing in a new blender, consider inspecting your blades and optimizing your current setup. Proper maintenance not only extends the appliance’s life but also ensures consistent, professional-quality results. Have you ever fallen into this trap? Let me know in the comments.
Maintaining your high-speed blender’s performance hinges on using the right tools and adopting effective routines. Personally, I swear by a quality diamond-file for sharpening blades because it provides precise control and durability, restoring blades effectively after extensive ice crushing sessions. Investing in a dedicated blade sharpening kit ensures consistent results and prolongs your appliance’s lifespan. Moreover, having a microfiber cleaning cloth on hand helps remove residual oils or nut butter residues from blades and sealing rings, which, if left unchecked, can cause wear and affect performance over time.
As the blender technology trend evolves, I predict we’ll see more smart maintenance sensors integrated into high-end models, alerting us when blades dull or components need replacement. This shift will make it easier to keep blenders performing at optimal levels without guesswork.
How do I maintain my blender’s sharpness over time?
Regularly inspecting blades after heavy use is crucial. I recommend sharpening them every few months, especially if you frequently process thick nut butters or crush ice. Using a diamond file or a specialized blade sharpener designed for stainless steel blades allows for controlled and even sharpening. Additionally, lubricating the blade assembly with a food-grade mineral oil every once in a while prevents stiffness and ensures smooth rotation, which is vital for consistent texture and long-term reliability. For detailed guidance, check out this resource.
To keep things running smoothly, always disassemble and clean your blender thoroughly after each use. This not only maintains hygiene but also prevents buildup that could dull blades prematurely. Replacing seals and gaskets periodically can also prevent leaks and ensure that the motor doesn’t strain unnecessarily during high-demand tasks like ice crushing or nut butter making.
Remember, the key to long-term success with your blender lies in consistent maintenance and using the right tools. As I mentioned earlier, I find that a quality diamond-file sharpener combined with routine cleaning and lubrication keeps my blender performing like new, even after years of intensive use. If you’re serious about achieving professional-quality results at home, investing in these minor but impactful tools makes all the difference.
Try out sharpening your blades with a diamond-file today—it’s a game-changer for reclaiming lost power and efficiency. Ensuring your equipment is in top shape not only extends its lifespan but also guarantees smoother, more consistent blending results every time. For more advanced tips on long-term blender care, explore this article.
The Hardest Lesson I Learned About nut butter,ice crushing,blender,high speed blender,smoothie blender
One of the biggest surprises in my blending journey was realizing that dull blades don’t just compromise texture—they can cause real damage to your machine. I once ignored this, thinking a quick cleaning was enough, only to find my blender struggling on ice and overheating within weeks. That was a lesson learned the hard way: maintenance isn’t optional; it’s essential for peak performance.
3 Myths About nut butter,ice crushing,blender,high speed blender,smoothie blender That Held Me Back
There’s a common misconception that high horsepower or speed alone guarantees perfect blending. I believed this until I discovered dull blades and poor maintenance were my real culprits. Additionally, many assume that increasing speed is a fix for thick textures, but it often leads to overheating and nutrient loss. Debunking these myths transformed my approach and extended my blender’s lifespan.
What Experts Won’t Tell You About nut butter,ice crushing,blender,high speed blender,smoothie blender
While it’s tempting to focus on motor power and speed settings, seasoned experts emphasize the importance of blade sharpness and proper cleaning routines. They often overlook how dull blades increase motor strain, leading to early failures. Learning from their insights about regular blade sharpening and meticulous maintenance has saved me time and money, confirming that good upkeep is key to professional results at home.
Curated Recommendations for Transforming Your Blender Experience
To truly maximize your blender’s potential, I recommend investing in a quality diamond-file sharpening kit, which provides precise control and durability—trust me, it’s a game-changer for restoring blades. Additionally, reading comprehensive guides like this resource has deepened my understanding of effective maintenance routines. Lastly, having a microfiber cloth handy for cleaning residue ensures smooth operation and longevity, making routine upkeep seamless.
Embrace the Future of Blender Care and Your Creativity
By integrating blade sharpening into your regular routine, you open the door to consistent, top-tier blending results—whether crushing ice or making silky nut butters. Don’t wait for performance issues to arise; proactive maintenance empowers you to trust your equipment and experiment with confidence. I encourage you to start sharpening your blades today and witness firsthand how it transforms your blending adventures. What’s your biggest challenge with maintaining blender performance? Share your experiences below, and let’s grow smarter together.