Ever had that moment during breakfast where you reach for your blender, only to be met with a frustrating jarring sound, or worse—a jam that ruins your entire smoothie attempt? I remember countless mornings when I’d struggle with my old blender, battling unyielding seeds and ice chunks, feeling like I needed a degree in engineering just to get a silky raspberry seed blend. That lightbulb moment hit me hard when I realized I wasn’t alone in this—many of us are fighting the same battle with subpar appliances that don’t quite cut it in 2026’s smoothie scene.
Why Finding the Right Blender Matters More Than Ever
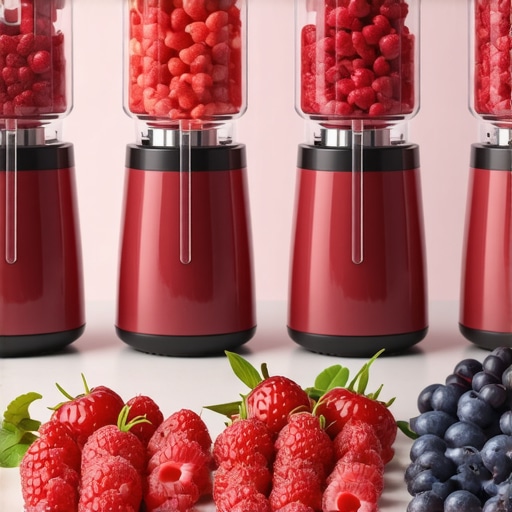
In the world of smoothie making, the game has changed dramatically. No longer are we satisfied with lumpy mixtures or seeds that stubbornly refuse to blend. Our goal is smooth, velvety textures that make healthful raspberry seed blends not just a treat, but an enjoyable experience. And trust me, the right device makes all the difference. According to recent studies, the efficiency of high-speed blenders can significantly impact nutrient retention and texture quality in smoothies (source: The Science Behind Blender Speed).
However, not all blenders are created equal. Early on, I made a crucial mistake—believing that a powerful motor alone was enough. I overlooked the importance of blade design and speed settings, which are essential for breaking down tiny raspberry seeds and crushing ice without the dreaded stuck-particle effect. Discovering which blenders excel at these tasks has truly transformed my mornings and can do the same for you.
Have you ever faced a blender that leaves chunks instead of a smooth pour?
If so, you’re not alone. The secret lies in selecting a model that combines power with precision, ensuring your raspberry seed blends are irresistibly silky every time. Ready to dive into the top contenders of 2026 and find the perfect match for your smoothie adventures? Let’s get started with some expert insights and practical tips that will elevate your blending game to the next level.
Start with the Right Foundation
Choose a blender with a powerful motor and optimized blade design, crucial for breaking down seeds and ice effortlessly. For instance, a high-torque motor combined with engineered blades can make quick work of tough ingredients. When I attempted to blend frozen berries without proper equipment, the motor struggled and overheated—highlighting the need for quality gear. Check out [top-rated blenders for nut butter](https://blenders.kitchentechhq.com/best-blenders-for-nut-butter-at-home) to ensure you’re starting on solid ground.
Proper Ingredient Preparation
Prep your ingredients for efficiency. For frozen fruit, cut into smaller pieces to reduce load on the blades and prevent stalls. For nuts, roasting enhances flavor and makes blending easier. Applying these small prep steps can significantly improve results, as I learned when my first attempt at almond butter turned into a dry, gritty mess because I didn’t soak or roast the nuts beforehand.
Optimize Blade Speed & Settings
Advanced blenders allow precise control over speed. Use ‘pulse’ for initial chopping, then ramp up to high speed for emulsifying or ice crushing. The key is in adjusting the settings based on the task—fast for smoothies, low for thick butters. This control prevents overheating and ensures uniform blending. I discovered this when I initially used full speed for everything; now, I switch settings for better texture and less wear on the motor, as detailed in [mastering blender speed settings](https://blenders.kitchentechhq.com/the-ultimate-guide-to-speed-settings-in-blenders).
Master Ice Crushing Techniques
For icy smoothies, add ice gradually. Use a pulse strategy to break larger cubes first, then blend at high speed. Keep the lid on tight to avoid leaks, and don’t overload the blender. I once tried blitzing a full tray of ice at once, causing the motor to stall; now I add smaller amounts and achieve a fluffy texture, especially after reviewing [ice crushing tactics](https://blenders.kitchentechhq.com/ice-crushing-techniques-with-top-blender-models). The difference is night and day.
Use Tamps & Accessories for Thick Blends
For stubborn ingredients like thick nut butters or frozen mixtures, use a tamper to push ingredients toward the blades without overloading the motor. Some blenders include tamper tools—use them smartly to maintain smooth processing. I remember fighting to get almond butter smooth—after introducing the tamper, the process became much easier, and I avoided overheating the motor. Check out [best blender accessories](https://blenders.kitchentechhq.com/3-high-torque-blenders-that-wont-stall-on-frozen-pitaya) for more tools to enhance your blending.
Clean & Maintain Your Equipment
Post-blending, rinse immediately, and occasionally deep-clean with vinegar or specialized cleaning solutions to prevent residue buildup. Sharp blades degrade over time; sharpening or replacing them restores performance. I used to ignore cleaning, which led to bitter flavors; now, regular care extends my blender’s life and ensures optimal blending quality. For troubleshooting blade issues, refer to [blender blade maintenance](https://blenders.kitchentechhq.com/blender-blade-sharpening-5-fixes-for-duller-blades-in-2026).
By applying these concrete steps—selecting the right equipment, preparing ingredients properly, fine-tuning settings, mastering ice techniques, leveraging accessories, and diligent maintenance—you’ll unlock the full potential of your blender. This hands-on approach transforms your kitchen experiments into consistent success stories, making silky smoothies and nut butters second nature.
,
Many enthusiasts believe that simply choosing a powerful motor makes a high-speed blender unbeatable. However, this common misconception overlooks critical nuances such as blade design, motor torque, and control precision. For example, some blenders with high wattage motors still struggle with dense ingredients or ice crushing due to inefficient blade geometry, which is often overlooked in marketing. According to experts from The Science Behind Blender Speed, the synergy between blade articulation and motor torque is essential for optimal performance—not just raw power.
Why do some blenders overheat during extended use, even with high wattage?
This phenomenon is often due to inadequate cooling systems or poor heat dissipation designs, not merely the motor’s wattage. Overheating can lead to faster wear, diminished blending quality, or even complete failure. Many users unknowingly fall into this trap by selecting blenders based solely on peak horsepower, neglecting operational durability. Investing in models with superior thermal management, as discussed in this guide, can save frustration and money in the long run. When it comes to ice crushing, a frequent myth is that a higher RPM always equates to better results. But in reality, excessive speed may generate heat and create uneven textures. Instead, consistent torque and well-designed blades ensure that you get fluffy, snow-like crushed ice without overloading your machine. Check out these hacks for smarter ice mastery. As for nut butters, many assume that high-speed blending is enough to guarantee creamy spreads. However, without proper ingredient prep—like roasting, soaking, or chopping—the process can turn gritty and inefficient. Mastering nut butter involves mastering multiple factors, including ingredient quality and texture control, not just blending speed. Discover the secrets to achieving silky nut butters at home by visiting this comprehensive guide. Finally, choosing the right blender for smoothies isn’t just about wattage or brand reputation. Factors like variable speed control, tamper compatibility, and pulse features make a significant difference in texture and consistency. Many users get frustrated because they fail to utilize these advanced controls effectively. Fine-tuning your device’s settings based on the ingredient profile can elevate your blending game. For expert tips on maximizing your blender’s potential, see this article. Remember, understanding these hidden nuances not only improves your results but also prolongs your appliance’s lifespan. Have you ever fallen into this trap? Let me know in the comments.
Investing in Quality Tools for Long-Term Success
One of the most crucial factors in maintaining your blender’s performance is choosing the right accessories and tools. I personally swear by a high-quality tamper tool because it helps push stubborn ingredients like nut butters and frozen fruits toward the blades, preventing stalls and overloading. Additionally, investing in durable blade sharpening kits ensures your blades stay sharp, maintaining optimal blending efficiency over time. Using the proper tools reduces wear and tear, saving you money and frustration in the long run.
Consistent Maintenance for Optimal Performance
Routine cleaning is vital. After each use, rinse your blender immediately to prevent residue buildup, which can affect taste and performance. Deep cleaning with vinegar or specialized solutions, as described in this guide, helps remove stubborn deposits. Be sure to inspect and replace blades periodically; dull blades cause inefficient chopping and ice crushing, leading to overheating and strain on your motor. Regularly lubricate or tighten any loose parts, like jar seals, to prevent leaks that can damage electrical components.
How do I maintain my blender over time to extend its lifespan?
Maintain your blender by following a few key habits: clean the components thoroughly after each use, perform periodic blade sharpening, and check for signs of wear or damage. Keep the motor cool by avoiding overloads and using appropriate speed settings. Storing your blender in a dry, dust-free environment also helps prevent corrosion. For more advanced techniques, consider consulting these maintenance hacks tailored for high-speed blenders.
Predicting the Future of Blender Maintenance and Tools
As technology advances, expect smarter blenders with sensors that monitor motor health and alert you when maintenance is needed. Integration with smartphone apps could provide diagnostic insights, making upkeep even easier. Staying ahead of these innovations will ensure your investment remains reliable and efficient for years to come.
For instance, experimenting with a precision nut butter attachment can elevate your homemade spreads and reduce wear on basic blades, showcasing how specialized tools can optimize performance and longevity. Don’t hesitate to try one of these advanced maintenance tips today—your blender will thank you!

Lessons I Wish I Learned When Starting Out with Blenders
One of the biggest lightbulb moments was realizing that blade design and speed control are just as crucial as motor power. I used to think a high-wattage motor would do all the work, but I soon discovered that effective blade geometry and variable speed settings make a world of difference. Another lesson was understanding ingredient prep—cutting frozen fruits into smaller pieces or roasting nuts beforehand prevents stalls and overheating. Lastly, I underestimated the importance of routine maintenance; regular cleaning and blade sharpening keep performance at its peak, saving me money and frustration in the long run. These insights shaped my blending success and can do the same for you, transforming your kitchen into a smoothie sanctuary.
My Top Three Resources to Elevate Your Blender Game
First, I rely on The Science Behind Blender Speed to understand how speed impacts texture and nutrient retention. It’s a game-changer for selecting the right device. Second, Creating Gourmet Nut Butters provided me with practical tips for achieving ultra-silky spreads without jamming or overheating. Lastly, I trust Boost Your Ice Crushing Power for mastering icy smoothie techniques—essential for snow-like textures. These resources have significantly improved my blending skills and are invaluable on my journey to smoothie mastery.
Your Next Bold Step in Blender Mastery
Now is the time to take action and elevate your blending adventures. Whether you’re aiming for velvety nut butters or perfectly crushed ice, understanding these nuanced techniques and leveraging trusted resources will set you apart. Embrace experimentation, learn from your experiences, and soon you’ll transform everyday ingredients into culinary delights. Remember, the journey to becoming a smoothie artisan begins with a single blend—so get started today and enjoy the delicious results that await!
Have you ever struggled to get that perfect silky smoothie or nut butter? Share your challenges below and let’s troubleshoot together!