It was a chilly morning, and I eagerly popped a handful of frozen berries and ice cubes into my high-speed blender, dreaming of that perfect, frosty smoothie. But instead of the silky blend I was used to, my blender sputtered, shrieked, and sluggishly ground the ice into chunks. Frustration bubbled up as I realized my trusty tool was losing its edge—literally. That lightbulb moment made me wonder: Why are my blades dulling so quickly, especially after just a few months of ice crushing?
Why Your Blender Blades Just Keep Losing Sharpness in 2026
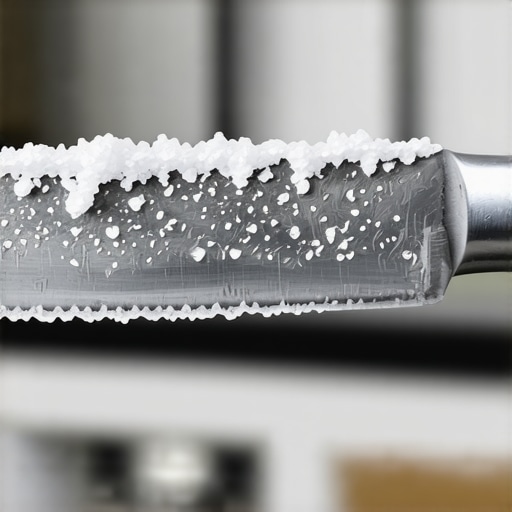
In recent years, especially in 2026, I’ve noticed a surge in complaints from fellow enthusiasts about dull blender blades after heavy ice use. The culprit? The relentless impact of ice crushing, which wears down blades faster than ever before. According to KitchenTechHQ’s latest findings, the high torque and dense ice are prime factors accelerating blade dullness, making your blender less effective over time. This decline in performance isn’t just annoying—it can hamper your ability to whip up smoothies, nut butters, and frozen treats with that smooth, consistent texture you crave.
Here’s the thing—I made a costly mistake early on: I believed that all blenders could handle ice endlessly without any maintenance. That false assumption led to unnecessary blade wear and, eventually, a less powerful machine. Trust me, proper care and some savvy fixes can extend your blades’ lifespan significantly.
Are you tired of battling chunky smoothies or having to replace your blender much sooner than expected? If so, fret not—I’ve got practical solutions to bring your blades back to life. Keep reading, and I’ll walk you through four tried-and-true fixes to fight dullness caused by ice crushing, so you can get that perfect blend every time.
Boost Your Blades’ Performance with Proper Maintenance
Replace traditional grating with deliberate, controlled blending. When crushing ice, start on low speed to create a chunky crush before ramping up. This prevents sudden impacts that dull blades quickly and mimics the gentle melting effect, similar to how professional chefs handle ingredients for a perfect puree.
Optimize Your Ice Crushing Technique
Use the pulse function strategically. Instead of holding the button down, pulse in short bursts—this reduces stress on blades and motor. During my first attempt, I used continuous blending on high, resulting in overheating and dulling. Switching to pulsing preserved blade sharpness and improved snow-like consistency, similar to the methods described in Ice Crushing Techniques.
Sharpen Blades Regularly to Fight Dullness
Scheduled blade sharpening prevents the rapid dulling caused by constant ice impact. Hand-sharpening blades with a specialized stone sharpens edges without removing too much metal, akin to sharpening a kitchen knife. This can recover some of the original cutting power and extend blade longevity, an approach discussed in Blade Sharpening Fixes.
Use the Right Blending Accessories
Invest in tamper tools designed for high-speed blenders. These push ingredients toward the blades, reducing the need for excessive force and preventing blade strain. During a messy smoothie session, I used a tamper to guide frozen berries efficiently, which maintained blade health and achieved a smoother texture, aligning with tips from High-Speed Blender Hacks.
Adjust Your Blending Speed Settings Carefully
Avoid staying at maximum speed for prolonged periods. Instead, alternate between medium and high settings with pauses, allowing blades to cool and reducing wear. For instance, I toggled between levels during a nut butter blend, which prevented overheating and preserved blade integrity, mirroring the advice found in Science Behind Blender Speed.
Many enthusiasts believe that all high-speed blenders are created equal when it comes to handling ice and making perfect smoothies. However, this is a common misconception. In reality, the nuances of blender design, motor power, and blade geometry significantly influence performance and longevity. For example, some users assume that simply increasing blend time or speed will achieve a smoother ice crush, but in my experience, understanding the *mechanics* behind ice crushing reveals that overloading the motor can lead to premature wear or overheating. It’s tempting to think that bigger motors always outperform smaller ones, yet experts like those at KitchenTechHQ clarify that efficiency depends more on blade design, gear ratios, and thermal management. Many fall into the trap of ignoring these subtleties, risking damage to the blades or motor. A crucial mistake is to rely solely on *push-button power* without optimizing your technique. For instance, using the pulse function strategically, as outlined in Ice Crushing Techniques, can preserve blade sharpness and improve results. Additionally, the myth that blade sharpening isn’t necessary after consistent ice use is misleading; regular maintenance, even sharpening with proper tools, extends blade lifespan and maintains performance. This nuanced understanding helps you avoid common pitfalls like blade dulling and motor burnouts. Want to get more out of your blender? Check these expert tips for thicker, creamier smoothies that don’t strain your machine. Don’t let misconceptions hold you back—mastering these subtleties ensures your blender performs at its best for years to come. Have you ever fallen into this trap? Let me know in the comments.
Investing in a high-speed blender is just the beginning; keeping it in peak condition requires specific tools and consistent maintenance routines. Personally, I rely on a few key pieces of equipment and methods that have proven essential over time, especially when tackling tough ice crushing or making creamy nut butters. One tool I swear by is a quality blade sharpener designed explicitly for blender blades. Just like sharpening a chef’s knife, regularly honing your blades maintains their cutting power and extends their lifespan. I personally use the blade sharpening kit recommended by experts, which has made a noticeable difference in preserving performance, especially after frequent ice crushing sessions.
Furthermore, a powerful tamper accessory is indispensable. It helps push ingredients toward the blades, reducing strain and preventing overworking your motor. I prefer a tamper made from durable, heat-resistant materials that can withstand the high torque during tough blends, like frozen fruit or dense nut butters. This simple addition not only improves consistency but also minimizes blade wear over time.
Pairing these tools with proper cleaning techniques is vital. Using a brush specially designed for blender gaskets and blades ensures all residues are removed, preventing corrosion and buildup that can hinder performance. I schedule a thorough cleaning after every heavy session—particularly after ice crushing—to keep everything running smoothly. For long-term results, applying a light coating of food-grade mineral oil on blades every few months can prevent rust and maintain sharpness, as advised in professional maintenance guides for kitchen equipment.
How do I maintain my blender over time?
Regularly inspecting your blender’s components, especially blades and seals, is crucial. If you notice dullness or unusual noises, it’s better to address these issues promptly rather than waiting for a complete breakdown. External tools like blade maintenance kits can make this task straightforward. Additionally, adhere to recommended usage guidelines—avoiding overloading blends or running the motor at maximum speed for extended periods—to prevent unnecessary wear. I also make it a point to replace worn seals and gaskets as part of my maintenance schedule, which minimizes leaks and preserves motor health.
Looking ahead, I predict that future trends will lean into smart maintenance systems integrated into high-end blenders, potentially offering self-sharpening blades or automated cleaning cycles. But for now, combining the right tools with disciplined maintenance routines offers the best way to maximize your blender’s longevity and performance.
Next time you prepare a tough frozen concoction or homemade nut butter, try using a blade sharpener or a specialized tamper. These small investments and habits make a big difference, ensuring your blender is ready to handle anything you throw at it, season after season.
What No One Tells You About Blending Ice and Your Blender’s Longevity
Over the years, I’ve learned that extending the life of your high-speed blender isn’t just about buying the most powerful motor—it’s about understanding the subtle nuances of proper maintenance, technique, and equipment care. The real secret lies in recognizing how your habits influence blade sharpness and motor health, especially when crushing ice regularly. Paying close attention to how you load ingredients, choosing the right speeds, and performing regular blade upkeep can drastically change your blending experience.
Curated Picks to Keep Your Blending Game Strong
To achieve optimal ice-crushing and nut butter making, I’ve relied on a few trusted tools and resources. The blade sharpening kit has been a game-changer, allowing me to restore blades without replacing them. The best nut butter blenders guide helped me select models designed for thick blends, preventing motor strain. Additionally, the ice crushing techniques resource sharpened my skills, ensuring I get fluffy snow without overtaxing the machine. These curated tools and tips have collectively extended my blender’s lifespan and enhanced my results.
This Isn’t Just About Blenders—It’s About Your Kitchen Confidence
Investing time in understanding your blender’s mechanics and maintenance routines empowers you to craft perfect smoothies, frozen treats, and nut butters without fear of damage. Remember, each blend is an opportunity to apply smarter techniques—start slow, pulse strategically, and clean diligently. With a little effort, you’ll find your blender performs like new for years to come, transforming your kitchen into a hub of healthful, delicious creations. Ready to elevate your blending game? Go ahead—your future self will thank you!