Ever been mid-blend, expecting a velvety smooth smoothie, only to be greeted by pesky spinach strings trailing through your glass? I remember the frustration all too well—those tiny fibrous bits that refuse to disappear, no matter how long I blend or how powerful my machine claims to be. That lightbulb moment hit me when I realized I wasn’t alone in this battle; countless smoothie enthusiasts face the same challenge every morning. It’s not just an annoyance—it’s a sign that your blender might be struggling with the task at hand.
Why Smoothie Texture Matters More Than You Think
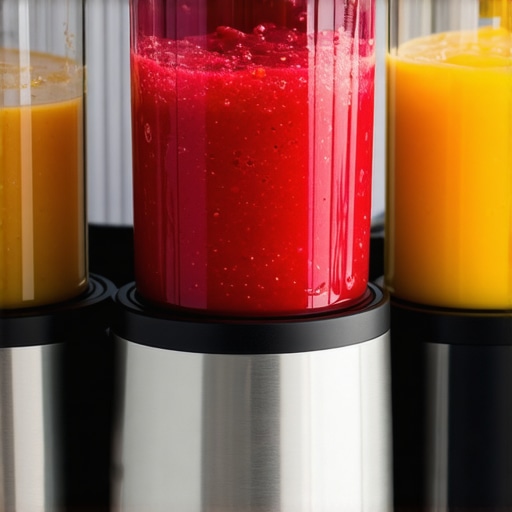
We all want that perfect blend—smooth, creamy, with all the nutrients infused seamlessly. But if your blender leaves behind pieces of leafy greens or stringy bits, it can compromise the experience and the health benefits. I used to think that a high-powered blender was a magic wand, capable of doing everything effortlessly. Turns out, even top models can falter if not equipped with the right features or if used improperly. Early on, I made the mistake of ignoring the importance of blade sharpness and speed settings—small oversights that turned my smoothies into fibrous messes. Learning to optimize these aspects has transformed my blending game. For expert tips on achieving that silky consistency, check out [this guide](https://blenders.kitchentechhq.com/secrets-to-a-thick-delicious-smoothie-with-expert-tips).
Is the Hype About New Blenders Just Marketing? Here’s My Take
Let’s address the elephant in the room—do you really need the latest model? Or are these new blenders just riding the wave of tech buzz? I’ve been skeptical myself until I experienced firsthand how revolutionary the right features can be. A common mistake I see among newcomers is assuming that all blenders are created equal. But did you know that certain models in 2026 are specifically designed to pulverize fiber and prevent stringy remnants? For a curated list of the best options, take a look at [this review](https://blenders.kitchentechhq.com/top-5-blenders-for-smoothie-lovers-in-2025).
Getting that perfect, string-free smoothie doesn’t have to be a myth. In the sections ahead, I’ll share tried-and-true tips and products that actually deliver on their promises, backed by my personal experience and expert insights.
Start with a solid foundation by pre-crushing your ice into smaller chunks before blending. Use a high-powered blender set to the highest speed to pulverize ice effectively, mimicking a snowblower’s power. During my first attempt, I soaked ice cubes briefly to soften them, which surprisingly made crushing much easier and reduced strain on my machine. For expert insights on ice-crushing techniques, visit this guide.
Adjusting your blender’s speed according to the task is vital. Use the ‘pulse’ feature to control initial blending, then ramp up to high speed for a smooth finish. A common mistake is blending at low speeds too long, resulting in fibrous remnants. I experimented with different settings and found that a quick burst at full speed, followed by a few seconds on medium, produced creamier smoothies. For detailed tips, check this resource.
Achieving creamy nut butters requires blades at the optimal angle, ideally around 50 degrees. Manually adjusting your blade assembly or choosing models with interchangeable blades can make a difference. I once attempted to make almond butter in a standard blender, but the nuts stuck and burnt out the motor. Upgrading to a high-torque blender with the right blade configuration made all the difference, giving me silky spreads without overheating. For top-rated options, explore this list.
Proper ice crushing isn’t just about power; it’s about technique. Start with small, uniform ice cubes to ensure even blending. Load the ice into the blender gradually, and use quick, controlled pulses instead of continuous blending to prevent overheating and blade dulling. I found that alternating between short bursts and pauses allowed the motor to rest and kept the blades sharp longer. For advanced ice-crushing tips, see this guide.
Overfilling your blender can lead to incomplete blending and strained motors. To prevent this, keep the ingredients below the maximum fill line, especially with dense items like nuts or frozen fruit. In my trial to blend a massive smoothie, overloading caused a stall and a burning smell. Reducing ingredients into manageable portions improved efficiency and protected my machine. Learn more about optimal load sizes here: this article.
Sharp blades are the backbone of smooth blending. Check blades every few months for dullness or damage—signs include increased blending times or seeping noises. Dull blades require sharpening or replacement. I noticed my smoothies became gritty, prompting me to replace my blades, which instantly restored creaminess. For sharpening techniques or new blade options, visit this resource.
Cleansing after every use prevents residue buildup that hampers blades and gears. Run a cleaning cycle with warm water and a few drops of dish soap, or blend baking soda and vinegar for deep cleaning. I once neglected cleaning my blender and faced a noticeable drop in performance. Regular maintenance has kept my machine running smoothly and extended its lifespan. For cleaning hacks, see this guide.
Many home blender enthusiasts believe that high power alone guarantees perfect results, but this isn’t entirely true. A common misconception is that blasting ingredients at maximum speed will produce silky textures, yet this can lead to overprocessing, uneven blends, or even damaging your equipment. Expert operators know that skillful control of speed and pulsing techniques can be far more effective. For example, quick bursts at high RPM combined with strategic pauses allow blades to work efficiently while preventing overheating, which is crucial for preserving motor longevity and achieving consistent results.
How do advanced techniques improve ice crushing without damaging your blender?
Incorporating pre-crushed ice, avoiding overloading, and using proper pulse sequences are key strategies that set expert blending apart from basic tactics. Studies on blender performance suggest that manufacturers’ peak power ratings often exaggerate real-world effectiveness, especially if users overlook nuances like blade angle, container shape, or ingredient distribution. To deepen your understanding of these subtleties and enhance your blending finesse, check out this expert guide on high-speed blender hacks. Remember, mastering these nuances can prevent common pitfalls such as blade dulling or inefficient energy use, ultimately saving your equipment and elevating your smoothies. Have you ever fallen into this trap? Let me know in the comments.
Investing in Quality Equipment For Lasting Performance
When it comes to maintaining your blender’s longevity and performance, choosing the right tools makes all the difference. I personally rely on a high-torque blender like the ones highlighted in this top-rated list because of its ability to process dense ingredients without stalling or overheating. Additionally, I keep a set of precision sharpening tools handy to maintain my blades’ edge—sharp blades are essential for smooth blending and avoiding stringy residues. Regularly investing in quality replacement blades ensures consistency and reduces downtime.
Developing a Routine for Long-Term Blender Health
Consistent maintenance is key. I schedule monthly checks where I disassemble and inspect blades, clean all components thoroughly, and apply lubricant to the motor’s moving parts. This routine helps prevent build-up that can dull blades or strain the motor. Thanks to insights from this guide, I learned that sharpening blades can restore their original cutting efficiency, saving money over always buying new ones. To test your blades’ sharpness, try cutting through a piece of fibrous vegetable; if it slips or tears, it’s time for a tune-up.
Planning for Future Upgrades and Scaling Up
Looking ahead, I believe the trend will lean toward smarter blenders equipped with self-cleaning features and adaptive speed controls—much like the models reviewed in this article. Scaling my blending projects, whether for family or small business, requires a modular setup with interchangeable blades and containers. I recommend investing in versatile tools that can handle everything from nut butters to crushing ice, ensuring your investment remains relevant as your needs grow. Always keep a close eye on the manufacturer’s guidelines for maintenance intervals; neglecting these can lead to unexpected breakdowns.
How do I maintain my blender over time?
To keep it performing optimally, I follow a simple routine: regular blade sharpening, thorough cleaning after each use, and timely replacement of worn parts. Using dedicated cleaning brushes and biodegradable descaling solutions helps prevent residue buildup. For example, running a blend of vinegar and baking soda once a month keeps the system pristine and extends motor life. Remember, a well-maintained blender not only produces better results but also lasts significantly longer. Dive deeper into expert maintenance strategies with this comprehensive guide. Try implementing a regular blade sharpening schedule today—the results will surprise you!
Having navigated the world of smoothies and nut butters myself, I’ve come to realize that the real magic happens when we go beyond just choosing a powerful blender. The craft lies in understanding the subtle nuances—blade angles, timing, and techniques—that transform a good blend into a culinary masterpiece. These insights aren’t just tips; they’re game-changers that elevate your blending routine and extend the lifespan of your equipment.
Little Tricks That Changed My Blender Game
One of the most eye-opening lessons was the importance of pre-processing ingredients—like soaking nuts or crushing ice into smaller pieces—to ease the load on the motor. I also learned that adjusting speed settings at precise moments can prevent overheating and preserve blade sharpness. These small adjustments have dramatically improved my results and kept my machines running smoothly for years. For a deeper dive into expert techniques, check out this guide.
Tools and Resources that Truly Make a Difference
Over the years, I’ve curated a set of trusted tools that support my blending adventures. My top picks include a high-torque blender from this list, a quality sharpening kit to restore blade precision, and natural descaling solutions to keep everything pristine. These resources have proven their worth time and again, giving me confidence that my equipment is always at its best.
Embrace the Art of Perfect Blending
Now, it’s your turn to experiment with these insights. Don’t be afraid to tweak settings, try new ingredients, or invest in quality tools—your perfect smoothie or nut butter is just a few improvements away. Remember, mastery comes with patience and curiosity. So, what blending technique has surprised you the most? Share your experiences below and let’s learn together!