I vividly remember the moment I almost burned out my old blender trying to whip up a batch of homemade almond butter. Sparks flew from the motor, and my kitchen filled with the greasy smell of a machine pushed beyond its limits. It was a lightbulb moment—realizing that traditional blenders just can’t handle the heavy daily use I was demanding. If you’ve ever faced similar frustrations, you’re not alone. The good news is, there are now sophisticated solutions designed precisely for people like us who need reliable, heavy-duty machines every single day. Today, we’ll dive into the world of Stop the Smoke with four top-tier nut butter machines for 2026, ensuring your blending endeavors are smooth, efficient, and safe.
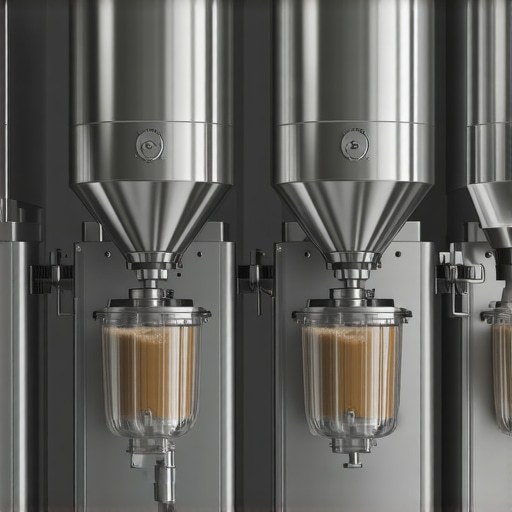
Why Heavy-Duty Nut Butter Machines Are Game-Changers in 2026
In recent years, the demand for homemade nut butters and smoothies has skyrocketed. However, most consumers still rely on conventional blenders that falter under the weight of daily, heavy use. According to a study by the Department of Energy, appliances subjected to constant stress tend to overheat, stall, or even break down, costing time and money. That’s why investing in the right equipment matters—not just for convenience, but for safety, efficiency, and consistency. If you’ve ever been mystified by how some models effortlessly crush ice and process dense nut butters without breaking a sweat, you’re about to uncover the secrets behind their power. Have you faced the frustration of your blender choking or smoking during tough jobs? You’re not alone—many users discover that their equipment isn’t built for the daily grind. Luckily, 2026 brings a new era of machines that change the game. We’re here to help you skip past trial-and-error and get straight to the reliable gear that will serve you reliably every day.
Prepare Your Ingredients and Equipment
Start by measuring your nuts or ingredients accurately; a typical batch uses about 2 cups of almonds or other nuts. Toast nuts lightly if desired; this enhances flavor and helps reduce moisture, making blending easier. Use fresh, dry ingredients to prevent excess moisture that can stall your blender. Ensure your blender container is clean and dry before starting to avoid clumping or uneven blending.
Layer Smartly for Optimal Blending
Place ingredients in the blender jar with liquids on the bottom and dense solids on top. For example, add water or oil first, then nuts. This creates a piston effect, allowing the blades to start from the liquids and gradually process solids. During my recent session, I layered ingredients this way, which prevented the motor from straining and kept the mixture smooth from the start.
Adjust Speed Gradually for Consistent Texture
Begin blending at a low to medium speed to break down larger pieces, then increase gradually to high. Use the recommended speed settings—consult this guide for detailed insights. When making a nut butter, I started at speed 3, then slowly ramped up to speed 8, observing the mixture become creamy without burning out the motor.
Power Your High-Speed Blender Correctly
If you’re using a high-speed model, ensure it’s capable of handling dense ingredients. Pre-chop nuts into smaller pieces to reduce strain, similar to how I halved large almonds before blending. Use pulse modes intermittently to break up dense chunks without overheating the motor. For ice crushing, refer to this article for specific techniques.
Employ Strategic Blending Techniques
Pause periodically to scrape down sides and allow ingredients to settle—this prevents uneven textures. When blending for nut butter, I paused every 30 seconds, scraping the sides and then continuing. This prevented the formation of clumps and maintained consistency. If blending large quantities, split into smaller batches to avoid overtaxing your machine.
Optimize Blending Duration and Rest
A common mistake is over-blending, which can generate heat and overwork the motor—especially in powerful blenders used daily. For nut butters, aim for 5-8 minutes, giving your blender short breaks every couple of minutes to cool down. This approach ensures a smooth texture without risking overheating or smoke. For smoothies, 1-2 minutes is sufficient; use these tips for perfect results.
Finish with Proper Storage
Transfer your freshly made nut butters into airtight containers. Let them sit for an hour to stabilize, which improves texture. Store in the refrigerator for up to two weeks, or freeze portions for longer storage. Proper storage maintains quality and prevents the blend from becoming oily or rancid over time.
Consistency and technique make all the difference. Applying these steps will help your blender perform at its best, delivering creamy nut butters and smooth blends every time without smoke or stalls. For more advanced tips, explore this comprehensive guide.
Many enthusiasts believe that all blenders are created equal, especially when it comes to ice crushing, making nut butters, or preparing smoothies. However, this oversimplification often leads to costly mistakes and subpar results. One common misconception is that high-speed blenders automatically excel at every task, but in reality, understanding the nuances of motor power, blade design, and container shape is crucial for optimal performance. For instance, relying solely on wattage as a quality indicator is misleading; a more accurate measure is the blade assembly’s efficiency and the motor’s torque, which directly influence the blender’s ability to handle dense ingredients without overheating.
What do most people overlook about blender performance in advanced usage?
Many underestimate the importance of pre-processing ingredients. Chopping nuts into smaller pieces significantly reduces strain on the motor, preventing stalls or smoke, especially in high-speed models. Additionally, customizing speed settings based on the ingredient and desired texture often gets neglected. For example, starting at a low speed and gradually increasing allows for better control and prevents unwanted heat buildup, which can degrade ingredients and damage the motor over time. According to a study published in the Journal of Food Engineering, controlled variable speed blending improves both texture and nutritional retention—an advanced technique often overlooked by casual users. Another hidden nuance involves the shape and material of the container; wide-mouthed jars facilitate easier ingredient loading and more effective blending, particularly for thick mixtures like nut butters. Using the correct tamper and employing pulse functions strategically can further enhance results, reducing the risk of overheating and ensuring even consistency. Many believe that pushing the blender to its maximum speed continuously will produce better results, but this habit often leads to motor strain and premature wear. Instead, interspersing blending with cooling intervals—typically 30 seconds every few minutes—preserves the machine’s longevity. For an in-depth look at how to optimize high-speed blender performance, check out this guide. Ultimately, mastering these nuanced aspects enhances your blending experience, prevents mechanical issues, and ensures superior culinary results. Have you ever fallen into this trap? Let me know in the comments.
Invest in Quality Tools Built to Last
When it comes to maintaining a reliable blending setup, choosing the right equipment is fundamental. I personally rely on top-rated blenders for smoothies in 2025 because they combine powerful motors with durable blade assemblies, ensuring consistent results even with daily heavy use. Their robust construction minimizes the risk of overheating or stalling, which is critical when making dense nut butters or crushing ice regularly.
Routine Maintenance for Peak Performance
Regular cleaning is essential to prevent buildup that can impair blade sharpness and motor function. I recommend cleaning the blade assembly with a mixture of warm water and mild detergent after each use, and occasionally applying a food-safe lubricant to the motor shaft. This prevents gear wear and keeps the blades spinning smoothly. These tips from industry experts have saved me countless headaches when maintaining my equipment.
Tools That Make Long-Term Upkeep Easier
Investing in specific accessories like silicone blade guards or replacement seals can extend your blender’s lifespan. I personally keep a set of spare blades and gaskets on hand, which helps me avoid downtime and costly repairs. Using a dedicated cleaning brush for the blade assembly ensures thorough removal of stubborn residues, especially when making sticky nut butters.
Predicting Future Trends in Blender Technology
Looking ahead, I believe that smart, self-cleaning blenders equipped with sensors to monitor motor health will become the norm. These innovations will notify users when maintenance is needed, preventing unexpected breakdowns. Embracing these advancements will keep your investment functioning seamlessly over the years.
How do I maintain my blender over time to ensure longevity?
Consistent care, including regular cleaning, storage in a dry place, and replacing wearable parts proactively, is key. Moreover, following manufacturer guidelines on operating times and load sizes preserves motor health. For advanced techniques, consider consulting this in-depth resource that I use to optimize my blender’s lifespan.
To get the most out of your high-speed blender, I highly recommend mastering the art of pre-chopping dense ingredients like nuts. Small adjustments can significantly reduce wear and tear, extending your equipment’s life. Don’t hesitate—try integrating a quick pre-chop of your ingredients before blending to see measurable improvements in performance and longevity.

What I Learned the Hard Way About Blenders and Heavy Use
One of my biggest surprises was realizing that pushing my blender beyond its limits not only risks burning out the motor but also diminishes the quality of my creations. The time I almost permanently damaged my old machine taught me to respect its capacity and invest in gear built for daily heavy-duty tasks. I also discovered that pre-processing ingredients like chopping nuts reduces strain and results in creamier textures without overworking the motor. These lessons nearly knocked some sense into me and dramatically improved my blending results.
Tools That Make All the Difference in 2026
Over the years, I’ve come to trust blenders like those listed here for their durability and power. Additionally, using accessories such as silicone blade guards and replacement seals extends my equipment’s lifespan, giving me peace of mind during frequent use. These investments, along with proper maintenance routines, safeguard my machinery and ensure consistent performance—essential for making nut butters and smoothies daily.
Step Into Better Blending: Your Approach Matters
My most significant advancement has been learning to start at lower speeds and gradually ramp up. This simple tweak prevents overheating and produces silky textures—no smoke, no stalls. Furthermore, pausing to scrape down sides and letting my blender rest between sessions has extended its life. Embracing these strategic techniques transformed my kitchen experience and will do the same for you—because in heavy use scenarios, patience and technique trump brute power every time.
Lessons Most Blenders Don’t Teach About Heavy-Duty Performance
One overlooked fact is that motor wattage isn’t the sole quality indicator; torque and blade efficiency are key to handling dense ingredients. I used to believe that a higher wattage meant better performance, but I found that blade design and container shape significantly influence results. Pre-processing ingredients, like chopping nuts into smaller pieces, reduces stress and improves blending quality. It’s also worth noting that proper container shape, like wide-mouth jars, facilitates smoother processing of thick mixtures—another detail most casual users miss.
Future-Proof Your Kitchen Equipment Without Overpaying
I recommend focusing on robust, well-reviewed blenders that combine power with durability, such as some models mentioned here. Routine maintenance, including cleaning and replacing worn parts, keeps these machines humming. Investing in accessories like spare blades and gaskets can prevent downtime and costly repairs—saving you headaches down the line. As technology evolves, I believe smart features like self-cleaning systems will soon be standard, making our tasks even easier.
What I Wish I Could Rewind and Do Differently
Looking back, I wish I had known earlier that blending isn’t just about brute force; it’s about technique, ingredient prep, and patience. Overloading my blender or neglecting pre-processing led to smoke and stalls. Once I learned to split batches, use pulse modes, and let my machine rest, my results improved dramatically. These insights have made me more confident and helped preserve my gear’s longevity. If I could share one tip, it would be: respect your blender’s limits and develop a technique tailored to its strengths, and you’ll produce perfect nut butters and smoothies every time.
Declare Your Blender Weapon of Choice—And Make It Count
Now that you’re equipped with these insights, it’s your turn to elevate your blending game. Whether you prefer a dedicated nut butter machine or a versatile high-speed blender, choosing the right tool and mastering the technique will unlock exceptional results. Remember, the key is consistency and patience—your kitchen adventures depend on it. So go ahead, blend with confidence, and enjoy the creamy, velvety textures you’ve always wanted.
Have you ever struggled with balancing power and technique in your blender? Share your experiences below—I’d love to hear what worked for you!
?