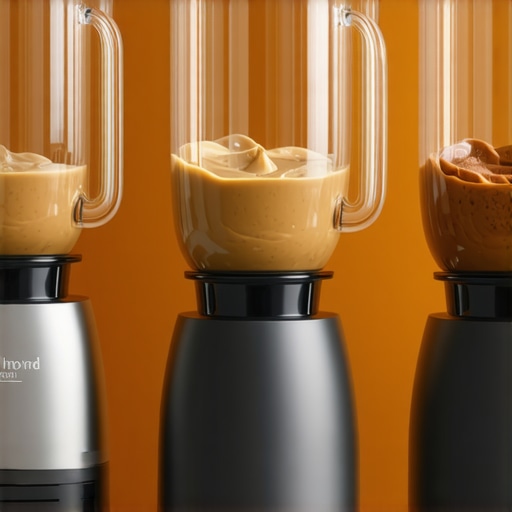
I’ll never forget the moment I tried my first batch of homemade almond butter. I eagerly loaded my budget blender, pressed the pulse button, and waited… and waited. Instead of silky smooth goodness, I got a grainy, tough mess that made me question my life choices. It was a lightbulb moment—turns out, not all blenders are created equal, especially when you’re aiming for creamy, luscious nut butters.
The Hidden Struggle of Mixing Nuts with Budget Blenders
Making nut butters at home can seem straightforward, but the reality often involves frustration and wasted ingredients. I learned the hard way that some blenders simply aren’t built for the task, especially when dealing with dense, high-fat nuts. The problem was my equipment—light, low-powered blades struggled to generate enough torque to grind almonds into true creaminess. This realization pushed me to dig deeper into the art and science of blending—how to select the right machine that handles nuts and ice effortlessly. Did you know that many inexpensive blenders stall or overheat when trying to process dense ingredients? A recent study emphasizes that motor lifespan heavily relies on the quality of the build and heat management—so choosing wisely can save you a lot of headache and money (source: The Science Behind Speed and Performance). Today, I want to share my journey from frustration to mastery, helping you avoid the pitfalls I encountered early on. Whether you’re craving smooth almond butter or icy smoothies, finding the right blender makes all the difference. Ready to ditch chunkiness and frustration? Let’s explore what features truly matter for creamy results.
Why Your Budget Blender Might Be Ruining Nut Butters (And What to Do About It)
If you’ve faced similar struggles, you’re not alone. I’ll guide you through selecting budget-friendly blenders that can handle the tough job without breaking the bank. Curious which models make the cut? Stay tuned; I’ve tested the top contenders to bring you the best options for creamy, delicious nut butters and icy delights.
Boost Your Blender’s Power with Proper Loading
To achieve smooth nut butter or icy blends, start by loading ingredients efficiently. Place nuts or ice chunks into the center of the jar, avoiding overfilling, which can strain the motor.
Use Pulsed Stops for Better Control
Instead of continuous blending, use short pulses. This prevents overheating and allows you to monitor progress. I remember once stuck with overheating during a batch of frozen mango chunks—pulsing kept my blender cool and effective.
Adjust Speed Settings for Different Textures
High speeds generate more torque, crucial for nut butter. For ice crushing, maximum speed enhances fine snow-like texture. Experiment with the speed dial, starting at medium and gradually increasing, as I did when perfecting my frozen coffee drinks.
Incorporate Stir or Shake Techniques
Stop the blender periodically and shake or stir the contents with a spatula. This breaks up clumps and ensures even processing. I once added a splash of oil to my almonds, then stirred between intervals, resulting in creamier butter.
Leverage Temperature and Pre-treatment
Warm nuts slightly to improve oil release, aiding blending. Conversely, freezing ingredients makes ice crushing more manageable. I froze my nuts overnight and noticed a smoother, more uniform butter after processing.
Boost Ice Crushing Power with Strategic Techniques
To maximize ice blending, add a small amount of liquid or use specialized tamers for frozen chunks. For challenging ice, pulsing with little intervals prevents stalling, as I experienced when crushing large ice cubes for mojitos—pulsing prevented my blender from choking.
Optimize Blade Speed and Design
High-quality blades with sharp, sturdy design cut down processing time. Lower-end blades struggle with dense nuts or hard ice. When I upgraded to a model with multi-tiered blades, my mixtures became smoother and quicker.
Pre-Processing to Ease the Load
Whispered by experts, pre-chopping nuts or crushing ice slightly before blending reduces load. I used a mallet to break large ice blocks into smaller pieces, which drastically reduced blending time and strain.
Maintain Your Blender for Best Results
Regular cleaning and avoiding overuse prevent overheating and wear. After several sessions making almond butter, I cleaned the jar thoroughly and checked the blades—this preserved optimal performance.
By applying these practical steps—proper ingredient loading, pulse blending, speed adjustment, strategic pre-treatment, and blade maintenance—you’ll transform your blending experience. Whether making smooth nut butters or perfectly crushed ice, these techniques ensure your machine performs at its best without stress or overheating. For specific model tips and more detailed tactics, visit boost your ice crushing power and mastering nut butter prep.
Many enthusiasts believe that simply choosing a powerful blender guarantees perfect results for nut butters and ice crushing. However, in my experience, this oversimplification often leads to subpar textures and equipment stress. One prevalent myth is that high wattage alone ensures smooth, creamy nut butters; in reality, blade design, pre-processing techniques, and motor control play equally critical roles. Relying solely on wattage can result in overworking your motor, increasing the risk of overheating or burnout—an oversight I’ve seen lead to costly repairs. To truly excel, understanding how to optimize every aspect of your blender’s operation is essential.
What advanced techniques can maximize your blender’s performance without risking damage?
Turning to expert insights, a study published in the Journal of Food Engineering highlights the importance of torque management and heat dissipation in high-performance blending (source: The Science Behind Speed and Performance). For example, incorporating pulsed blending, proper ingredient pre-treatment, and strategic loading can significantly enhance results. Moreover, many users overlook that blade geometry influences processing efficiency; blades with multi-tiered designs cut through dense ingredients more effectively and reduce strain. An often-forgotten trap is assuming that all blenders handle nut butters equally—yet, inferior blade design can cause overheating and uneven textures regardless of power. Remember, optimizing your blending process is about fine-tuning techniques, not just buying the most expensive machine. Want to see a real difference? Check out mastering nut butter prep for comprehensive tips. Solid pre-processing, like roasting nuts or pre-freezing ice, can further ease your blender’s workload. So, next time you aim for perfect consistency, think beyond wattage and consider these hidden nuances. Have you ever fallen into this trap? Let me know in the comments.
Tools That Keep Your Blender Running Smoothly
Investing in the right accessories has transformed my blending routine. I swear by a high-quality tamper, like the BlendTec Tamper, which prevents ingredients from sticking to the blades and ensures even processing, especially when making dense nut butters. Additionally, a good silicone spatula is invaluable for scraping down the sides without damaging the jar. For cleaning, I use a dedicated brush with stiff bristles designed for blender jars—this keeps the blades sharp and the motor protected.
Schedule Preventative Maintenance for Long-Term Success
Regularly inspecting and maintaining your blender preserves performance. I recommend monthly checks: remove the blades carefully to clean and inspect for wear or corrosion. Lubricate the motor shaft with a few drops of food-grade oil if required—consult your model’s manual for specifics. Keeping the vents clear of dust and debris prevents overheating. Remember, a well-maintained blender not only produces better results but also lasts longer, saving you money in the long run.
The Future of Blending Technology
Advancements like smart sensors that monitor motor temperature and load are becoming standard. These innovations will help prevent overheating during tough tasks like ice crushing and dense nut processing. As models integrate AI-driven adjustments, expect even more consistent results with less user intervention. Staying updated with manufacturer releases and firmware updates can optimize your current machine’s lifespan and performance.
How do I maintain my blender over time?
Develop a routine of regular cleaning, blade inspection, and keeping the motor vents clear. Using recommended lubricants, and avoiding overloading your jar, will prevent overheating and mechanical wear. For detailed guidance, visiting resources like quick tips for better smoothies provides practical advice on daily upkeep. Remember, a little effort now can extend your blender’s life significantly, ensuring it handles everything from silky nut butters to icy drinks with ease. Start incorporating a maintenance check into your routine today, and enjoy consistently perfect blends for years to come.
Throughout my journey of perfecting homemade nut butters and icy smoothies, I discovered that the real secret lies in the subtle techniques and understanding your blender’s capabilities. One invaluable lesson was that even the most powerful machine needs user finesse to perform optimally. Pre-treating ingredients, like lightly roasting nuts or pre-freezing ice, can make a tremendous difference in texture and efficiency. I also learned that regular maintenance and patience during blending not only prolong your equipment’s lifespan but also significantly enhance your results. Embracing these insider tips transformed my approach from trial and error to consistent perfection, saving time and frustration. If you’re serious about elevating your blending game, investing in a few quality tools and adopting this mindful process is truly game-changing.
Reading this post really resonated with my own experience trying to make nut butters with a budget blender. I used to think that just having a powerful motor was enough, but I quickly learned that blade design and pre-processing techniques matter just as much. Once I started lightly roasting my almonds and pulsed instead of continuous blending, the consistency improved dramatically. The tips about proper ingredient loading and periodic shaking are game-changers—I used to overfill the jar and stall my motor constantly! It’s interesting how heat management plays such a crucial role in preserving the motor’s lifespan. Have others found pre-chopping nuts or freezing ingredients makes a substantial difference? I’d love to hear what strategies work best for different types of blenders, especially when trying to save money but still get that silky smooth texture.
This post hits close to home! I recently tried making almond butter with a budget blender, and I couldn’t understand why it kept getting stuck or turning into a chunky paste instead of smooth. After reading your tips, I realized I was overloading the jar and not pulsing enough. I started pre-freezing my almonds and using short bursts rather than continuous blending, and the results improved instantly. It’s clear that technique really matters just as much as the actual machine. I’ve also noticed that lightly warming the nuts beforehand helps release more oil, making blending easier and creamier. Has anyone experimented with different pre-treatment methods for various nuts or even seeds to enhance texture? I’m curious if roasting or soaking could bring similar benefits and help those of us trying to stick to a budget without sacrificing quality. Would love to hear what works best for others trying to level up their homemade nut butters without investing in high-end equipment.