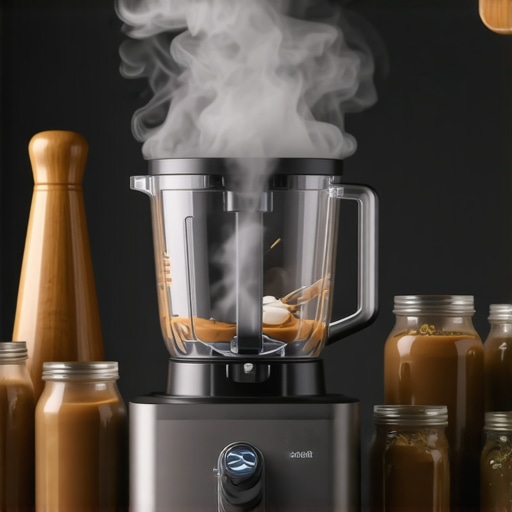
I’ll never forget the first time my trusty high-speed blender started billowing smoke while blending a batch of almond butter. It was a sudden, alarming moment—I thought I had cooked my nuts or worse, started a mini fire in my kitchen. Turns out, even top-tier blenders can choke on thick nut butters if not handled properly. That lightbulb moment taught me the importance of understanding what’s really happening when your blender smokes, especially during nut butter creation.
The Hidden Truth Behind Blender Smoke During Nut Butters
Ever Wonder Why Your Blender Struggles and It Smokes?
In my early days of blending, I made a rookie mistake—overloading my machine with nuts and expecting perfect results right away. Soon enough, I noticed the smell of burnt motor wiring and a puff of smoke. It was a wake-up call. High-speed blenders generate intense heat when they work hard, particularly during thick, resistant tasks like nut butters. If the motor overheats or the blades stall, smoke can appear, risking both your machine and your kitchen safety. According to blender experts, improper use—like pushing too much at once—can cause thermal overload, which not only damages the appliance but also diminishes its lifespan. To avoid this drama, knowing the right techniques and limits can make all the difference. Curious if you’ve faced this issue? Keep reading; I’ll walk you through fixes that have saved my blenders and my sanity.
Start with Small Batches for Consistent Results
My first successful attempt at making almond butter involved processing just half a cup of nuts at a time. This micro-batch approach prevents the motor from becoming overwhelmed and reduces heat buildup. When I overloaded the blender, it stalled and emitted smoke. By processing smaller portions, I kept the motor cool and maintained control over the texture. Think of it like running a marathon: pacing heals both you and your gear.
Use Sharp Blades and a Suitable Container
Old or dull blades cause the blender to exert more effort, generating excess heat. I replaced my blades with sharp, high-quality ones recommended for nut butters, which cut through nuts more efficiently. Additionally, choosing a container with a heat-resistant base helps dissipate generated heat. Check out expert tips on crafting gourmet nut butters for more insights.
Pulse with Short, Controlled Intervals
Rather than continuous blending, I adopted pulsing—short bursts at 1-2 second intervals. This method mimics careful churning rather than aggressive grinding, allowing heat to escape and preventing motor burnout. During my first attempt, I pulsed for about 30 seconds, then paused to check the temperature of the container. This strategic approach kept my blender functioning without smoke.
Keep a Steady, Low Speed
High speeds increase heat, pushing your blender closer to its thermal limit. I adjusted the speed to medium (around 4-5 on most blenders) and increased gradually if needed. This controlled pace ensured the motor worked efficiently without overheating. For more advanced speed management secrets, see this comprehensive guide on blender speed settings.
Add Liquids or Use Internal Cooling Techniques
If your recipe allows, adding a small amount of oil or water can act as a cooling agent and reduce friction. When I was making thick peanut butter, a splash of coconut oil helped maintain a cooler environment within the container. Additionally, some blenders have built-in cooling features—if yours does, utilize them to prevent overheating. For dedicated equipment, consider blenders designed for nut butters with enhanced cooling capabilities.
Pause and Allow Cooling Between Batches
My favorite hack is simply stopping every minute to let the motor cool down. During my second batch, after blending for about 60 seconds, I turned off the machine for five minutes. This interval prevents heat accumulation, especially during extended nut butter sessions. Remember, patience prevents smoke and extends your blender’s lifespan.
Regular Maintenance for Peak Performance
Keeping blades sharp, cleaning filters, and ensuring the motor vents are unblocked are essential. I inspect and replace blades annually and clear dust buildup, which can insulate heat and cause overheating. Regular maintenance ensures your blender stays in top shape, avoiding unexpected smoke during critical moments.
Implementing these precise steps transformed my nut butter game. Not only did I avoid smoke and potential damage, but I also achieved creamier, more consistent results. Mastery over technique turns your blender into a reliable partner in the kitchen, letting you enjoy healthy, homemade nut butters without worry. For pro tips on creating silky smooth textures, explore expert smoothie secrets and turning your blender into a nut butter powerhouse.
When it comes to high-speed blenders, many enthusiasts operate under certain myths that can hinder their results or even damage their appliances. One widespread misconception is that more power always equals better performance. While a powerful motor helps, it doesn’t guarantee flawless blending if users neglect proper techniques or batch sizes. For example, attempting to blend large quantities of tough ingredients like nuts or ice without considering the optimal speed settings or pulsing methods can cause overheating or stalling, leading to smoke or mechanical failure. It’s a common mistake to think that high speeds alone will pulverize ingredients—yet, as expert scientists have proven, proper pulse techniques and ingredient preparation are critical for achieving smooth textures without overtaxing your machine. Another myth is that blenders designed primarily for smoothies can’t handle nut butters or ice crushing. In reality, selecting a blender with the right features and understanding its nuances allows you to leverage its full potential. Remember, optimal results depend on knowing your device’s limitations and employing advanced techniques like short bursts and proper batch sizes. Many users overlook the importance of maintenance; dull blades or clogged vents can cause overheating and smoke, even in top-tier models. Regularly inspecting and cleaning your blender ensures peak performance and longevity. Have you ever fallen into this trap? Let me know in the comments. For deeper insights into maximizing your blender’s capabilities, check out expert tips for perfect smoothies and gourmet nut butter techniques. Understanding these nuances not only saves your appliance but also elevates your culinary creations, transforming the way you approach blending.
Tools That Make Maintenance Easier and More Effective
To ensure your high-speed blender continues to perform at peak levels, investing in the right tools is essential. I personally rely on a high-quality blade sharpening kit because dull blades are a common culprit behind overheating and inefficient processing. Regular sharpening prevents loss of cutting efficiency, reducing strain on the motor and preventing smoke during tough tasks like grinding nuts or crushing ice. Additionally, keeping a compressed air blower handy allows me to clean dust and debris from vents and motor housing without disassembling the device, which extends its lifespan. For deep cleaning, I use silicone brush sets designed specifically to reach into blade assemblies and seals, removing residual product build-up that can insulate heat. These small investments go a long way in maintaining top performance and avoiding costly repairs.
Perform Routine Checks for Long-Term Results
Consistency is key. I schedule regular maintenance — about every three months — to inspect the blades, seals, and cooling vents. Dull blades not only make blending inefficient but also cause extra heat generation, risking the emission of smoke. Choosing blenders designed for nut butters with accessible blade assemblies makes this process simpler. I also monitor the motor temperature after extended blending sessions; if I notice excessive heat, I pause and let the machine cool down, preventing burnout. A quick inspection and cleaning routine significantly increase durability, and it’s a practice recommended by blender experts like industry insiders.
Scaling Up While Keeping Things Safe
As you experiment with larger batches or more challenging ingredients, your equipment needs to adapt. I suggest upgrading to a model that offers built-in cooling technology or higher wattage, enabling prolonged use without stress. When I moved to a commercial-grade blender for frequent nut butter production, I found it invaluable to have dedicated cooling fans and extra robust seals. To stay ahead of potential issues, I follow manufacturer guidelines for batch sizes and blending durations, always allowing periods for the motor to recover. Incorporating these practices supports long-term success and prevents unexpected smoke episodes.
How do I maintain my blender over time?
Consistent cleaning, blade sharpening, vent inspection, and adhering to manufacturer recommendations are the pillars of effective maintenance. Regularly cleaning the vents with compressed air keeps airflow optimal, avoiding overheating during intense tasks. Keep a detailed schedule; I mark my calendar to check blades and seals quarterly. Incorporating these habits extends your blender’s lifespan and ensures exceptional results with every batch. For more advanced tips, explore expert advice on smoothie mastery and gourmet nut butter techniques. Don’t forget to try sharpening your blades using a dedicated kit—it’s a small step that yields big gains in performance.
What I Wish I Knew Before Blending Thick Nut Butters
- Never underestimate the stubbornness of nuts—processing them in small batches and with proper pulsing made all the difference, saving my blender from smoke and burning out.
- Dull blades are deceptive; sharp blades reduce effort, heat, and the risk of smoke—investing in quality is truly investing in your appliance’s longevity.
- Gentle, steady speeds combined with short pulsing sessions maintain control and prevent overheating; patience is a virtue in the kitchen.
- Adding a splash of oil or liquid not only helps achieve silky textures but also acts as a cooling trick, especially for dense, sticky nut butters.
- Regular maintenance like blade sharpening and vent cleaning is the secret sauce to keep blenders performing like new and smoke-free.
Tools that Changed My Nut Butter Game
Having a high-quality blade sharpening kit ensures my blades stay razor-sharp, drastically reducing effort and heat during processing. A compressed air blower helps me effortlessly clean vents and motor housing, preventing heat buildup. For meticulous cleaning, I rely on specialized silicone brushes designed to reach into difficult crevices, maintaining peak performance. These small but mighty tools have significantly extended my blender’s life and kept smoke episodes at bay.
The Joy of Taking Control and Making It Personal
Your blender is more than just an appliance—it’s a trusted partner in creating healthy, homemade treats. By understanding its limits, employing strategic techniques, and investing in the right tools, you transform the blending experience from frustration to fun. Don’t hesitate to experiment with batch sizes, pulsing patterns, and maintenance routines—your kitchen magic is within reach. Ready to elevate your nut butter game and enjoy smoke-free success? Dive into expert tips for perfect smoothies or explore gourmet nut butter techniques to keep your blender humming happily for years to come. Your next culinary masterpiece awaits—are you prepared to take control? How have you managed overloading or overheating in your own blending adventures? Share your experiences below!
This post really resonated with me because I’ve definitely experienced smoke from my blender when trying to tackle large batches of almond butter. What I found most helpful was the tip about starting with smaller batches and pulsing instead of continuous blending. It’s a simple change but made a huge difference in preventing overheating and smoke. I also appreciate the emphasis on regular maintenance like sharpening blades; dull blades can really cause those issues without you realizing it. Has anyone experimented with adding a small splash of oil to keep the mixture running smoothly without overloading the motor? I’ve read that this can help with heat dissipation, but I wonder if it affects the texture or flavor of the final product. It seems like patience and attention to detail—like giving the machine time to cool—are essential for making perfect nut butters without risking damage. Would love to hear other tips from folks who have mastered blending thick nut butters without smoke or burnout!
This was such a helpful read, especially the part about pulsing and small batch processing. I’ve definitely had that terrifying moment when my blender starts smoking, and it’s always due to trying to push too much at once. What I’ve found works well is slightly pre-chilling my nuts in the freezer before blending; it helps reduce heat buildup. Also, making sure my blender’s container stays well-clear of overfilling is key. I’ve been curious — has anyone experimented with adding a splash of olive oil or coconut oil? Does it really help with heat management without affecting the taste? I wonder if it might make the final nut butter a bit creamier, too. It’s clear that patience, proper maintenance, and technique are crucial for avoiding damage and making perfect nut butters. Would love to hear how others balance these tips, especially if you’ve found additional tricks to keep your blender cool during extended sessions!