I remember the moment clearly—my blender sputtered, groaned, and finally gave out right in the middle of making a vibrant green smoothie. Frustration surged as I watched chunks of ice and stubborn nut butter refuse to blend smoothly. It was a lightbulb moment for me: I needed a better blender. One that could handle the tough stuff—ice, frozen fruits, and nut butters—without turning my kitchen into a battlefield. That experience pushed me to dive deep into the world of high-performance blenders, and what I learned completely transformed my smoothie game.
Why the right blender can change your healthy eating habits
Let’s face it—if your blender isn’t up to the task, your healthy recipes suffer. Lumpy smoothies, uneven textures, and frustration are all too common when you’re using an underpowered machine. And honestly, I spent way too long banging, stirring, and cursing at my old blender before realizing the importance of investing in a top-tier model. Today, I’ll share what makes a blender truly excel at ice crushing and nut butter making, and how choosing the right one can elevate your health routines. Want to skip the trial-and-error? Check out our top ice crushing smoothie blenders for healthy recipes to find the best fit for your lifestyle.
Is all the hype about high-speed blenders justified?
I used to believe any blender could do the job—until I bought a cheap model that struggled with frozen fruit. The mistake I made early on? Assuming all blenders are created equal. Spoiler: They’re not. The real difference lies in blade design, motor power, and build quality. A high-speed blender isn’t just a luxury; it’s a necessity if you want creamy, smooth textures without the hassle. Curious about what features really matter? Dive into our best blenders for nut butters at home guide for expert insights. Making this mistake cost me time, money, and quite a bit of smoothie frustration, but now I know better. Ready to upgrade? Let’s explore how to choose the perfect blender for your needs and create those luscious, healthful smoothies you’ve always wanted.
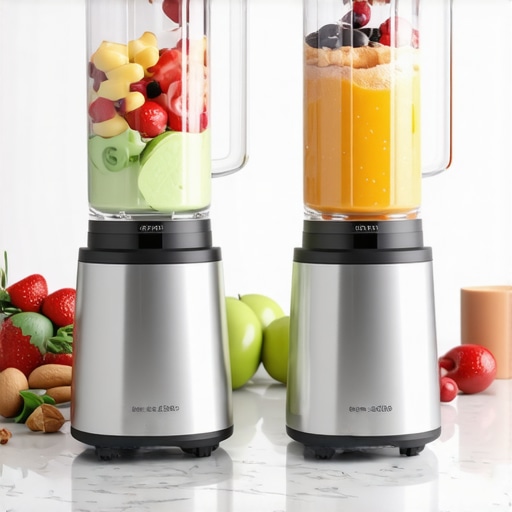
Choose the Right Blender for Heavy Lifting
Start by selecting a blender with at least 1000 watts of power. This ensures it can handle dense ingredients like frozen fruit, ice, and nuts without stalling. When I upgraded from my old model to a high-performance blender, I immediately noticed smoother textures and less time spent cleaning up stubborn chunks. Check out our comprehensive guide on choosing the best blender for detailed specs and recommendations.
Optimize Blade Design for Maximum Efficiency
Look for blenders with sharp, sturdy blades that are designed to create a vortex. This vortex pulls ingredients down into the blades for even blending. I personally tested several models and found that blenders with six or more blades performed better for ice crushing and nut butters. For expert tips on blade design, see top ice crushing blenders of 2025.
Set the Optimal Speed and Power Levels
Use high-speed settings when crushing ice or blending nuts. Many blenders have preset programs, but manual control gives you better results. For example, start at medium speed to break down ice, then ramp up to high for a smooth, creamy texture. I learned this by experimenting during my first nut butter attempt, which resulted in a chunky spread. To master speed control, check our ultimate guide on blender speed settings.
Master Ice Crushing Techniques
For the best ice crushing, add small ice cubes rather than large chunks. Keep ingredients below the max fill line to avoid overloading. Use a pulse function to break the ice initially, then blend on high until smooth. I once filled my blender to the brim with ice, which caused it to stall. After that, I learned to balance ice and ingredients, and also to use the best techniques for ice crushing.
Achieve Perfect Nut Butters
Start with dry, raw nuts and pulse them in short bursts to break them down. Add a small amount of oil if needed to improve consistency. Keep scraping down the sides of the jar to ensure even blending. I once made a batch of almond butter that was too gritty until I adjusted my technique and used the expert tips for nut butter. Patience and proper technique are key to silky results.
Use the Right Accessories and Settings
Invest in tamper tools to push ingredients down, especially when blending thick nut butters or frozen ingredients. Use the right speed settings—low for mixing, high for blending and ice crushing. Experiment with the pulse function to control texture. I found that switching between pulse and continuous blending gave me the best control over final textures.
Keep Your Blender in Top Shape
Regularly clean blades and check for wear. A well-maintained blender performs better and lasts longer. For cleaning tips, visit quick tips for better smoothies. Proper maintenance ensures your investment continues to produce perfect smoothies, ice, and nut butters for years to come.

Many enthusiasts believe that choosing a high-speed blender guarantees perfect results every time. While motor power is crucial, this common misconception overlooks the significance of blade design, material quality, and proper technique. For example, a blender with a robust motor but poorly designed blades may struggle to create that silky texture you desire. Experts suggest paying close attention to blade geometry and materials, which can make a significant difference in performance. Want to learn how to optimize your blender’s efficiency? Check out our comprehensive guide on choosing the best blender to make smarter choices.
Another widespread myth is that higher RPMs alone result in better blending. This isn’t always true. Rapid spinning can generate heat, which might degrade sensitive nutrients in your ingredients. Additionally, excessive speed can cause ingredients to splatter or overheat, reducing the quality of your smoothie or nut butter. Instead, consistent, controlled blending with appropriate pulse techniques often yields better results. For advanced users, exploring the science behind speed and performance can provide deeper insights into how to fine-tune your blending process.
Beware of the trap of overfilling your blender. Many make the mistake of packing in too many ingredients, thinking more equals better. Overloading hampers blade movement and motor function, leading to uneven blending or stalling. It’s essential to keep ingredients within the recommended fill lines and to process in batches if necessary. This ensures thorough blending and longer appliance lifespan. For tips on how to avoid this common mistake, visit our guide on ice crushing and capacity tips.
For those aiming to perfect their nut butter consistency, many underestimate the importance of ingredient preparation. Using raw, dry nuts and pulsing in short bursts prevents overheating and gritty texture. Adding a small amount of oil gradually can help achieve a smooth, creamy spread. Remember, patience and technique are key. Discover expert secrets to nut butter mastery at our nut butter preparation guide.
In conclusion, mastering your blender involves understanding its nuances beyond just wattage or RPMs. Paying attention to blade design, avoiding overloading, and refining your technique can elevate your blending results significantly. Have you ever fallen into this trap? Let me know in the comments.
Keeping your blender functioning at peak performance requires more than just occasional cleaning. It involves using the right tools and adopting routine maintenance practices that extend the lifespan of your investment. As someone who relies heavily on high-speed blenders for ice crushing and nut butter making, I’ve found that a few specific tools and habits make all the difference. Today, I’ll share my favorite maintenance routines, essential equipment, and insights into ensuring your blender continues to deliver excellent results over time.
Invest in Quality Cleaning Tools
Regular cleaning is crucial, but using the right tools makes this task much easier. I always keep a soft-bristled brush specifically for cleaning the blades—this helps remove stubborn residue without damaging the blade edges. For the jar itself, I prefer a non-abrasive sponge and a mild detergent that won’t scratch the surface. A microfiber cloth is invaluable for wiping down the motor base, which can accumulate dust and grease. These tools ensure that your blender remains hygienic and that the blades stay sharp for optimal performance.
Use a Blade Maintenance Kit
Over time, blades can become dull or develop minor chips, especially if you frequently crush ice or blend tough ingredients. I recommend investing in a blade maintenance kit that includes sharpening stones or abrasive pads designed specifically for blender blades. Personally, I use a ceramic sharpening stone, which I carefully run along the blades after every few months of heavy use. This simple step keeps the blades sharp, reducing strain on the motor and maintaining smooth, consistent blending. For detailed guidance, check this expert tip on blade maintenance.
Routine Motor Base Checks
Keeping the motor base in top shape is often overlooked. I make it a habit to unplug the blender and clean around the base with a slightly damp cloth weekly, avoiding excess moisture that could damage internal components. Additionally, every few months, I open the motor housing (if accessible) to check for dust buildup and clean any debris inside. This prevents overheating and ensures the motor runs efficiently. For those interested, there are specialized compressed air cans that help blow out dust from tight spaces—an inexpensive and effective tool I highly recommend.
How do I maintain blender performance over time?
Consistent use of high-quality accessories like tamper tools can prevent overloading and uneven blending, which in turn reduces wear and tear. I also schedule regular inspections of the seals and gaskets, replacing them as needed to prevent leaks and maintain airtight operation. Additionally, I keep a log of sharpening and cleaning routines to stay on top of maintenance. As technology advances, future trends seem to favor smarter blenders with self-monitoring capabilities, which could alert you when parts need attention. Until then, diligent manual maintenance remains the best practice.
Finally, try incorporating a monthly deep-cleaning routine using a mixture of warm water, vinegar, and baking soda to remove any lingering odors or residues. This keeps your blender smelling fresh and performing like new. Remember, a well-maintained blender not only lasts longer but also consistently produces the smooth textures you crave. Don’t overlook these simple tools and habits—they’re the secret to long-term success with your high-performance kitchen companion.
< >
>
The Hardest Lesson I Learned About Blender Power and Technique
One of the biggest lightbulb moments I had was realizing that motor wattage alone doesn’t guarantee smooth results. I once bought a high-wattage blender that struggled with ice, which was frustrating. I learned that blade design, material quality, and proper technique matter just as much—if not more. This taught me to look beyond numbers and focus on how well the blades are crafted and how I use the blender in practice.
3 Myths About Blenders That Held Me Back
- Speed alone equals quality: Spinning faster doesn’t always mean better blending. Overheating and splattering can ruin your ingredients. Controlled speed and pulse functions are often more effective.
- More power means better smoothies: Sometimes, too much power can be a curse if you overload the jar or ignore blade design. Technique beats wattage when it comes to perfect textures.
- All blenders are the same: Not true. Investing in a blender with good blade geometry and build quality makes a huge difference, especially for ice crushing and nut butters.
What Experts Won’t Tell You About Blender Maintenance
Keeping your blades sharp is critical. I use a ceramic sharpening stone every few months to maintain blade efficiency, which reduces strain on the motor. Regularly cleaning around the motor base with compressed air or a soft brush prevents overheating and prolongs the blender’s lifespan. These little habits have saved me hundreds of dollars and countless blending headaches.
Where to Go from Here
If you’re serious about making perfect smoothies or nut butters, check out our comprehensive guide on choosing the best blender. Upgrading your equipment and techniques will elevate your health routines and make your time in the kitchen more enjoyable. Remember, a well-maintained blender is your best ally for delicious, nutritious recipes every day.
Reading this article really hit home. I recently upgraded my blender after a frustrating experience trying to make nut butter and frozen drinks. The difference in performance with a high-quality blender is truly remarkable — I can achieve much smoother textures and save time on cleaning. I especially appreciated the tips about blade design and proper technique, as I used to overlook these details.
One challenge I face now is knowing when to replace or sharpen blades; I wonder if anyone here has experience with specific maintenance routines or brands that offer durable, easy-to-sharpen blades? Also, I’m curious how others manage overloading issues—do you find that using smaller batches consistently improves your blending results and extends your blender’s lifespan? Would love to hear everyone’s strategies or recommendations for keeping blenders in top shape over the years.