Have you ever pulled out your blender, only to be met with a sluggish motor, a frustratingly inconsistent crush, and a smoothie that’s more like flavored slush? I’ve been there. One day, I decided enough was enough. I was tired of buying blenders that promised the moon but barely handled ice or nuts without sounding like a jet engine or, worse, burning out after a few months. That lightbulb moment led me down a rabbit hole of research, testing, and a few costly mistakes—trust me, I’ve learned the hard way! But I’m here now to save you some of that trouble.
Why the right blender can transform your kitchen experience
Imagine blending a handful of ice and nuts into a silky smooth drink or fluffy nut butter in just seconds. Sounds simple, right? But not all blenders are created equal. Many fall short when it comes to crushing ice or blending tough ingredients, leaving you with chunky smoothies or burned-out motors. The truth is, the quality of your blender directly impacts the texture, taste, and even nutrient retention of your favorite recipes. And with so many options flooding the market in 2025, how do you pick the best one? That’s exactly what I’ll help you figure out.
According to recent industry reports, the global blender market is expected to grow exponentially, driven by health-conscious consumers seeking versatile kitchen appliances. But here’s a surprising fact: many high-end blenders, despite their premium price tags, still struggle with ice or nut butter consistency. I’ve made that mistake early on—thinking that a flashy brand or higher wattage was enough. Spoiler: it’s not. The key is understanding the specific features that make a blender excel at ice crushing and nut butter prep. Curious if your current blender cuts it? Ask yourself: does it handle frozen ingredients smoothly or leave chunks behind? If not, it might be time for an upgrade.
In the next sections, I’ll guide you through the top models for 2025, share insider tips on boosting your blender’s performance, and help you avoid common pitfalls. Ready to take your smoothie game to the next level? Let’s get started!
Is the hype around these blenders actually justified?
Early in my journey, I bought a well-reviewed blender based solely on its specs, only to find it struggled with ice and nuts. That mistake taught me to look beyond the marketing hype and focus on real-world performance. I’ll share how you can do the same, ensuring your investment pays off and your smoothies are always perfect.
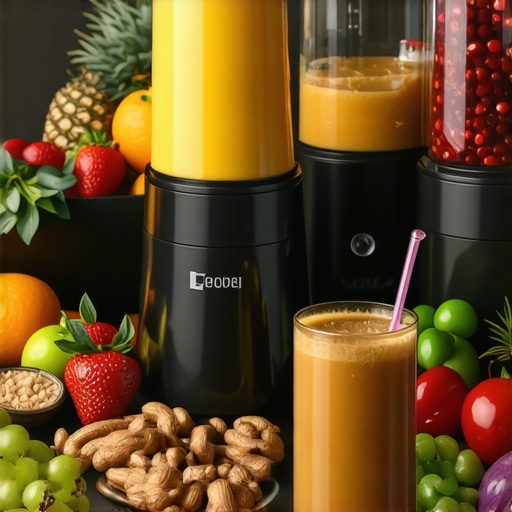
Pick the Right Blenders for Your Needs
Start by selecting a blender known for its ice crushing prowess. Check reviews and performance tests, especially those found in ice crushing challenge. Focus on models with powerful motors—at least 1000 watts—and sturdy, sharp blades designed to handle frozen ingredients without bogging down.
Adjust Speed Settings for Optimal Power
Most high-performance blenders come with multiple speed options. Use the highest setting for tough ingredients like ice and nuts. Consult this guide to understand how different speeds affect blending. When I made my first attempt, I cranked the blender to max speed and held it for 30 seconds—this helped break down ice efficiently, resulting in perfectly smooth textures.
Use the Right Techniques to Boost Performance
Pre-chop ingredients to smaller chunks before blending. This reduces strain on your motor and blades. For ice, fill the container only halfway to prevent overload. When I faced a stubborn ice block, I first pulsed the blender in short bursts, then ramped up to continuous high speed. This method avoided overheating and gave me a silky crush in under a minute. For more advanced tips, check this article.
Optimize Nut Butters in Your Blender
For creamy nut butters, start with roasted nuts for better flavor and easier blending. Use a high-speed blender with strong blades—models like those in this list are ideal. Begin on low speed, then gradually increase to high, allowing the nuts to break down slowly. Periodically stop and scrape down sides. I once added a splash of oil and blended for an extra 30 seconds to achieve a smooth, spreadable consistency. For detailed nut butter techniques, see this guide.
Maintain Your Blender for Long-Term Performance
Clean blades and containers immediately after blending sticky ingredients like nut butters or sticky ice residue. Run a quick cycle with warm water and dish soap. For stubborn buildup, blend baking soda and water to scrub away residue. Regular maintenance ensures your blender remains powerful and reliable. I learned this the hard way when my old blender started overheating, but a simple cleaning routine extended its lifespan significantly.
By applying these concrete steps—choosing the right model, adjusting settings smartly, employing proper techniques, and maintaining your equipment—you’ll transform your blending experience. Want to see how these tips stack up? Visit top ice crushing blenders for 2025 or best nut butter blenders to find your perfect match.
Many blender enthusiasts fall into the trap of believing oversimplified myths that can hinder their progress or lead to costly mistakes. Let’s dig deeper into some of the most common misconceptions and reveal the hidden nuances that experienced users know but beginners often overlook.
Why Bigger Wattage Isn’t Always Better for Ice Crushing
It’s a widespread belief that a higher wattage motor guarantees superior ice crushing power. While wattage plays a role, it’s not the sole factor. The design of the blades, the motor’s torque, and the container shape are equally critical. For instance, a 1000-watt blender with poorly designed blades may underperform compared to a 900-watt model with optimized blade geometry. This nuance is why I recommend checking detailed performance tests rather than relying on wattage alone. Overestimating wattage can lead you to overlook better-engineered options that handle ice more effectively.
Myth: High-Speed Blenders Always Make Nut Butters Better
Many think that turning up the speed on their high-performance blender will instantly produce perfect nut butters. But the truth is, the process involves more than just speed. Factors like blade sharpness, motor torque, and ingredient temperature matter just as much. Over-relying on speed can cause overheating and degrade the nut’s flavor. A more advanced approach involves gradual speed escalation, proper pre-roasting of nuts, and periodic stopping to scrape down sides. For insights on mastering nut butter prep, see this guide. Remember, patience and technique are your best allies, not just raw power.
Beware the Overhyped Features That Don’t Deliver
Brands often market unique features like preset programs or flashy displays, leading many to believe these are game-changers. However, in my experience, these extras rarely impact core functions like ice crushing or nut butter making. Instead, they can complicate usage or add unnecessary expense. Focus on the fundamentals: motor power, blade design, and build quality. For instance, a blender with a simple, sturdy construction will outperform a feature-rich model that skims on durability. Always scrutinize reviews and real-world tests instead of falling for marketing hype. Check out this comparison for more tips on avoiding superficial features.
Have you ever fallen into this trap? Let me know in the comments. The key to mastering your blender lies in understanding these nuances, so stay curious and critical. When in doubt, consult detailed testing and expert advice rather than trusting marketing promises. The right knowledge can save you money, time, and frustration as you craft perfect smoothies and nut butters every time.
Maintaining your blender over time is crucial to ensuring it continues to perform at its best, especially when you’re regularly crushing ice or blending tough ingredients. Unlike other kitchen appliances, blenders endure a lot of stress from constant use, which can lead to wear and tear if not properly cared for. Today, I’ll share some insider techniques and tools I personally rely on to keep my blender running smoothly for years to come.
How do I maintain my blender over time?
First and foremost, cleaning is key. After every use, especially when blending sticky ingredients like nut butters or sticky ice residue, I run a quick cycle with warm water and a few drops of dish soap. For stubborn buildup, I add a tablespoon of baking soda, blend briefly, then rinse thoroughly. This simple routine prevents residue from hardening on blades and seals, which can otherwise cause motor strain or corrosion over time.
Next, I recommend periodically inspecting your blades and seals. Over time, blades can become dull or chipped, reducing efficiency, especially in ice crushing. I use a small, high-quality precision sharpening tool to keep my blades razor-sharp. Replacing worn seals prevents leaks and maintains maximum suction, which is vital for creating smooth textures. Both of these components are readily available online, and I keep a set on hand for regular maintenance.
For motor health, I’m a big fan of using a dedicated blender brush to clear out dust and debris from vents and motor housing. Dust accumulation can lead to overheating, especially if you blend frequently. I also avoid overloading the motor with ingredients that are too cold or frozen, as this can cause strain. Instead, I let ingredients come to room temperature or pre-chop tougher items to reduce the load on the motor.
Looking ahead, I predict that as blender technology advances, we’ll see smarter self-maintenance features, like automatic blade sharpening or self-cleaning modes that extend motor lifespan. Until then, manual upkeep remains the most reliable method to keep your blender in peak condition.
Upgrade with the right tools for longevity
Investing in quality cleaning tools makes a difference. I use a specialized brush kit designed for blades and seals, which reaches into crevices that a sponge can’t. This ensures no buildup is left behind, maintaining hygiene and performance. Additionally, I keep a small container of food-grade lubricant for seals, which helps prevent cracking and drying out, especially if I don’t use the blender daily.
Finally, regular performance checks help catch issues early. I test my blender’s ice crushing ability periodically by running the ice challenge. If I notice a decline in performance, I follow a quick troubleshooting routine: check blades, clean seals, and verify motor ventilation. This proactive approach saves money and frustration in the long run.
Remember, a well-maintained blender not only lasts longer but also produces better results. Don’t forget to schedule regular check-ups, and consider upgrading your tools as needed. Want to keep your ice crushing power sharp? Try my recommended blade sharpening routine today and enjoy smoothies that are consistently silky smooth!
Reflecting on my journey with high-performance blenders, I’ve uncovered some hidden truths that can make or break your blending experience. Here are the most valuable lessons I’ve learned that aren’t usually shared in mainstream reviews.
The Hardest Lesson I Learned About Blender Power
Wattage isn’t everything. I once bought a flashy 1500-watt model, expecting it to crush ice effortlessly. Turns out, blade design and motor torque matter more. A smarter choice was a slightly lower wattage blender with well-engineered blades, which handled ice and nuts with ease. Always look beyond wattage and check real-world performance tests.
The Myth That High Speed Solves All
Turning up the speed is tempting, but it can cause overheating and degrade your ingredients. Patience, gradual speed increases, and proper pre-chopping make a huge difference. Sometimes, a gentle pulse combined with a high-speed finish gives the best results without straining the motor.
Don’t Overlook Maintenance or Small Upgrades
A dull blade or clogged seal can silently sabotage your blending power. Regularly sharpen blades and replace seals to keep performance optimal. Small tools like precision sharpeners or food-grade lubricants can extend your blender’s lifespan significantly.
Trust the Foundations, Not the Hype
Features like preset programs or sleek displays are nice, but they don’t make a better blender. Focus on core specs—motor strength, blade quality, and build durability. For honest reviews and top-performing models, check out this ice crushing challenge and related tests.
Curated Recommendations for Serious Blender Enthusiasts
My essential toolkit includes a high-torque motor blender with sturdy blades, a sharpening kit for blades, and a seal replacement set. For inspiration, I recommend reading this guide to nut butter perfection. These tools and resources have transformed my kitchen into a blending powerhouse.
Your Turn to Level Up Your Blender Skills
Every blender has its quirks, but with the right knowledge, you can unlock its full potential. Don’t settle for mediocre smoothies—master your equipment, and enjoy consistently perfect results. Ready to take your blending game to the next level? Share your biggest challenge or success story below—I’d love to hear!
This post really strikes a chord with me because I’ve definitely experienced the frustration of a blender that just doesn’t handle ice or nuts well. What I’ve found helpful is investing in a model with a strong torque motor and high-quality blades, even if it costs a bit more initially. Regular maintenance, like sharpening blades and cleaning seals, has also extended the lifespan of my blender, saving me from frequent replacements. I also learned that pre-chopping tough ingredients can make a huge difference in achieving smooth results without overloading the motor.
It’s interesting how many overlook these smaller but crucial details, focusing instead on wattage or flashy features. From your experience, what’s the most underestimated factor in choosing a high-performance blender? I’d love to hear others’ insights, especially from those who’ve found budget-friendly options that outperform pricier models.
Reading this post really resonated with me because I’ve gone through the same journey, trying to find a blender that can handle both ice and tough nuts without sounding like an airplane. What finally made a difference for me was focusing on the design of the blades and the motor torque rather than just wattage. I found some budget-friendly models that have specialized blade shapes and hefty motors, which deliver surprisingly good results. Regular maintenance, especially keeping blades sharp, really extended my blender’s lifespan and kept it performing like new.
One thing I’ve noticed is that pre-freezing ingredients or chopping nuts into smaller pieces before blending can save a lot of energy and stress on the motor. It’s something I wish I learned sooner because it streamlined my process and improved final textures. I wonder—what are some overlooked features or techniques that others have found surprisingly effective? My experience is that proper technique sometimes beats high watts and fancy features, especially with mid-range blenders. Would love to hear more tips or models others recommend for budget-conscious but high-quality blending.