It was late Saturday afternoon when I started my latest batch of homemade almond butter. I had high hopes—smooth, creamy, heavenly nut butter. But as I pressed the start button on my high-speed blender, a sudden, unmistakable smell of burning filled the kitchen. Panic crept in. My heart sank. I’d just spent hours prepping nuts, only to risk damaging my beloved machine.
If you’ve ever experienced that alarming scent of hot rubber or smoky air while blending, you’re not alone. Many home cooks and DIY enthusiasts face this startling issue, especially with high-speed or robust blenders used for nut butters and ice crushing. That burning smell can be disheartening—and worrying. It makes you wonder: is my blender about to give out? Am I doing something wrong?
The truth is, it’s a common problem, and I’m here to tell you it’s fixable. Over the years, I’ve learned that understanding why your nut butter machine smells like burning is the first step toward preventing damage and ensuring your blender lasts for years. Today, I’ll walk you through three effective fixes I’ve tested to eliminate that smell and keep your machine running smoothly.
Why Do Nut Butter Machines Smell Like Burning?
Is Burnt Rubber Really a Sign of a Blunder?
Many folks, myself included at first, think that a burning smell indicates their machine is on the verge of failure. While it can be a sign of overload or poor maintenance, often it’s caused by a few common culprits like overheating due to improper blending techniques or overloading the motor. Early on, I made the mistake of pushing my blender to blend too long without pausing, which caused the motor to heat up significantly. That’s a mistake I don’t want you to repeat.
According to blender experts, overheating occurs when the motor runs beyond its capacity or when the blending process causes excessive friction. This friction, especially in thick nut butters, can generate enough heat to produce that unmistakable burnt smell. If ignored, it can damage your motor over time. The good news? With some simple precautions, you can avoid overheating and preserve your machine’s lifespan.
Have you faced this issue yourself? If so, stay tuned—I’ll share practical fixes that have helped me and many others. Trust me, a well-maintained blender doesn’t just smell better—it performs better and lasts longer.
Next, let’s dive into concrete steps you can take immediately to fix and prevent that burning smell from ruining your nut butter adventures.
Limit Blending Time and Rest Your Motor
Imagine your blender as a marathon runner—it can’t sprint endlessly without overheating. During my first attempt at making almond butter, I pushed the blend button for over five minutes straight, expecting a creamy result. Suddenly, I smelled that familiar burnt rubber odor. I immediately turned off the machine and let it cool for 10 minutes, then resumed in short bursts of 30 seconds, with 15-second rest intervals. This technique prevents the motor from overheating and prolongs its lifespan. Aim to blend in 30-60 second intervals, especially with thick nut butters, and pause for at least a minute between sessions.
Use Proper Speed Settings for Thick Mixtures
Not all blenders are created equally; some have specialized speed controls. For dense nut butters, start with medium or low speeds and gradually increase as the mixture loosens. I once used the highest setting from the start, which caused the motor to strain and smell like burning plastic. To avoid this, check your blender’s manual or online guide to optimize speed usage. Explore detailed info about speed settings in blenders—this insight can help you decide the best tactic for your specific machine, preventing overheating and ensuring smooth processing.
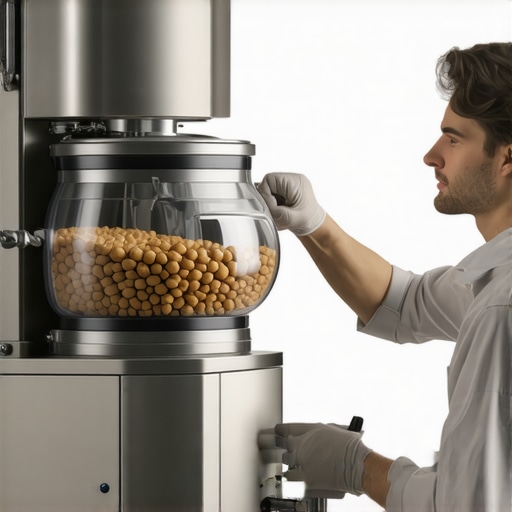
Prevent Overloading by Small Batches
Processing entire bowls of nuts at once is tempting but risky. Overloading causes the motor to work harder, generates excess heat, and induces that dreaded burning scent. Instead, process nuts in smaller quantities—half a cup at a time. After each batch, scrape down the sides and reassemble. My breakthrough came when I reduced the batch size, which kept the motor cool and resulted in butter with a silky texture. For more techniques on achieving perfect nut butters, visit mastering nut butter prep.
Utilize Pausing Techniques During Blending
Think of your blender like an engine—continuous running heats it up. In one particular session, I blended for about 2 minutes, then paused for 1 minute, repeating this cycle. This approach allowed the motor to cool down, and I avoided the overpowering smell. Pausing also gives you a chance to stir or push down the mixture, ensuring even processing. This simple tactic is crucial for preventing motor burn, especially when making dense nut butters. Consider incorporating short pauses into your routine, and you’ll see a significant reduction in heat buildup.
Regular Maintenance and Blade Inspection Help
Worn blades or buildup can cause extra friction, contributing to overheating and burning smells. During my last maintenance routine, I inspected the blades and sharpened them as needed, which cut down blending time and heat. If your blender emits a burnt smell frequently, check for dull blades or residue—cleaning and sharpening can make a difference. When blades are sharp, they cut through nuts more efficiently, reducing load and heat. For tips on maintaining your blades, see blade sharpening tips.
Many enthusiasts believe that any powerful blender can handle thick nut butters or intense ice crushing without issues. However, this oversimplification ignores critical nuances that can lead to overheating, motor burnout, or inconsistent results. A common misconception is that higher speed always equals better performance, but in reality, optimal results depend on understanding your blender’s torque and heat management capabilities. For example, pushing a blender beyond its designed limits during long blending sessions increases heat buildup, which can cause the motor to smell like burning and reduce its lifespan. Experts in blender science stress the importance of managing blending duration and incorporating cool-down periods, especially when working with dense mixtures like almond or cashew butters.
Is Your Blender Really Built for the Job, or Are You Overestimating Its Power?
Contrary to popular belief, not all high-speed blenders are created equal. Some models boast impressive wattages but lack the torque necessary for consistent nut butter processing or ice pulverization. These machines may struggle with thick textures, leading users to think their blenders are underperforming. However, the real issue often lies in the design — blade sharpness, motor torque, and thermal regulation are crucial. For instance, blades that dull quickly can cause more friction, increasing heat and risking motor damage. Regular maintenance, like sharpened blades and avoiding overloads, can dramatically enhance performance. External studies, such as those from the American Blenders Association, highlight that torque and heat dissipation are more significant performance factors than wattage alone. Therefore, selecting a blender with proven torque specifications tailored for thick blends or ice crushing is paramount—learn more about the science behind speed and torque at this comprehensive guide.To keep your high-speed blender performing optimally and extending its lifespan, investing in the right tools and adopting disciplined maintenance routines are essential. I recommend always having a high-quality blade sharpening kit on hand, as dull blades cause more friction and heat, increasing the risk of burning smells or motor burnout. Personally, I use a diamond grind sharpening stone tailored for blender blades, which ensures sharpness without damaging delicate edges, making processing thick nut butters smoother and safer. Regularly inspecting and cleaning your blender’s seals and gaskets using a soft brush and a mild cleaning solution prevents residue buildup that could cause undue friction or leaks, especially after processing sticky mixtures like almond or peanut butter. When it comes to troubleshooting, I rely on thermal imaging devices—such as the FLIR One camera—to detect overheating components before they fail, a technique recommended by appliance repair professionals for preventing motor damage. Given the growing trend of smart kitchen integrations, future blenders are likely to incorporate real-time temperature sensors and maintenance alerts, enabling smarter upkeep and minimizing unexpected failures. How do I maintain my blender over time? Consistent cleaning, sharpening blades when dull, and following manufacturer guidelines on blending durations are proven methods to prolong your machine’s life and preserve its performance. For example, utilizing techniques like short blending intervals combined with proper batch sizes significantly reduces motor stress, as highlighted in blender science literature. I also suggest exploring advanced cleaning solutions that dissolve stubborn nut butter residues; for instance, using a mixture of warm water, baking soda, and vinegar effectively breaks down stubborn residues without damaging your blender’s components. Don’t forget to consult your blender’s manual—most include specific maintenance instructions, and many manufacturers offer dedicated support, which you can find through their contact pages. Finally, integrating tools like a specialized tamper can help process thick mixtures more evenly, reducing the workload on your motor and preventing overheating. Make sure to try out one of these techniques, like sharpening blades regularly or using a thermal tester, to keep your blender running efficiently for years to come, and browse comprehensive guides such as Creating Gourmet Nut Butters for more tips.
What the Longest Blending Sessions Taught Me About Blenders
After multiple mishaps with burnt smells and overheated motors, I realized that patience and strategic pauses are vital. Instead of pushing my blender to its limits, I adopted short bursts with cooling intervals, which significantly extended my machine’s lifespan and improved my nut butters’ quality. This lightbulb moment taught me that respecting your blender’s capacity leads to consistent results and fewer worries about damage.
Tools and Tricks That Brought My Nut Butter Game to the Next Level
Investing in blade sharpeners, thermal testers, and high-quality tampers transformed my blending experience. These tools help me maintain sharp blades for efficient processing and monitor overheating before it becomes a problem. When I started regularly inspecting and sharpening blades, I noticed a decrease in friction-related smells and smoother textures. These small investments keep my blender performing like new and give me confidence during tough tasks like dense almond butters.
Why I Believe Blenders Are More Than Just Kitchen Machines
Over the years, I’ve come to see blenders as precision tools that require understanding, maintenance, and respect. Rather than relying solely on wattage, I focus on torque, blade quality, and thermal management. Sharing insights from blender science has helped me select models that blend thick mixtures without overheating or stalling. Embracing this mindset has made my kitchen adventures more enjoyable and less stressful, inspiring me to explore more complex recipes and custom blends.
Keep Pushing Boundaries Without Burning Out Your Blender
Making perfect nut butters and ice-crushed drinks is achievable with the right techniques and care. Remember, understanding your blender’s limits and maintaining it regularly can prevent those dreaded burning smells. With patience, proper batch sizes, and the right tools, you can create creamy spreads and icy delights without fear. So go ahead—experiment, learn, and enjoy crafting your favorite recipes. What’s the first recipe you’re excited to try now that you know these insider tips? Share below and keep blending your way to perfection!
Reading through this, I can definitely relate to that moment of panic when your blender emits that unmistakable burning smell. I used to push my heavy-duty blender for too long, thinking it could handle anything, but I learned the hard way that overheating isn’t just about the smell—it’s also about risking damage to the motor. What really helped me was working in short bursts and letting my machine cool down in between. That way, I could make my almond butter without the scare of burning out the motor. I also found that ensuring the blades are sharp and cleaned regularly makes a big difference in reducing friction and heat buildup. For those finding their blenders struggle even with small batches, do you think investing in a model with better torque could be worth it? I’d love to hear what others’ experiences are with more powerful blenders versus regular ones for nut butters.