It was late last Sunday afternoon when I finally faced the truth. My trusty blender, the one I’ve relied on for years, was sizzling, whirling, and then suddenly humming its distress. I was attempting to whip up a batch of almond butter, and instead of a creamy spread, I got a stubborn, chunky mess that refused to blend any further. The motor was smoking slightly, and I realized I’d pushed it too hard again. That moment — staring at my failed attempt, clutching a spoonful of unspreadable nut butter — was a real wake-up call.
Blenders in 2026: Why Are So Many Still Struggling?
Despite all the advances in kitchen tech, why do so many home blenders choke on thick, dense nut butters? This is a question I hear a lot from fellow blending enthusiasts. The answer isn’t just about the latest model or wattage; it’s rooted in how these machines are built and the common mistakes we make early on. I’ve learned from my own blunders, and I want to share what I’ve discovered so you can avoid burning out your blender or settling for subpar textures.
Part of the challenge stems from the fact that many blenders are designed primarily for smoothies and ice crushing. They often lack the torque or blade design necessary to handle the sticky, oil-rich consistency of nut butters. Plus, I used to think cranking up the speed was enough, but that’s a misconception. Ever since I started paying attention to the specific features that optimize nut butter making, my results have improved exponentially. For a deeper dive into which blenders excel for such tasks, check out the [top blenders for nut butters in 2025](https://blenders.kitchentechhq.com/best-high-speed-blenders-for-nut-butters-ice-crushing-in-2025).
So, what’s going wrong, and how can you fix it? That’s what I plan to explore in the next sections — practical tips that will help you create smooth, creamy nut butters without risking your appliance’s health. But first, let me share a little story about a mistake I made early on that nearly ended my blending adventures altogether.
Is Overpowered Really Better? Here’s What I Learned
Initially, I believed that only a high-wattage blender could handle tough nut butters. I was wrong. I bought the most powerful model I could find, thinking it would solve all my problems. Instead, I ended up burning out the motor after just a few months. It turns out that torque — the twisting force that keeps blades turning through sticky ingredients — matters more than brute strength. I overlooked the importance of proper blade design and speed settings. Now, I understand that the right balance, combined with specific techniques, makes all the difference. Curious about how to optimize your blender for nut butters? Dive into our [mastering nut butter preparation](https://blenders.kitchentechhq.com/mastering-nut-butter-preparation-in-your-blender) guide for detailed insights.
Optimize Your Process with Proper Loading Techniques
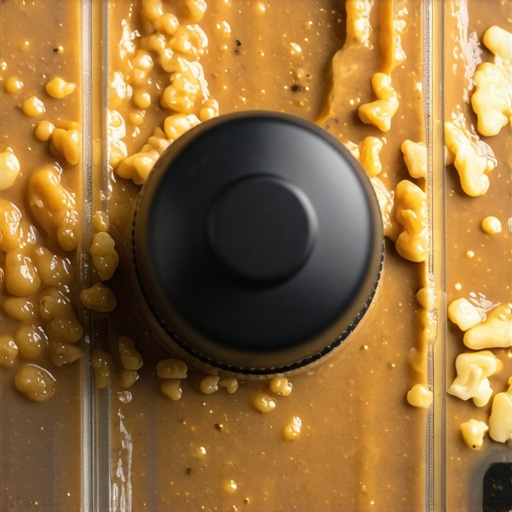
Start by adding ingredients gradually instead of all at once. During my first attempt, dumping a full cup of roasted almonds caused my blender to stall instantly. Instead, I loaded half, blended briefly, added more, and repeated. This incremental approach reduces strain on the motor and ensures uniform consistency. Think of it like pouring water into a dry sponge—slowly and steadily to maximize absorption.
Adjust Speed Settings Smartly to Prevent Overheat
High-speed blending can generate heat that affects both texture and your motor. Use lower to mid-range speeds initially, then ramp up as needed. I once tried fast blending from the start, resulting in smoke and a burnt smell. By gradually increasing speed, guided by the speed guide, I maintained control and achieved smoother nut butters without risking damage.
Use Pulsing and Rest Cycles for Consistency
Pulsing combines short bursts with rest periods, helping break down nuts efficiently. I adopted this method after reading about it in the power-boost technique. For instance, I pulse for 10 seconds, then let the motor rest for 20 seconds. This prevents overheating and allows fats to redistribute, giving you a creamier texture. Think of it like kneading dough: gentle, controlled, and deliberate.
Maintain Blade and Motor Health to Keep Results Consistent
Proper maintenance is critical. Regularly check and clean blades; dull blades struggle with sticky textures. I learned this firsthand when my nut butter came out gritty—turns out, a dull blade was the culprit. You can sharpen blades or replace them as needed. For motor longevity, avoid overfilling and always use the recommended load sizes. Incorporate cooling intervals and use the techniques for heat management to extend your blender’s lifespan.
Experiment with Ingredient Ratios and Preprocessing
Pre-soaking nuts or roasting them beforehand can significantly impact blending ease. I soaked raw almonds overnight, reducing blending time and improving creaminess. Adding a tablespoon of oil—avocado or coconut—also helps achieve silky textures. Remember, small adjustments can make a big difference, so keep notes of your variables to refine your technique over time. Curious about specific ingredient ratios? Check out gourmet nut butter tips for more insights.
Are You Falling for These Common Blender Myths?
Many enthusiasts believe that simply increasing the motor wattage guarantees perfect ice crushing or creamy nut butters. However, this is a misconception. The truth is, **torque and blade design** are much more critical factors. A high-wattage motor can still underperform if it lacks the proper torque transfer and blade sharpness. According to blender science experts, torque consistency is paramount to handling dense ingredients gracefully. So, before upgrading to the next powerful model, consider these technical nuances.
The Pinch Point: Overloading and Its Hidden Dangers
One trap many overlook is overloading the blender jar. Stuffing it beyond the recommended capacity may seem efficient, but it actually risks overheating, motor burnouts, or poor blending results. This common mistake can be subtle; you might notice inconsistent textures or strange noises before a full-blown failure. Implementing proper loading techniques, like adding ingredients gradually, ensures your blender operates within safe limits. For more tips on optimizing performance and avoiding breakdowns, explore quick blending tips.
Advanced Question: Why Does Speed Setting Matter Beyond Blending Time?
Speed settings are not just about how quickly your ingredients blend—they influence heat generation, texture, and ingredient breakdown. High-speed pulses create more heat, which can melt fats or cause thermal degradation of some ingredients. Maintaining optimal heat levels is essential for preserving flavor and texture, especially in delicate recipes like raw nut butters. Recent research from blender performance science highlights that precise speed control enhances blending efficiency and prolongs device lifespan. Mastering this nuance allows advanced users to perfect their recipes without risking damage or undesirable outcomes.
Remember, becoming proficient means understanding and controlling these intricate factors rather than relying solely on raw power or a ‘set it and forget it’ mentality. Incorporate these insights into your routine, and you’ll notice smoother, more consistent results every time. Want to elevate your blending game? Check out ice crushing hacks and nut butter mastery guides for professional-level results. Have you ever fallen into this trap? Let me know in the comments.
Investing in a high-quality blender is just the beginning; the key to consistent, excellent results lies in diligent maintenance and using the right tools. I personally rely on a few trusted methods and equipment that ensure my blender stays powerful and efficient over the years.
Regular Blade and Motor Care
First, I emphasize cleaning and sharpening the blades regularly. Dull blades can turn a smooth nut butter into a gritty mess, and they strain the motor unnecessarily. I’ve found that sharpening blades with a professional-grade honing kit restores their sharpness effectively. Additionally, I inspect the motor brushes every few months—if you notice decreased performance or unusual noises, it’s often time for a professional checkup. In the long run, this upkeep prevents costly replacements and keeps my texture consistently creamy.
Choosing the Right Accessories and Tools
Beyond maintenance, selecting proper accessories makes a significant difference. For example, using a sturdy tamper designed for high-speed blenders helps push ingredients toward the blades without overworking the motor. I prefer models with a vented lid or cooling system, like the ones highlighted in ultimate ice crushing guides, which prevent overheating during lengthy nut butter sessions.
Predicting and Extending Long-Term Performance
In the future, I predict that smart blenders with built-in sensors will become commonplace, alerting users when maintenance is needed or parts are worn down. Until then, diligent manual upkeep is my best strategy. I’ve extended my blender’s lifespan by avoiding overfilling and allowing it to rest after intensive blending, following recommendations from technical sources like blender performance science.
How do I keep my blender working over time?
The secret is consistent cleaning, proper component checks, and using the right tools such as blade sharpeners and cooling accessories. Additionally, I always adhere to manufacturer guidelines for load sizes and speed settings, which help prevent overheating and mechanical wear. Incorporating these practices ensures reliable performance and better long-term results—whether I’m making silky nut butters or ultra-smooth smoothies.
To optimize your blending technique further, I recommend trying the advanced tip of pulsing combined with rest cycles, as discussed earlier. This method not only protects your motor but also yields superior textures by allowing ingredients to evenly break down. For a detailed walkthrough, explore high-speed blender hacks and implement this in your routine today. A small investment in proper maintenance tools and disciplined practices will significantly enhance your blending experience and equipment longevity.

After experimenting with countless techniques and different blenders, I realized that achieving perfect nut butters isn’t just about equipment—it’s about understanding and fine-tuning your process. The real magic happens when you combine proper loading, temperature control, and maintenance habits, transforming a stubborn mixture into a silky spread. By embracing these insider strategies, you’ll unlock a new level of consistency and longevity for your blender, making your kitchen adventures more enjoyable and less stressful. Remember, patience and attention to detail are your best tools—soon, you’ll be churning out gourmet nut butters that impress everyone and preserve your appliance’s health for years to come.