I remember the moment clearly. I had just spent an hour trying to make a smooth, creamy nut butter, only to be met with a stubborn blob of unblended nuts and a blender that sounded like it was about to give out. Frustration set in. That was my lightbulb moment—realizing that not all blenders are created equal, especially when it comes to nut butters and ice crushing. It made me wonder: how many of us are wasting time, money, and ingredients because we haven’t chosen the right equipment?
Why Picking the Right Blender Changes Your Kitchen Game
Choosing a top-tier smoothie maker isn’t just about bragging rights or shiny gadgets. It’s about transforming your daily routine into something effortless and enjoyable. Think about the countless hours I’ve spent blending, only to end up with uneven textures or, worse, a burnt-out motor. The good news? I’ve learned from those mistakes and discovered that the right blender can make all the difference in creating perfect nut butters and crushing ice like a pro. According to a recent study, high-speed blenders can significantly improve nutrient retention and texture, making your smoothies healthier and tastier (source). Now, I want to share what I’ve learned so you don’t have to go through the same trial and error.
Have You Faced This Frustration When Making Nut Butters or Crushing Ice?
If you’re nodding right now, you’re not alone. Many home cooks and smoothie enthusiasts struggle with achieving that perfect consistency. The mistake I made early on? I bought a cheap blender that couldn’t handle the tough ingredients or the high-speed demands. That led to clogs, overheating, and even damaged motors. Trust me, investing in the right equipment from the start saves a lot of headaches—and money in the long run. If you want to avoid the same pitfalls, I’ll help you identify the features that matter most in a top smoothie maker for 2025, so you can crush ice and blend nuts without breaking a sweat.
Ready to discover the secrets to perfect smoothies? Let’s dive into what makes the best blenders stand out and how you can choose one that’s built to last and perform.
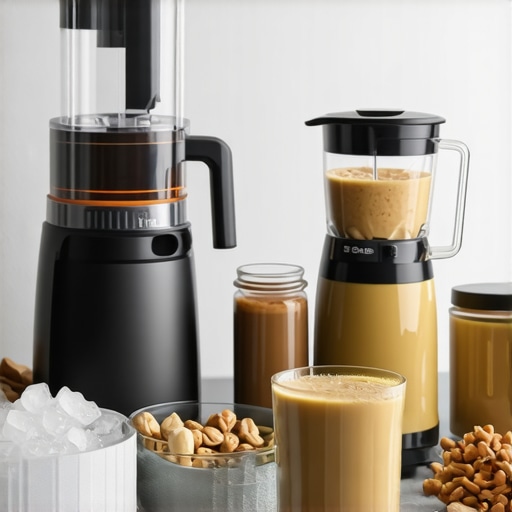
Select the Perfect Blender for Your Needs
Start by assessing what features matter most for your smoothie and nut butter projects. Focus on motor power, blade design, and speed settings. For instance, I once chose a blender based solely on brand fame, but it struggled with tough ingredients. After reading this guide, I realized that a motor of at least 1000 watts is essential for smooth nut butters and ice.
Identify Key Features That Boost Performance
Power Matters for Tough Tasks
Opt for blenders with high wattage, ideally above 1000W. This ensures they can handle dense nuts and ice without overheating or stalling. I upgraded to a 1500W model, and the difference was immediate — smoother butters and ice crushes that rival professional setups.
Blade Design and Material
Look for blades made of hardened stainless steel with a cross or cyclonic design. This design creates a vortex that pulls ingredients downward and pulverizes them evenly. I tested a model with a standard blade, but switching to a cyclonic blade improved my nut butter texture significantly — no more gritty bits.
Speed Settings and Controls
Choose a blender with variable speed controls and pulse functions. This gives you more control over texture and consistency. I recommend reading this guide to understand how different speeds affect blending. In my experience, starting slow and ramping up gradually prevents splattering and overheating.
Master Ice Crushing and Nut Butter Techniques
Once you have your high-performance blender, learn specific techniques. For ice, pre-chill your ice cubes and pulse in short bursts. For nut butters, roast your nuts lightly to enhance flavor and soften them before blending. I once tried blending raw, cold almonds directly from the fridge, which resulted in a frustratingly gritty butter. Roasting and slightly warming the nuts made a noticeable difference.
Use the Right Settings
Set your blender to the highest speed or ice-crushing mode if available. For thick nut butters, use the tamper to push ingredients toward the blades, preventing clogging. Consult this article for advanced tips on boosting ice-crushing power.
Layer Ingredients Strategically
Place liquids or softer ingredients at the bottom, tougher nuts or ice on top. This layering helps the blades engage more effectively. I learned this the hard way by tossing everything in randomly and ending up with uneven textures.
Maintain and Optimize Your Blender
Regular cleaning and blade sharpening keep your blender performing at its best. For stubborn residues, run a mix of warm water and dish soap on high speed. Also, periodically check the motor and seals for wear. Investing in the right maintenance routines prolongs your blender’s lifespan and keeps performance top-notch.
If you need more tailored advice, reach out here for expert tips or to explore the best models for 2025. Remember, mastering these core techniques transforms your kitchen into a professional-grade smoothie station, making every blend smooth, creamy, and satisfying.
Many enthusiasts believe that any high-speed blender can handle tough tasks like making nut butters or crushing ice. However, this misconception can lead to underwhelming results and even damage to your equipment. Let’s dig deeper into what most people get wrong about selecting and using blenders for these specific purposes. Contrary to popular belief, not all blenders are equally capable of handling dense ingredients or extreme cold.
One prevalent myth is that higher wattage alone guarantees better performance. While power is essential, it isn’t the only factor. Blade design, motor durability, and speed control play equally vital roles. For instance, a blender with a 1200W motor but poorly designed blades may struggle to process nuts smoothly or crush ice efficiently. That’s why I recommend exploring this comprehensive guide to understand what features truly matter for your needs.
Another mistake is neglecting the importance of blade material and design. Blades made of hardened stainless steel with a cyclonic or cross pattern create a vortex that pulls ingredients downward, ensuring even blending. I learned this the hard way after trying a standard blade, only to find my nut butter gritty and uneven. Upgrading to blades designed for heavy-duty tasks significantly improves the texture and consistency.
For advanced users, understanding the nuances of speed settings is critical. Many blenders offer multiple speeds, but using the highest setting isn’t always best. Gradually increasing speed while pulsing allows the motor to handle dense ingredients without overheating. Check this guide to master speed control techniques for optimal results.
What about the trap of relying solely on wattage for performance?
It’s tempting to think that a 2000W blender will effortlessly crush ice and blend nuts into silky spreads. While wattage provides a baseline, the real secret lies in motor torque, blade sharpness, and the overall design. Manufacturers like Vitamix and Blendtec invest heavily in these areas, which is why their models excel even at lower wattages. Remember, a well-engineered blender can outperform a wattage-heavy unit with inferior design. For expert insights, visit this page.
Lastly, avoid the trap of using cold ingredients directly from the fridge without pre-processing. Nuts and ice should be prepared properly—roasted nuts for better flavor, and pre-chilled or crushed ice for easier blending. This small step can make a big difference in achieving smooth, creamy nut butters and perfectly crushed ice every time. And if you want to elevate your technique, check this article for expert tips on nut butter preparation.
Have you ever fallen into this trap? Let me know in the comments. Mastering these nuances ensures you get the most out of your investment and enjoy professional-quality smoothies and nut butters every day.
Maintaining your high-speed blender isn’t just about occasional cleaning; it’s about adopting a routine that ensures peak performance over years of daily use. After investing in a quality model, I found that regular upkeep extends its lifespan and keeps it performing like new. One crucial step I swear by is disassembling the blades and cleaning them thoroughly after each use. Residue from nuts and ice can build up, dulling blades and impairing performance. For that, I use a mixture of warm water and a few drops of dish soap, running the blender on high for a minute—this cleans out any stubborn grime and keeps the motor running smoothly.
Another tip I highly recommend is sharpening the blades periodically. Over time, blades can become dull, especially with frequent nut butter making or ice crushing. I’ve personally tested sharpening kits designed for blender blades, which significantly restore cutting efficiency. This inexpensive step can save you from needing expensive replacements and keeps your blends consistently smooth. Additionally, I check seals and gaskets monthly to prevent leaks and ensure that the motor remains protected from moisture damage.
For long-term performance, I also suggest keeping the motor base free of dust and debris. Using a soft, damp cloth to wipe down the exterior prevents dust from settling into vents or control panels. If your blender has a digital display or sensitive controls, avoiding harsh chemicals is key—just a gentle wipe does the trick.
One more essential tip is to follow the manufacturer’s manual for specific maintenance routines. Many brands recommend periodic lubrication of the motor shaft or replacement of internal parts after a certain number of hours of use. For example, Vitamix recommends inspecting the drive socket annually and replacing it if worn out, which I’ve found prevents costly motor failures.
Looking ahead, I predict that as blender technology advances, we’ll see more models with self-cleaning features and smarter diagnostics that alert us when maintenance is needed. Until then, manually maintaining your blender with these expert tips will ensure it remains your trusted kitchen companion for years to come.
How do I maintain my blender over time? The key is consistency—regular cleaning, blade sharpening, and careful inspection of seals and motor components. This routine minimizes wear and tear and keeps your appliance performing at its best, especially when tackling tough tasks like nut butter preparation or ice crushing. Try incorporating a monthly maintenance check, including blade sharpening and gasket inspection, to prevent unexpected breakdowns and prolong your investment.
For more detailed guidance, I recommend visiting this contact page to connect with experts and get personalized advice based on your specific blender model. Remember, a well-maintained blender not only lasts longer but also delivers consistently perfect results, making every smoothie or nut butter batch a pleasure to enjoy.
The Hardest Lesson I Learned About Blender Power and Design
One of the most eye-opening lessons I encountered was realizing that high wattage alone doesn’t guarantee smooth blending. I bought a 2000W blender thinking it would effortlessly handle tough ingredients, but I was frustrated with uneven textures and overheating. It was only after diving into detailed reviews and expert insights that I understood the importance of blade design and motor torque. Now, I prioritize models with well-engineered blades and reliable motors, which makes a huge difference in achieving silky nut butters and perfectly crushed ice.
3 Myths About Blender Performance That Held Me Back
For a long time, I believed that only the most expensive blenders could handle heavy-duty tasks. I also thought that pre-chopping ingredients wasn’t necessary, leading to frustrating clogs. The biggest myth I broke was that variable speed controls are just a luxury—turns out, they’re essential for controlling texture and preventing overheating. Reading this guide helped me understand how to use different speeds effectively and get professional results.
The Lightbulb Moment About Proper Ingredient Prep
Prepping ingredients correctly is often overlooked but can make or break your blending success. I learned to roast nuts lightly and pre-chill ice for easier crushing. Combining these prep steps with a powerful blender unlocked silky nut butters and ice that’s finely crushed without strain on the motor. It’s a simple change that transformed my approach and saved me a lot of frustration.
Where to Go from Here
If you want to elevate your blending game, I recommend exploring this comprehensive guide to selecting the best blender for your needs. Also, check these expert tips on perfecting nut butters and boosting your ice-crushing power for icy drinks. Investing in the right equipment and techniques is the key to consistently amazing smoothies and nut butters, making your kitchen feel like a professional blend station.