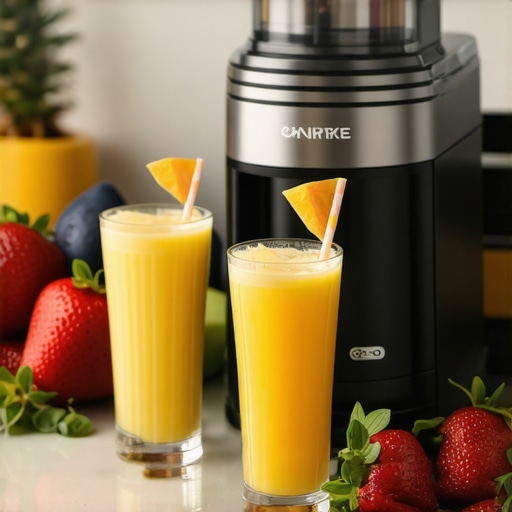
Ever tried pulling out your blender on a busy morning only to be met with a sluggish motor that struggles to crush ice or blend those hearty nuts? I’ve been there, frustrated, watching my smoothie turn into a chunky mess instead of that smooth, creamy delight I crave. That lightbulb moment hit me hard—my trusty old blender just wasn’t cutting it anymore. And honestly, I was tired of wasting time and ingredients on equipment that couldn’t handle the job.
Why Choosing the Right Blender Matters More Than Ever
In 2025, the market is flooded with options, but not all blenders are created equal—especially when it comes to crushing ice or making nut butters. The right machine can turn your kitchen into a health haven, allowing you to whip up nutritious smoothies, icy treats, and even homemade nut butters with ease. But if you pick the wrong one, you’ll be stuck with a noisy, inefficient device that doesn’t deliver what it promises.
From personal experience, I learned that investing a little more in a high-speed blender—one designed for ice crushing and nut butter making—paid off big time. It saves me time, effort, and frustration, plus it makes my recipes taste better. Did you know that the best blenders for 2025 can even improve your nutrition by maintaining the integrity of delicate nutrients during blending? According to experts, the science behind blender performance shows that choosing the right speed and blade design makes all the difference (more here).
Is The Hype About Ice Crushing and Nut Butter Making Just Marketing?
I used to think so—until I made the mistake of choosing a low-power blender early on. I thought, “How hard can it be?” Turns out, quite a lot. My first blender couldn’t handle ice or nuts without overheating or burning out. It was a costly mistake that taught me to look deeper into specs and reviews. Now, I focus on models with proven ice-crushing power and the ability to create smooth, consistent textures for nut butters and smoothies (see top picks here).
If you’ve faced similar frustrations, don’t worry—you’re not alone. In the sections ahead, I’ll walk you through what to look for, share my favorite models, and give tips on how to get the most out of your blender. Because, trust me, the right gear can transform your health routine and make your kitchen work for you, not against you.
Are you tired of dealing with underperforming blenders? Ready to upgrade to a machine that actually handles ice, nuts, and smoothies with ease? Let’s dive into what makes a top-tier blender for 2025—so you can start blending smarter, not harder.
Set Up for Success with Your Blender
Start by choosing a high-speed blender with a powerful motor—look for models with at least 1000 watts, which are capable of handling tough ingredients like ice and nuts without overheating. Place your blender on a flat, stable surface to prevent any wobbling or accidental spills during operation.
Optimize Your Ingredients and Prep Properly
For best results, cut ice into smaller chunks and soak nuts for 10-15 minutes to soften them slightly before blending. This reduces strain on the motor and ensures a smoother outcome. Remember, dry, frozen ingredients are harder to process, so prep them accordingly for optimal performance.
Start with the Right Speed and Technique
Power up your blender and gradually increase the speed to its highest setting—most models have a dedicated ice crush or pulse function. Think of blending as a dance: start slow to get everything moving, then crank up the speed to break down ice or nuts thoroughly. Using the pulse function in short bursts helps control the texture and prevents overheating.
Crushing Ice Like a Pro
Place ice into the blender, secure the lid, and turn it to the ice-crush setting or pulse mode. Hold the lid firmly and blend for 10-20 seconds, then stop and check. If you want finer snow-like ice, repeat a few times, scraping down sides if needed. To avoid overloading the motor, don’t fill the blender more than halfway with ice.
Creating Nut Butters with Precision
Add nuts and a splash of oil (like coconut or vegetable oil) for smoother blending. Start at a low speed and gradually increase. Scrape down the sides periodically to ensure even processing. For ultra-smooth nut butters, blend for 2-5 minutes, pausing occasionally to prevent overheating. For expert tips, see this detailed guide.
Adjust Settings for Consistency
Use the blender’s speed settings to control texture—lower speeds for chunky mixes, higher for silky smoothness. Some blenders have specific programs for ice crushing or nut butter; utilize these for consistent results. Remember, patience is key—allow the machine to run in short bursts rather than continuous operation to extend its lifespan.
Post-Blend Care and Maintenance
Once finished, clean your blender immediately to prevent residue buildup. Disassemble the blades and wash all parts with warm, soapy water. Regular maintenance ensures your machine remains powerful and ready for the next task. For more expert tips and tricks, check this resource.
< >
>
Many enthusiasts assume that simply having a high-speed blender guarantees perfect results for smoothies, ice crushing, or nut butter making. However, even experienced users often get tripped up by nuanced mistakes that can compromise performance or damage their machine. Let’s dig deeper into some of these overlooked pitfalls and how to avoid them.
Why Overloading the Blender Can Backfire
One of the most common myths is that filling the blender to the brim ensures maximum efficiency. In reality, overloading can strain the motor, cause uneven blending, and lead to overheating. For optimal results, always leave some space for ingredients to circulate and consider blending in batches if needed. This approach not only protects your blender but also guarantees a smoother, more consistent texture. Check out this guide on how to properly load your blender for ice crushing.
Misunderstanding Blade Sharpness and Design
Many believe that a sharper blade automatically means better performance. While blade sharpness matters, the design and angle of the blades are equally critical, especially for nut butters and ice. The most effective blades for these tasks are often wider and have specific angles that facilitate pulling ingredients into the center for thorough blending. Ignoring this nuance can result in uneven textures or prolonged blending times. For insights into blade technology, see this article.
Overlooking the Role of Speed Settings and Pulsing
Many users rely solely on the highest speed setting, thinking more power equals better results. However, advanced blending techniques involve starting slow, then gradually increasing speed, and utilizing pulse functions for more control. Pulsing helps break down ice or nuts evenly without overheating the motor, leading to better texture and longevity of your machine. For expert tips, explore this comprehensive guide.
Can Your Blender Handle the Task? The Hidden Power Requirements
It’s a misconception that any high-speed blender can handle all ingredients with equal ease. In reality, different models have varying power ratings and blade configurations tailored for specific tasks. Attempting to make ultra-smooth nut butters or crush ice in a lower-rated machine can cause overheating or motor burnout, even if it’s labeled as a “high-speed” blender. Always match your blender’s capabilities with your intended use. For recommended models, see this list.
Have you ever fallen into this trap? Let me know in the comments. Remember, understanding the nuances of your blender’s design and operation can significantly improve your results and extend its lifespan. For more advanced techniques and advice, check out this resource.
Maintaining your high-speed blender, especially those powerful models designed for ice crushing and nut butter making, is essential for long-term performance and reliability. Over time, even the best blenders can experience wear and tear, which is why implementing a routine maintenance schedule is crucial. Personally, I ensure that I clean my blender immediately after each use, disassembling the blades and washing all removable parts with warm, soapy water. This simple step prevents residue buildup that can dull blades and affect blending efficiency.
Another critical aspect is periodically inspecting the motor and blades for signs of damage or wear. For example, if you notice decreased ice-crushing power or unusual noises, it might be time to consult the manufacturer’s guidelines or contact a professional for service. I’ve found that using a dedicated blade sharpening tool can extend the lifespan of blades—though many models come with durable, rust-resistant blades that don’t require sharpening often. For detailed maintenance routines, I recommend visiting this guide.
How do I maintain my blender over time?
Beyond cleaning, keeping your blender’s motor cool is vital. Avoid running it continuously for more than 60 seconds; instead, blend in short bursts with pauses in between to prevent overheating. Also, check the venting areas regularly and clear any dust or debris that might hinder cooling. Using a cooling pad or placing the blender on a well-ventilated surface can help dissipate heat during heavy use, especially when making dense nut butters or crushing large ice loads.
In addition, replacing worn-out parts like gaskets or seals as recommended by the manufacturer can prevent leaks and maintain optimal performance. Many newer models feature self-diagnostic functions that alert you to potential issues early, saving you costly repairs down the line.
Looking ahead, I predict that smart blenders equipped with IoT technology will become more prevalent, allowing for remote diagnostics and maintenance reminders. This trend will make it easier for users to keep their equipment in top shape without the guesswork.
One of my favorite advanced tips is to add a few drops of vinegar to the cleaning water periodically. This helps break down mineral deposits and keeps blades and containers free from buildup, ensuring consistent performance for years to come. Try incorporating this into your routine and see the difference it makes!
Remember, a well-maintained blender not only lasts longer but also performs better—crushing ice into snow and blending nuts into silky butters without bogging down. For more detailed maintenance tips, don’t forget to explore this resource.
Lessons the Blenders Don’t Talk About
One of the toughest lessons I learned was that more power isn’t always the answer. I used to believe that a 1500-watt motor could handle anything, but I found that blade design and user technique matter just as much. It’s tempting to push the button and hope for the best, but slow and steady blending, especially for delicate nut butters, yields better results and extends your machine’s lifespan.
Another insight is that ingredient prep is crucial. Chopping nuts into smaller pieces and soaking them slightly can dramatically improve texture and reduce strain on your blender’s motor. I used to skip this step, only to be disappointed with uneven blends and overheating. Now, I always prep ingredients thoughtfully, and the difference is night and day.
Finally, I discovered that pulsing is your best friend. Continuous high-speed blending can overheat and degrade your blades, but short bursts with pauses help maintain performance and give you control over texture. I wish I had embraced pulsing earlier — it’s a game changer for ice and nuts.
Tools and Knowledge that Changed Everything
My go-to resource for understanding blender tech is this article. It explains how motor wattage, blade design, and speed settings work together to produce perfect ice snow or smooth nut butters. For practical tips, I rely on this guide to boost ice crushing power, which has saved me countless mornings.
When choosing a blender, I trust brands and models recommended in this list. It’s packed with insights into which machines excel at nut butters and ice, saving you time and money. I also keep handy this detailed guide for making ultra-smooth nut butters — it’s my secret weapon.
Fuel Your Blender Journey with Passion
Now, I approach my blending routine with confidence and curiosity. Every smoothie, ice snow, or nut butter feels like a small victory, thanks to understanding the nuances of my equipment. Remember, your blender isn’t just a machine — it’s a tool for creating health, happiness, and delicious memories.
So, are you ready to upgrade your blender skills and unlock its full potential? Dive into the resources, experiment with techniques, and enjoy the process of mastering your kitchen. Your perfect blend awaits!
Have you ever faced a challenge with ice crushing or nut butter texture? Share your story below — I’d love to hear your experience!
Reading through this post resonated with my own experience of upgrading to a high-performance blender last year. I used to struggle with making ice smoothies that were more like chunky slush than creamy drinks, and my nut butters often came out gritty. Investing in a blender with a 1200-watt motor and advanced blade design truly made a difference. Now, I can effortlessly crush ice and achieve ultra-smooth textures without overloading the machine. I’ve also found that pre-cutting ingredients and using the pulse function significantly improve results and preserve the nutrients. I’m curious, how do others here manage to blend tough ingredients without overheating their motors? Do you have any specific techniques or accessories that help extend your blender’s lifespan? Would love to hear your tips for maintaining performance over time while tackling dense ingredients.
This post really hits home for me. I’ve recently upgraded to a high-speed blender with a powerful 1300-watt motor, and the difference in handling dense ingredients like nuts and frozen berries is incredible. One thing I’ve learned is that pre-soaking nuts not only shortens blending time but also helps in preventing overheating—plus, it results in a creamier butter. I always start with a pulse or low speed to get things moving, then ramp up gradually. Overloading is still a concern for me, so I make a habit of filling the jar about halfway, especially when crushing ice. As far as maintaining performance, I clean the blades immediately after use and check for any buildup of residues that could dull the blades. The question I have is—have others experimented with additional accessories, like cooling mats or vibration dampening pads? Do they really make a difference in extending blender life? Would love to exchange tips on keeping these powerful machines running at their best over the long haul.
This post really hits home for me, especially the emphasis on proper ingredient prep and technique. I’ve also found that using a bit of warm water or soaking nuts overnight can make a remarkable difference when making nut butters — it reduces strain and speeds up blending. I’ve been experimenting with different blade designs and find that wider blades with specific angles do pull ingredients into the center more effectively, leading to smoother textures. Has anyone else noticed a significant difference between blade shapes or materials? Also, I’d love to hear others’ tips on preventing overheating, especially when making large batches of dense ingredients. I’ve started placing my blender on a cooling pad, which seems to help during extended use, but I’m curious if others have tried vibration dampening pads or other accessories. Finally, maintaining your blender seems crucial—are there specific routine maintenance tips you swear by? I believe that a well-maintained machine not only lasts longer but also consistently performs better. Looking forward to hearing everyone’s experiences and insights!