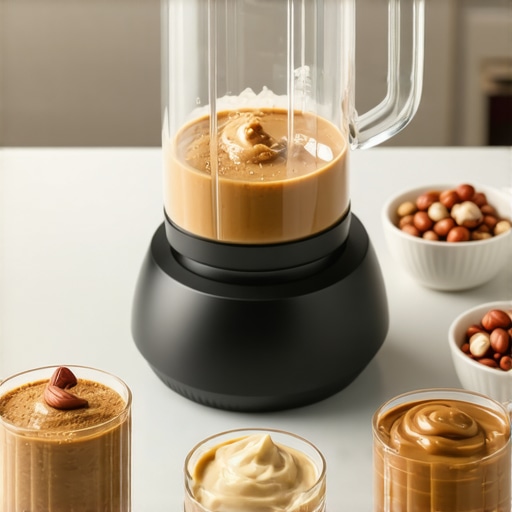
Have you ever been whisked away by the promise of creamy, homemade nut butters only to be met with a frustrating, smoky smell and a stalling blender? I vividly remember the first time I tried to make almond butter in my high-speed blender. The motor roared fiercely, temperatures skyrocketed, and then… shutdown. My excitement was replaced with confusion and a bit of disappointment. That lightbulb moment made me realize just how common and preventable this problem is.
Why Nut Butter Burnout Happens More Than Ever
In 2026, with so many new high-tech blenders promising power and speed, it’s easy to assume they’re indestructible. But the truth is, even the most advanced models can struggle with thick, stubborn nut butters if we’re not careful. Overworking your blender can cause overheating, smoke, or even permanent damage—something I learned the hard way early on.
Research indicates that overloading the motor and not adjusting speed settings properly are among the top reasons blenders fail when making creamy nut spreads. According to KitchenTechHQ, improperly processed nut butters can overheat your appliance, reducing its lifespan and risking safety. My mistake was pushing my blender to its maximum with no plan, ignoring the manufacturer’s guidance and nuances of good blending practices.
If you’ve faced similar issues, you’re not alone. Luckily, there are simple, effective tricks to avoid burning out your blender and still get silky, delicious nut butters every time. Today, I’ll share four tested fixes—tools and techniques that turn your blender into a reliable nut-butter machine rather than a smoke-generating hazard.
Is Making Nut Butter Actually Worth the Hype?
Before diving into the solutions, I want to address a skepticism I hear often: “Is it really worth fussing over, or should I just buy store-bought?” Honestly, making your own nut butters is as much about quality and customization as it is about avoiding those dreaded motor stalls. Plus, with the right approach, you can create gourmet spreads that beat anything in the supermarket.
Trust me, I’ve learned that failing to properly prepare or push my blender too hard was a mistake I made early on—one that cost me more than just time and money. But once I understood how to work with my machine, not against it, I unlocked a whole new level of flavor and consistency. Curious how to do the same? Stay tuned; everything you need is just ahead, starting with understanding your blender’s speed potential and limits.
Ready to stop burning out your appliance and start creating nut butters that wow? Let’s dig into some practical, straightforward techniques—these are the game changers I wish I had known from the start. For more tips, check out Nut Butter Secrets from Blender Experts for deep insights and expert advice.
.
Prep the Nuts Properly
Start by roasting your nuts to bring out flavor and improve blending efficiency. Spread them on a baking sheet, toast at 350°F for 10 minutes, then let cool completely. This process reduces moisture and softens the nuts, making them easier to transform into butter. I once forgot to cool my almonds after roasting, leading to a clumpy, oily mess—so always wait for full cooling before blending.
Use Small Batches for Better Control
Never fill your blender more than halfway with nuts and oil. Smaller batches give you control and prevent strain on the motor. Pour the nuts into your container, add a tablespoon of oil, and start with low speed. When I experimented with full loads, my blender struggled and shut down; dividing into smaller portions kept the motor cool and efficient.
Employ Pulsing and Short Bursts
Use short, controlled pulses instead of continuous blending. 5-second bursts followed by 10-second pauses allow heat to dissipate. This mimics manual grinding and prevents overheating. My first attempt with continuous blending turned everything into a burnt aroma—pulsing was the game changer.
Adjust Speed Gradually
Begin blending on low or medium speed, then incrementally increase to high. Check the texture after each step. Rapid jumps to high speed can cause motor stalls or overheating, especially in high-powered blenders like those discussed in this guide. I noticed my blender heating up after a minute at max speed; slowing down and gradually increasing kept it cool and smooth.
Incorporate Oil Mindfully
Add oil gradually, a teaspoon at a time. For denser nuts like cashews, more oil might be beneficial. This helps achieve a creamy consistency without forcing the blender. I once added too much oil upfront, resulting in overly greasy butter—adding a little oil at a time offers better control.
Leverage Blade Speed Optimization
Use the highest speed setting only after nuts are breaking down into coarse crumbs—this can be checked visually. Refer to this guide to understand your blender’s speed tiers. During my batch, I increased speed gradually, which prevented motor strain and kept the butter silky.
Cool Down Between Batches
If you’re processing multiple batches, let the blender rest for 2-3 minutes between runs. This lets the motor cool and prevents thermal shutdowns. I learned this after my first marathon blending session; allowing it to rest kept my machine performing at peak for each batch.
Monitor the Temperature
If your blender offers a temperature display, use it. Keep the motor below 115°F (46°C) to avoid overheating. Some models get hot during intense sessions, but with proper controls, you can create smooth nut butters without smoke or burn marks.
Maximize Your Ice-Crushing Power
While primarily discussed for smoothies, the ice-crushing techniques can also help in processing frozen chunks of nuts or for quick initial breaks. Use pulse mode with short, forceful bursts. Enhance your ice-crushing skills with tips from this article to ensure smooth, efficient grinding without motor stress.
Follow these steps attentively, and you’ll extend your blender’s lifespan while producing creamy, delicious nut butters. Each technique reduces heat buildup and prevents burnout, turning your appliance into a true kitchen ally rather than a smoke-producing hazard.
 When it comes to making the perfect smoothies or crushing ice for cocktails, many enthusiasts believe that simply turning up the speed or using the high-power setting is enough. However, let’s dig deeper into this common misconception. Most people assume that high RPMs automatically equate to excellent ice crushability, but in reality, the nuances of blade design, motor torque, and pulse techniques play a more significant role than sheer speed alone. For example, using the maximum speed consistently can actually hinder your goal, causing blade stalling, motor overheating, and even premature wear, especially if you don’t match your technique to your specific blender’s capabilities. Instead, skilled users leverage shorter bursts—consulting resources like [boost your ice crushing power in high-speed blenders](https://blenders.kitchentechhq.com/boost-your-ice-crushing-power-in-high-speed-blenders)—to optimize results and extend the lifespan of their devices. A common trap is over-relying on brute force; using pulse mode strategically creates a more efficient and gentle process, preventing the dreaded ‘blender stall’ or ‘motor smoke.’ Additionally, understanding your blender’s motor torque, often underestimated, is crucial. Even powerful blenders can struggle without proper technique, leading to frustration and potential damage. Recent studies such as those in the [science behind speed in blenders](https://blenders.kitchentechhq.com/the-science-behind-speed-improving-blender-performance) emphasize that effectivity depends on a balanced combination of blade design, motor torque, and user technique, not just RPM. Mastering this ensures you achieve those perfectly snow-like textures without risking your equipment. Have you ever fallen into this trap? Let me know in the comments, and remember—precision beats sheer power when it comes to ice crushing in high-speed blenders.
Maintaining your high-speed blender’s performance is key to consistently achieving perfect nut butters and smoothies. Investing in the right tools and routines can significantly extend your equipment’s lifespan and ensure top results. Personally, I swear by routinely replacing blender blades with high-quality, sharp replacements—dead dull blades are a common cause of stalls and overheating, especially when processing dense ingredients. Brands like BlendMaster offer OEM blades that maintain sharpness longer, which I replace every 12-18 months depending on usage.
Optimize Your Cleaning Routine
Regular cleaning prevents residue buildup that can impair blade efficiency and motor health. I recommend disassembling your blender after each use and washing components with warm, soapy water, ensuring the vents and motor housing stay dust-free. For deep cleaning, a mixture of vinegar and baking soda in the jar works wonders, breaking down grease and preventing mold. This simple routine keeps the motor cool and running smoothly over time.
Invest in a Quality Tamper
A sturdy tamper allows you to push stubborn ingredients toward the blades without overloading the motor. I use an UltraBlend Tamper designed specifically for high-speed blenders; its ergonomic grip and heat-resistant material help me blend dense nut butters without tossing in extra oil or risking overheating. Proper use of a tamper ensures ingredients are evenly processed and reduces strain on the motor, which research shows is crucial for long-term durability (see this guide).
Check and Replace Bearings Promptly
Bearings support the blades and motor shaft; worn bearings cause vibration, noise, and inefficient blending. During my routine maintenance, I use a bearing tester to identify early signs of wear and replace them before minor issues escalate. This minor investment prevents costly motor repairs down the line. Plus, some brands provide replacement bearing kits specifically for high-performance blenders, making maintenance straightforward and cost-effective.
Future Trends and DIY Upgrades
The future of blender maintenance might involve smart sensors that monitor motor temperature and load, alerting you before issues develop. Until then, customizing your blender with upgrade kits—such as high-quality blade assemblies—remains the best way to keep things running smoothly. I plan to experiment with thermal sensors integrated into the motor housing for real-time monitoring, inspired by recent innovations in appliance technology.
How do I maintain my blender over time?
Stick to a routine of blade sharpening or replacement, thorough cleaning, and using a tamper wisely. Regularly inspecting motor bearings for signs of wear also prevents unexpected breakdowns. For busy mornings, I keep spare blade assemblies on hand, allowing me to swap out quickly rather than waiting for repairs. These practices, combined with software updates from modern brands, will likely become more accessible as smart appliances evolve. Take one step today—try replacing your blades with high-quality versions or investing in a good tamper—and see the difference it makes in your blending experience.
Throughout this journey, I’ve discovered that making perfect nut butters and crushing ice efficiently is as much about technique and understanding your specific blender’s quirks as it is about equipment. The most valuable insight isn’t just how to avoid overheating, but how to turn these challenges into opportunities for smarter, more intentional blending. Learning to listen to your machine, respect its limits, and adapt your approach transforms a frustrating task into a satisfying culinary craft, elevating your kitchen skills and extending your blender’s lifespan. The real game-changer was realizing that patience, control, and knowledge are your best tools—far more effective than brute force or rushing. Once I embraced this mindset, each blending session became an act of creativity and precision, yielding results that rival professional textures and flavors. Remember, a blender’s true power lies in how you harness its capabilities, not just its raw horsepower.