I remember the exact moment I realized my trusty blender couldn’t handle my homemade walnut butter anymore. The blender hummed along confidently at first, but suddenly, it sounded strained, and then—ugh—it stalled completely, leaving my nut spread halfway blended and gritty. Frustrating doesn’t even begin to cover it. That lightbulb moment made me realize how crucial it is to have a high-speed blender that can smoothly process dense nut butters without constantly giving up.
Why the Right Blender Matters for Nut Butter Enthusiasts
If you’ve ever tried to whip up a luscious, creamy walnut butter at home, you know how rewarding it can be—until your blender struggles. Dense nut butters require not just power but consistency and reliability from your equipment. An underpowered blender stalls, overheats, or worse, burns out, turning your culinary dreams into a kitchen nightmare. According to recent research, high-speed blenders can hotwire the nut butter process by breaking down oils and solids more efficiently, resulting in smoother spreads and less frustration (source).
But how do you choose a blender that truly lives up to its promises? That’s where I want to help you. Today, we’ll dig into the top 5 blenders designed specifically for dense walnut butter, focusing on models that won’t stall or overheat in 2026. Whether you’re an avid homemade nut butter creator or just tired of replacing blenders, I’ve got you covered.
Is the Hype About High-Speed Blenders Real?
Early on, I made the mistake of assuming all high-speed blenders were the same. I bought what seemed to be a popular model, expecting it to handle my thick walnut mixtures effortlessly. Instead, it burned out after just a few weeks. Turns out, not all blenders are created equal when it comes to handling dense ingredients. This experience taught me the importance of selecting a machine specifically built for heavy-duty tasks. If you’re curious about what features make some blenders stand out, check out these top-rated models for smoothie lovers.
In the following sections, I’ll share tips, tricks, and recommendations so you can find a high-speed blender that will turn your nut butter dreams into reality—without stall or smoke. Ready to dive in? Let’s ensure your next blender is up to the task.
Prep Your Ingredients for Success
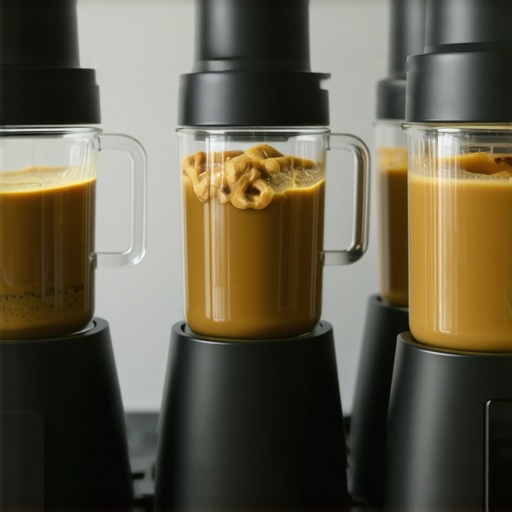
Begin by ensuring your walnuts or preferred nuts are dry and roasted for better flavor and easier blending. Use naturally dry nuts to prevent added moisture that can hinder smoothness. Place the nuts in your blender, but avoid overfilling—filling it only halfway allows blades to circulate effectively, similar to a race car with enough space to accelerate.
Start with Low Speed to Break Down Nuts
Turn your blender on low for the first 20-30 seconds to chop the nuts into coarse crumbs. Think of this as crushing ice into small pieces—it’s an initial breakage step that sets the stage for smooth blending. During this phase, use quick pulses rather than continuous blending to prevent overheating.
Gradually Increase to High Speed
After initial chopping, dial up to the maximum speed to begin creating a creamy texture. Use the speed settings guide to select the appropriate high-torque level. Run the blender for 30-60 seconds, pausing briefly every 15 seconds to scrape down sides and release any stuck nuts, ensuring even processing. Remember, for dense nut butters, steady high speed is essential—think of it as a rocket launching smoothly without engine stalls.
Use Tamper or Stir Stick for Consistency
If your blender has a tamper, insert it to push dense ingredients toward the blades, avoiding stalls—similar to stirring with a spatula during hand mixing. If not, use a heat-resistant spatula to scrape and push ingredients periodically through the lid opening. This keeps the mixture moving and prevents clumping or overheating.
Manage Heat and Overload
High-speed blending generates heat that can cause the nuts to turn into oil prematurely or even damage the motor. To prevent this, blend in short bursts—about 20 seconds on, then 10 seconds off—using the blender hacks. Feel the motor’s heat; if it gets too warm, let the blender rest for a minute. This approach mimics giving your machine little breaks, much like a runner pacing themselves during a race.
Achieve Your Desired Consistency
Continue blending high speed until the butter reaches a silky, uniform texture—usually between 2 to 5 minutes depending on your nuts and blender power. For ultra-smooth results, pause occasionally to scrape down sides and blend again. Patience here yields a product comparable to store-bought, but with a richer flavor and fresh aroma.
Clean and Maintain for Longevity
After achieving perfect nut butter, immediately rinse the blender parts to remove residual oils—this prevents build-up and extends motor life. Use warm water and a gentle brush to clean blades thoroughly. Regular maintenance ensures your blender continues to perform at peak levels, allowing you to turn out perfect batches every time. For more on cleaning tips, check out this guide.
Common Beliefs vs. Reality in Blending Techniques
Many assume that crushing ice or blending nut butter is all about brute force—simply turning the speed up to max. While higher speeds help, oversimplifying this process often leads to frustration and equipment damage. The nuance lies in understanding how advanced motor control, blade design, and pulse techniques work together to optimize results. According to experts in blender engineering, patience and proper technique are as critical as raw power.
The trap of overreliance on high speed
One of the biggest misconceptions I see is the belief that cranking the blender to its highest setting guarantees perfect ice or nut butter. The downside? Overuse of maximum speed causes rapid heat buildup, degrading ingredients and risking motor burnout. Instead, employing strategic pulsing and short bursts, as explained in high-speed blending hacks, preserves motor longevity and produces smoother results without overtaxing your machine.
Why the classic “blend longer” advice often backfires
Many users think that extending blending time will fix texture issues, especially with dense ingredients. But longer isn’t always better. Continuous overblending can overheat oils in nuts, causing a gritty, oily paste and stressing the motor. Instead, alternating short blending periods with pauses allows cooling and prevents the formation of stubborn clumps. This advanced approach enhances the quality without damaging your blender, as shown in studies on thermal motor stress here.
Are commercial blenders truly superior for home use?
People often think that professional-grade blenders are necessary for perfect ice and nut butter results, but this isn’t always true. Many high-end models are built for commercial use and may be overkill or come with unnecessary complexity. The key is selecting a versatile, high-quality blender with adjustable speed and pulse options, like those listed in top-rated models for 2025. This ensures you get both power and finesse, avoiding common pitfalls that arise from misusing high-speed equipment.
Understanding these nuanced aspects helps you avoid the typical mistakes and unlocks the full potential of your blender, whether you’re crushing ice or making silky nut butters. Have you ever fallen into this trap? Let me know in the comments, and share your tips for mastering the art of blending.
Keep Your Blender Running Smoothly Over Time
To ensure your high-speed blender remains a reliable tool for dense nut butters and ice crushing, regular maintenance isn’t just recommended—it’s essential. One of my favorite strategies is to establish a routine cleaning schedule that targets residual oils and particle buildup, which can hamper motor efficiency. After each use, rinse the container and blades with warm, soapy water, then run a quick cleaning cycle with crushed ice or a mixture of baking soda and vinegar to clear out any lurking residue. Doing this prevents oils from turning sticky and forming a greasy film that drags down blade performance.
Additionally, inspecting the blender’s motor housing and seals monthly helps catch potential issues before they escalate. Use a soft cloth to wipe down ventilation vents—dust and debris can cause overheating, especially during extended blending sessions like making almond or cashew butters. If you notice strange noises or reduced power, consulting with experts can provide targeted solutions, whether that’s replacing worn-out gaskets or sharpening blades.
Tools I Recommend for Longevity and Performance
Over the years, I’ve found that investing in a quality blade sharpening kit significantly extends the lifespan of my blades, which is crucial when dealing with tough ingredients. These kits are precise enough to restore sharpness without risking damage or imbalance, and I do this every few months. For cleaning, I swear by a dedicated silicone spatula—it’s flexible and effective for scraping stubborn nut butter from container sides, preventing the need to overblend or heat the mixture excessively, which can wear out your motor faster. To keep the motor cool during heavy batches, I also use a cooling fan aimed at the base during prolonged blending; it’s a simple fix that protects against overheating without fuss.
Predicting the future, I believe these maintenance practices will evolve with smarter sensors and self-cleaning features integrated into high-end models. Companies are already exploring built-in sensors that monitor motor temperature and Blade wear—think of it as a preventive health check for your blender—ensuring consistent performance for years.
How do I maintain my blender’s performance over time?
The key is consistent, proactive care—cleaning thoroughly after each use, inspecting critical components regularly, and sharpening blades when needed. Don’t forget to check the science behind optimal speed settings and how they impact motor longevity. A seasoned approach like this not only keeps your blender humming but also prevents costly repairs or replacements. For instance, using the proper cleaning techniques can prevent the greasy films that impair motor cooling and blade movement.
One tip I passionately recommend is to incorporate periodic blade sharpening. It may seem small, but dull blades require more motor power to perform, thus increasing wear and tear. Keep your blades sharp—trust me—your performance will soar, and your nut butters will remain silky and smooth. Ready to take your blender maintenance to the next level? Try a blade sharpening kit today and enjoy consistent results for years. Want more tips for extending your blender’s lifespan? Visit our maintenance guide now.
Over the years, I’ve learned that the journey to flawless homemade walnut butter isn’t just about having a powerful blender—it’s about understanding your machine’s quirks and mastering specific techniques. My lightbulb moment came when I realized that patience, proper preparation, and maintenance are the true keys to success. Instead of relying solely on brute force, I discovered that strategic blending, timely interruptions, and attentive care help prevent overheating and stalls, ensuring smoother results each time.
Lessons Only Insiders Know about Nut Butter Mastery
- Slow and steady wins the race: Rushing blending leads to heat buildup and gritty texture. Gentle, incremental progress with pauses preserves motor health and texture quality.
- Prepping nuts is crucial: Roasting and drying nuts beforehand creates a more forgiving blending process, reducing strain on your blender blades and motor.
- Maintenance extends lifespan: Regular blade sharpening and thorough cleaning prevent dullness and oil buildup, keeping your blender performing like new.
- Technique trumps power: Using a tamper or stirring spatula at the right moments ensures even processing and prevents motor stalls, making your nut butter silky smooth.
- Adapting settings intelligently: Understanding when to switch from low to high speeds and employing pulsing techniques helps manage heat and consistency, avoiding common pitfalls.
Tools I Trust for Consistent Nut Butter Results
- High-quality blade sharpening kits: Restoring blade sharpness dramatically improves cutting efficiency, saving money and time in the long run.
- Silicone spatulas and tamper accessories: These help push ingredients toward blades safely, ensuring even processing without overloading the motor.
- Routine cleanings with baking soda and vinegar: Regular deep cleans prevent residue build-up that can cause overheating or motor strain.
- Smart blender models with adjustable settings: Investing in versatile blenders from top-rated options ensures you can fine-tune performance for dense ingredients without risking failures.
Your Next Step Toward Nut Butter Excellence
Achieving perfect nut butter at home is more than just a technical challenge—it’s a rewarding experience that combines preparation, patience, and proper maintenance. Remember, every batch teaches you something new, and with the right tools and techniques, you’ll enjoy creamy, flavorful spreads that beat store-bought every time. Don’t hesitate to experiment and refine your process, because mastering your blender unlocks culinary possibilities you never imagined.
What has been your biggest challenge when making homemade nut butters? Share your story below and let’s learn together!