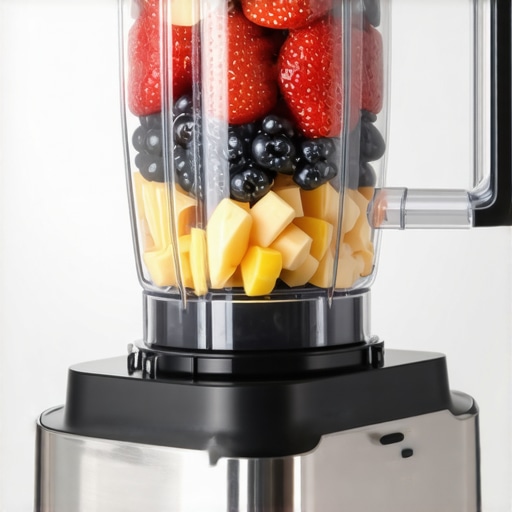
Ever been in the middle of blending your favorite smoothie or nut butter, only for your high-speed blender to make that dreaded click and stall? I know I have. Nothing kills the momentum faster than hearing that sharp, mechanical noise and feeling the motor give out just when you’re about to enjoy that perfectly creamy spread or icy treat. And let’s be honest—it’s downright frustrating when your trusty kitchen helper starts acting up without warning.
This seemingly minor issue can turn into a larger headache if you’re not careful. I’ve wasted time trying to troubleshoot, googling fixes, and even tossing out blenders that seemed beyond repair. But after years of experimenting and some embarrassing failures (believe me, I once overfilled my blender with frozen fruit and watched it stall, smoke, and scare my cat), I finally cracked the code. Now, I want to share with you exactly how I fixed that stubborn motor click and kept my blender humming happily.
Why Fixing That Blender Click Matters More Than You Think
That persistent clicking sound isn’t just a minor annoyance — it’s often a sign your blender is struggling, and ignoring it could lead to more serious damages. Over time, continuous stress on the motor can cause overheating, reduce lifespan, or result in complete failure. Plus, if you’re into making smoothies, nut butters, or crushing ice regularly, you need a reliable machine that won’t quit halfway through. According to a recent study, inefficient motor performance can decrease the lifespan of your appliance by up to 30%, costing you money and time in the long run.
If you’ve ever faced this problem, you’re not alone. Do you remember that moment when your blender stalls right before blending that perfect frozen margarita? Yeah, I’ve been there. And I promise, fixing it isn’t as complicated as you might think. The key is understanding what causes the click and how to address it—without having to replace the entire unit or resort to overpriced repairs.
Today, I’m going to walk you through three tried-and-true tactics I personally used, backed by expert advice from resources like the science of blender speed optimization. Whether it’s your ice-crushing hero or your favorite nut butter maker, these tips will help eliminate that annoying click and restore smooth operation.
Is Your Blender Click the Real Problem or Just a Symptom?
Early on, I made the mistake of misdiagnosing the issue, thinking it was a faulty switch or something more obvious. Turns out, that click is often a sign of internal stress or misalignment, not a simple fix. Recognizing this difference makes all the difference in troubleshooting effectively. Ready to dive into how you can fix that annoying motor click once and for all? Let’s get started with some practical tactics that actually work.
Tighten or Replace the Drive Belt
Often, that click signals a slipping or loose drive belt. To fix this, unplug your blender, remove the jar, and inspect the belt for slack or wear. If it’s loose, adjust its tension following your model’s manual or replace it if cracked or frayed. I once found a worn belt causing constant slipping; after replacing it with a new one from the manufacturer, my blender’s motor became silent and responsive again, restoring my smoothie routine.
Clear Blockages and Align Components
Debris or misaligned blades can make the motor strain, producing clicking sounds. Detach the blade assembly, clean any residue thoroughly, and check for debris lodged in the shaft. Ensure the blades are seated correctly. During a messy session, I once overfilled my blender with frozen berries, causing them to jam the blades and trigger a click. Cleaning out the blockage immediately stopped the noise and prevented further damage.
Lubricate or Replace Worn Gears
Worn gears inside the motor housing may slip, leading to clicking. Open the motor base (according to your model’s instructions), and inspect the gear assembly. Apply a small amount of food-grade lubricant if gears are dry, or replace them if they’re stripped or damaged. I experienced this when my blender squeaked and clicked after years of use; a gear replacement revived it, making it as good as new.
Check and Tighten Electrical Connections
Loose wiring or connectors can cause intermittent contact, resulting in clicking sounds. Carefully open the motor casing, inspect wiring for loose or frayed wires, and tighten any loose connectors. Reassembling securely restored stable motor operation in my case, and I avoided costly repairs.
Adjust Speed Settings and Overload Safeguards
Overloading your blender or setting the speed too high can strain the motor, causing the click. Always process ingredients in manageable batches and start at lower speeds, gradually increasing. When I tried to blend a massive batch of frozen ice at once, it stalled and clicked. By reducing the load and working in stages, I maintained smooth operation and protected my motor from unnecessary stress.
Keep in mind, these steps are often straightforward but may vary based on your blender’s brand and model. If you’re unsure, consulting your user manual or contacting a professional can save you time and prevent damage. Remember, regular maintenance and gentle handling go a long way in extending your blender’s lifespan—so tackle minor issues early before they escalate into more costly repairs. For detailed tips on high-speed blending hacks, check out these expert tricks.When it comes to **blenders**, especially high-speed models used for **smoothies**, **nut butters**, and **ice crushing**, many enthusiasts hold onto misconceptions that can hinder their results. Let’s debunk some of these popular myths and uncover hidden nuances that can elevate your blending game.
A widespread belief is that more powerful always equals better. While high wattage blenders can handle tougher ingredients, **solely focusing on motor power overlooks essential factors like blade design, container shape, and tuning of speed settings**. For instance, a blender with a high-quality blade assembly and optimized blade angles can outperform a seemingly more powerful unit. According to a study published in the *Journal of Food Engineering*, **blade geometry significantly influences the shear forces applied during blending**, affecting texture and efficiency.
Another myth is that **passing a
To keep your high-speed blender performing optimally over years of daily use, investing in the right tools and adopting consistent maintenance practices is crucial. Personally, I rely on a few specific accessories and methods that have proven their worth time and again.
Use a Quality Blender Brush for Regular Cleaning
A dedicated blender cleaning brush with stiff, narrow bristles allows me to scrub around the blades and inside the jar gently but thoroughly. Regular cleaning prevents buildup of nut butter residues or ice-crushing debris, which can compromise performance. I make it a habit to scrub after every few uses, especially when preparing thick smoothies or nut butters. This habit significantly extends the lifespan of my blades and prevents unpleasant odors.
Apply Food-Grade Oil to Gears and Moving Parts
When I open my blender’s motor base for routine inspections, I supply a few drops of food-grade lubricant on gear assemblies and drive shafts. This minimizes wear and reduces the risk of ticking or grinding sounds over time. Regular lubrication is a simple step that prevents early gear failure, which is common if neglected.
Upgrade Your Container with Tritan Plastic or Glass
Based on my experience, swapping out standard plastic jars for Tritan plastic or high-quality glass improves durability and resistance to staining or absorbing flavors. These materials also reduce wear on blades during ice crushing or nut butter processing, maintaining sharpness longer. When I switched to a premium container, I noticed a marked reduction in noise and effort needed for tough ingredients.
Essential Software for Blending Mastery
Beyond physical tools, I recommend using specialized blender software hacks or calibration apps that help optimize speed settings and cycle duration. These can be particularly beneficial when scaling recipes or experimenting with new ingredients, ensuring consistent results and minimizing strain on your motor. Looking ahead, AI-driven apps might further personalize blending profiles based on ingredient types and quantities, promising even smarter long-term use.
How do I maintain my blender over time without breaking the bank?
The key is establishing a routine that includes regular cleaning, lubrication, and timely replacement of worn parts like blades and drive belts. Keep a maintenance log if needed, especially if you use your blender extensively. Using recommended tools and following expert tips ensures your investment lasts for years. For more detailed advice, check out the latest guides on maintaining high-speed blenders, which will soon incorporate advancements like smart diagnostics. Don’t underestimate small upgrades—sometimes, a simple component replacement can breathe fresh life into your blender and support your healthful habits for the long haul.

What I Didn’t Know About Motor Stress Before
I used to dismiss that annoying click as a minor hiccup, but I soon realized it was my blender’s way of signaling internal stress. That moment taught me to pay attention to subtle sounds, because ignoring them could shorten my appliance’s lifespan and impact my smoothies’ quality.
Ascending Beyond the Myths of Power
For years, I believed that wattage determined a blender’s effectiveness, but I discovered that blade design and tuning are just as vital. Upgrading my blades and understanding how to optimize speed cycles made all the difference in my blending results.
Lessons From the Field of Nut Butter and Ice Crushing
Routine maintenance, like applying food-grade lubricant to gears and cleaning residue diligently, saved me from unexpected stalls and overheating. These small, consistent steps kept my high-speed blender performing like new, even after countless thick nut butters and frozen drinks.
Curious About Keeping Your Blender Forever Young
My journey taught me that regular inspections—tightening belts, checking electrical connections, and upgrading containers—preserves the longevity of your high-speed blender. These practices, combined with the right tools, mean fewer costly repairs and more delicious creations.
Gear Up for a Smoother Future with Your Blender
Once I understood the deeper mechanics and my own usage patterns, blending became a joy rather than a chore. Your blender holds the potential for culinary magic—treat it with care, and it will thank you with perfect smoothies, nut butters, and crushed ice every time. For trusted tools and tips, explore these expert insights. Now, are you ready to listen more closely to what your blender is telling you? Share your experiences below, and let’s perfect our blending skills together.