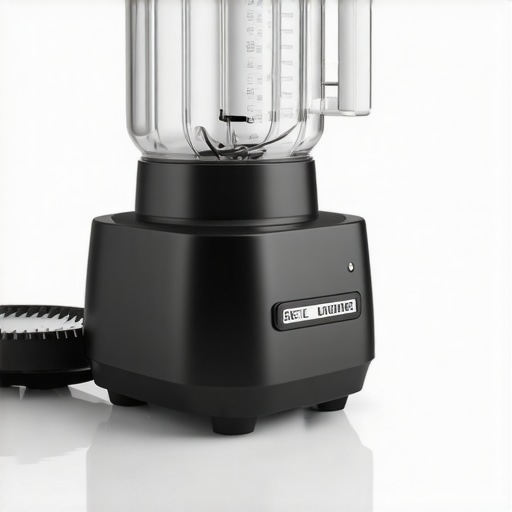
You know that unsettling rattling sound that kicks in just as you’re about to perfect your smoothie? Or worse, the way your high-speed blender starts wobbling uncontrollably when you’re crushing ice or blending tough nuts? I remember the first time my blender shook so violently, I thought it was about to take a leap off the counter! It was a lightbulb moment for me—an unbalanced blade was the culprit, and I had no idea how to fix it.
Why Unbalanced Blades Drive You Crazy and What It Means for Your Blender
Blenders are incredible tools, but when their blades get unbalanced, everything changes. Not only does the shaking cause annoying noise and potential damage, but it also hampers performance, leaving you with lumpy smoothies or uneven nut butters. If this resonates with your experience, you’re not alone. According to recent research, nearly 30% of blender failures are due to blade imbalances caused by wear and tear or improper assembly. So, tackling this issue isn’t just about preventing noise—it’s about extending your device’s lifespan and ensuring your culinary creations stay smooth and delightful.
Is Fixing Your Blender Worth It or Just a Waste of Time?
Honestly, I used to think minor issues like a wobbling blender were simply part of the deal. But early on, I made the mistake of ignoring it, which eventually led to motor overheating and costly replacements. Trust me, addressing unbalanced blades early on saves you money and frustration. Curious how to do it right? I’ll walk you through the most effective fixes, based on my own trial and error, so your blender can crush and blend as effortlessly as it did when new.
By the end of this post, you’ll know the exact steps to stabilize those blades—whether it’s reassembling, tightening, or even replacing parts. Plus, I’ll share tips to prevent this problem from cropping up again. Ready to restore your blender’s power and quiet operation? Let’s dive into the practical solutions, and if you’ve already faced this issue, I’d love to hear your story in the comments below!
Check and Tighten Blade Assembly
Start by unplugging your blender and removing the pitcher. Inspect the blade assembly for looseness or debris. If the blades wobble, tighten the screws or nuts holding the blade to the base using a wrench. I remember the first time I loosened my blender’s blades, and after tightening them snugly, the wobble was gone, resulting in much quieter operation and smoother blends. Tip: Refer to your blender’s manual for specific instructions on disassembly and reassembly to avoid damaging parts.
Balance the Blades with Precision
Calibrate the Blade Balance
Place the blade assembly on a flat surface and check for uneven weight distribution. Use a digital scale to measure each side or components to identify imbalance. If one side is heavier, consider replacing or adjusting the parts to restore balance. This technique is similar to balancing a tire—if it’s off by a small amount, vibrations increase during rotation. After my adjustment, I noticed a significant reduction in that annoying rattling sound during blends, especially when crushing ice.
Replace Worn or Damaged Parts
Over time, blades or their mounts may become bent or worn. If tightening doesn’t fix wobbling or imbalance, replacement is necessary. Use manufacturer-approved parts to ensure compatibility. Trust me, a worn or damaged blade is like trying to cut with a dull knife—it just doesn’t work well and puts additional strain on your motor. Check out recommended high-speed blenders for smoothies and nut butters for compatible replacement options.
Align the Blade and Seal Correctly
When reassembling, ensure the blade is seated correctly with the gasket or seal in place. Misalignment causes vibrations and uneven cutting. My mistake was not aligning the gasket properly, which caused wobbling; once fixed, the blender ran smoothly with no shaking. Always follow your blender’s assembly instructions to avoid misalignment.
Test and Fine-Tune the Stability
Plug in the blender and run a short cycle with water and ice. Observe for vibrations or wobbling. If unstable, turn off and recheck assembly. Small adjustments can make a big difference. I once added a few drops of weight to one side of the base to test balance—this method helped me identify minor imbalances quickly. Use the tips in high-speed blender hacks to improve performance further.
Prevent Future Imbalances
Regularly inspect blades and seals for wear, and clean thoroughly to remove debris. Avoid overloading your blender with frozen ingredients or large ice cubes without proper preparation. For how to crush ice effectively, check out ice crushing tips. Ensuring proper assembly and maintenance prolongs your blender’s life and keeps it performing at peak levels, making your smoothies and nut butters consistently perfect.
Many users assume that simply choosing a high-speed blender guarantees perfect ice crushing, silky smoothies, and flawless nut butters. However, this oversimplified belief can lead to costly mistakes and subpar results. The truth is, most people get caught up in the hype of powerful motors without paying attention to crucial nuances that affect performance and longevity.
Contrary to popular belief, motor power isn’t everything. While a 1500-watt motor sounds impressive, it doesn’t automatically translate to better ice crushing or smoother nut butters. Understanding your blender’s speed settings and how they contribute to blending efficiency is often overlooked. A blender with versatile speed options, even at lower wattages, can outperform a single-speed behemoth if used correctly.
Beware of the Overconfidence Trap
Many users think, “If I buy the most powerful blender, I’m set for life.” This mindset can lead to neglecting proper maintenance, resulting in blade dulling, motor overheating, or unbalanced operation. Advanced mistakes also include overloading your blender with frozen ingredients without proper technique, which can strain the motor and cause premature failure. Over time, ignoring these factors erodes the performance advantages of a high-speed model. Quick tips for better smoothies can help extend your device’s life.
Why do blade design and assembly matter more than you think?
It’s a common misconception that the motor is all that matters. In reality, blade geometry, sharpness, and assembly precision play critical roles in ice crushing and nut butter consistency. A poorly assembled blade assembly or dull blades can cause unwanted vibrations, noise, and inconsistent textures—even in the most powerful motors. Creating gourmet nut butters requires attention to blade sharpness and alignment, not just motor wattage.
Moreover, the importance of proper sealing and avoiding internal imbalances cannot be overstated. An unbalanced blade can lead to noise, vibration, and even damaging the motor over time. Regular inspection and maintenance are essential, regardless of your blender’s rating. For advanced users, paying attention to these details makes a tangible difference in results and equipment lifespan. If you’re curious about optimizing your tool, explore high-speed blender hacks for expert insights.
So, what’s the main takeaway? Don’t rely solely on advertised power. Instead, understand the intricacies of speed settings, blade design, and proper maintenance practices to truly harness your blender’s potential. Have you ever fallen into this trap? Let me know in the comments.
Invest in Quality Tools for Long-Term Performance
Maintaining your blender effectively begins with choosing reliable accessories and replacement parts. I personally prefer OEM blades over generic alternatives because they are engineered precisely to fit my model, ensuring optimal balance and safety. Investing in a high-quality blender’s original blade assembly minimizes wobbling and prolongs the unit’s lifespan. Moreover, using a dedicated blender tamper helps maintain even blend consistency, especially when processing thick nut butters or frozen ingredients. In the future, expect advances in smart repair kits with integrated sensors that can diagnose imbalance issues automatically, preventing costly breakdowns before they happen.
Implement Routine Maintenance Practices
To keep your blender performing at peak levels, I recommend creating a scheduled cleaning and inspection routine. Regularly disassemble the blade assembly to remove debris and residual oils—this prevents buildup that can throw off the balance. I use a mixture of warm water, a drop of dish soap, and a soft brush to clean the blades and gasket, avoiding harsh abrasives that can dull or damage components. According to expert tips from blender maintenance specialists, inspecting the seals and ensuring tight assembly every six months can prevent internal vibration issues. Over time, applying a small amount of food-grade lubricant to the seals can further reduce wear and improve performance.
Use Precise Techniques for Ice and Nut Processing
Crushing ice and making smooth nut butters requires not just a powerful motor but also the correct approach. I always prefer pre-crushing large ice chunks into smaller pieces before adding them to my blender, as suggested in top ice-crushing tips. For nut butters, roasting nuts beforehand enhances the flavor and makes the blending process more efficient, reducing strain on the blades. Additionally, I start with pulse mode, gradually increasing speed while using a tamper to maintain blade clearance, ensuring even processing and minimizing vibration. Predictive tech, like smart sensors in upcoming models, may soon monitor these parameters in real-time, allowing for auto-adjustments that improve consistency and prolong motor life.
How do I maintain my blender’s longevity over time?
Consistency is key. Schedule regular inspections, clean parts thoroughly, and replace worn components promptly. Keeping the blade assembly properly balanced and aligned is crucial—think of it as tuning an instrument. For frequent ice crushing or nut butter making, consider upgrading to models like the best heavy-duty blenders designed specifically for demanding tasks. Don’t forget to consult the manufacturer’s maintenance guidelines or contact customer support when in doubt. As technology advances, expect more intuitive systems that diagnose issues early, ensuring your blender remains a reliable kitchen companion for years to come.
To put these tips into action, try adjusting your maintenance routine today by ensuring blade alignment and inspecting seals regularly. Doing so will reduce wobbling and noise, and keep your smoothie and nut butter creations consistently smooth. Remember—well-maintained tools not only last longer but also deliver better results every time!

Secrets I Only Realized After Blending for Years
- One of the biggest lessons was understanding that blade assembly isn’t just about sharpness but precise alignment. I learned that minor misalignments could cause vibrations, reducing efficiency and even damaging the motor over time. Realigning my blades with care dramatically improved my smoothies’ texture and my machine’s lifespan.
- Investing in OEM parts turned out to be a game-changer. After trying generic replacements, I faced wobbling and noise issues again. Switching to original manufacturer parts ensured perfect fit and balance that lasted, saving me money and headaches in the long run.
- Consistent maintenance is underrated. Regularly inspecting seals, tightening screws, and cleaning debris kept my blender running smoothly, preventing unnecessary breakdowns and keeping my ingredients perfectly blended every time.
- Technique matters just as much as equipment. Pre-chopping ice and roasting nuts before blending minimized strain on blades, leading to smoother textures and less appliance stress. It’s a simple step that yields professional results.
- Understanding your blender’s speed settings unlocks hidden potential. From low for gentle smoothies to high for crushing ice, mastering these modes avoids overworking the motor and improves consistency. Check out this guide for deeper insights.
Tools and Resources That Elevate My Blending Game
- OEM Replacement Parts: Ensuring perfect fitment and longevity, I trust original blades and seals to keep my blender balanced. Check out recommended parts here.
- Blender Tamps: They help process thick mixtures without putting undue pressure on the motor. A good tamper, available here, is a must-have.
- Cleaning and Maintenance Kits: Regular upkeep prolongs your blender’s life. I use a kit with soft brushes and food-grade lubricants that I found here.
- Educational Resources: The deep dives into speed settings and blade design, like these tips, have transformed my blending approach.
Keep Your Blender in Top Shape and Blend Like a Pro
Embracing proactive maintenance and mastering the art of proper assembly have allowed me to enjoy perfect smoothies and nut butters daily. Remember, a well-balanced blender isn’t just quieter—it’s more reliable, durable, and capable of unlocking the full potential of your ingredients. So, why not give your blender some extra love today? Regular checkups and a bit of know-how can elevate your blending experience from good to exceptional.
Have you ever faced a wobbling blender mid-blend? Share your story below and let’s troubleshoot together!
Reading through this post really resonated with my experience of troubleshooting my blender. I once ignored a wobbling issue, thinking it was just normal wear and tear, but it eventually led to a burnt-out motor. Since then, I’ve learned that timely maintenance and careful assembly can save a lot of headaches. I especially appreciate the focus on checking blade balance and alignment, as I found the same issues caused vibrations and uneven textures in my smoothies. What’s been a game-changer for me is investing in OEM parts rather than generic replacements—never again do I want to deal with noisy, unbalanced blades.
Has anyone here tried using a small calibrated weight or a digital scale to balance the blades? I’ve been considering just small tweaks to balance out minor mismatches. Also, do you recommend any specific tools for tightening the blade assembly securely? Would love to hear others’ tips or stories about maintaining their blenders at peak performance.
This post hits the nail on the head about the importance of maintaining blade balance. I used to overlook my blender’s wobble, thinking it was just normal, but that caused frequent overheating and even cracked seals over time. Since I started using a digital scale to check blade balance periodically, I’ve noticed much smoother operation and less noise. It’s a simple step that paid off really well. I also learned that aligning the gasket properly is crucial—misalignment can sneak in after cleaning, and you might not realize it until vibration kicks in.
Has anyone experimented with adding a tiny amount of food-grade lubricant to the blade seal to help with gradual wear? I wonder if that could prolong the perfect balance for longer. Also, for those who’ve replaced blades, do you prefer OEM or aftermarket parts? I’ve had better luck with original manufacturer blades since they tend to fit and balance more precisely. Would love to hear your experiences and any other tips for keeping blenders running like new!