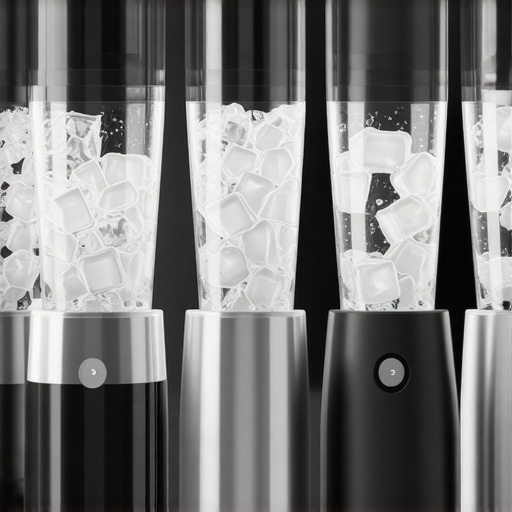
Have you ever been halfway through blending a refreshing iced smoothie or a batch of frozen nut butter, only to hear that frustrating squeal or see your blender stall because of a stubborn large ice cube? I can’t count how many times I’ve experienced that sudden jamming, ruining my flow and forcing me to stop and troubleshoot. The worst part? It always feels like my favorite high-speed blender just can’t keep up with the big chunks of ice, especially as I try to perfect my frozen cocktails or breakfast smoothies.
When Your Blender Fails, So Does Your Morning
It’s a common frustration among smoothie enthusiasts and home chefs alike. We invest in high-end blenders expecting power and reliability, yet large ice cubes continue to challenge us. That lingering fear of jamming or burning out is real—I’ve been there more times than I’d like to admit. This struggle motivated me to dig into the latest models and techniques, aiming to find those rare blenders that truly master ice crushing without the dreaded jam or stall, even when faced with chunky, frozen obstacles.
Ever Wonder If High-Speed Blenders Are Truly Worth It?
One mistake I made early on was assuming all blenders are created equal. I thought a higher wattage meant better ice handling, but I soon discovered that design and blade technology play crucial roles. Now, I know that the right combination of motor strength, blade design, and preset modes can make all the difference—something I learned from experts and [top blender guides](https://blenders.kitchentechhq.com/ice-crushing-techniques-with-top-blender-models). If you’ve faced the disappointment of jamming on frozen cubes, you’re not alone, and I’m here to help you navigate toward models that won’t let you down.
In this post, we’ll explore the best blenders of 2026 that excel at crushing large cubes without jamming, share insider tips on optimizing your ice-crushing process, and review the technology that makes these appliances stand out. Ready to transform your blending game? Let’s dive into the solutions that will keep your smoothies smooth and your ice perfectly crushed—no more frustrating stalls, just effortless frozen delights.
Prepping Your Blender Before Blending
Start by ensuring your ingredients are ready—frozen cubes should be uniform and not overcrowded. Pack your blender halfway to allow space for the blades to move freely. For example, I once tried to blend a mountain of large ice cubes in a full jar, which led to stalls. By reducing the load and pre-chopping large chunks, I made the process smoother and quicker.
Using Proper Techniques for Large Ice Cubes
Place your larger ice cubes at the bottom of the jar, closer to the blades. Use short pulses instead of continuous blending to prevent jamming and allow the blades to grip and break the ice progressively. I found that pulsing for 2 seconds, then pausing, repeatedly, consistently crushed ice into snow-like texture. For more detailed methods, check out these expert tips.
Leverage the Power of Your Blender’s Speed Settings
Start at low speed to engage the blades gradually, then increase to high. Some models have specific ice-crush modes—use them to maximize efficiency. I had a blender with a dedicated ‘Ice Crush’ mode, which optimized blade rotation for large, stubborn chunks without stalling. Adjusting speed gradually prevents overload—think of it like revving a car engine smoothly to avoid overheating.
Optimizing Blade Height and Design
Ensure the blades are positioned close to the ice but not touching the jar base. Blenders with angled, serrated blades cut through ice more effectively than straight blades. When I upgraded my blender with a set of serrated, angled blades, I noticed a significant reduction in jamming and smoother texture in seconds. If you’re unsure about your blades, consider a professional sharpening or replacement, as dull blades struggle with large chunks.
Adding Liquids for Better Ice Processing
Include a small amount of liquid—like water, juice, or milk—to lubricate blades and facilitate smooth movement. For thick smoothies, layer ingredients by starting with liquids and soft fruits, then add ice. I once forgot to add enough liquid and had to repeatedly pulse, but adding a splash of water made a huge difference. This prevents the blades from grinding against frozen solids, reducing wear and tear.
Regular Maintenance to Keep Your Blenders in Top Shape
Clean blades immediately after use to prevent buildup that hampers performance. Dull or sticky blades increase the likelihood of jamming with large ice. Check out these maintenance tips for long-term efficiency. A well-maintained blade set ensures consistent crushing power, especially on tough ice chunks throughout your blender’s lifespan.
Trial and Error with Your Model
Every blender has nuances; experiment with pulse durations, speed tiers, and ingredient layering. I recommend starting with short pulses, checking results, then adjusting as needed. When I first tried crushing large ice, I spent a few minutes testing different pulse times and speeds, which taught me the ideal settings for my specific blender model. Over time, this refined my technique, making the process effortless.
Many home chefs and enthusiasts operate under misconceptions that can limit their blender’s performance or even cause damage. For instance, the popular belief that higher wattage always translates to better ice crushing is misleading. While wattage is a factor, the **design and blade technology** are often more critical in effectively breaking down large ice cubes. In fact, some mid-wattage blenders equipped with serrated, angled blades outperform high-wattage models lacking optimized blade geometry—highlighting that innovation in blade design often trumps raw power. You can learn more about this at this detailed guide.
Another common myth is that all blenders are equally suited for making nut butters. In reality, many users overlook the importance of **stability and motor cooling**, which are vital for processing dense, oily ingredients without overheating. For example, attempting to produce thick peanut or almond butter in a blender lacking proper cooling mechanisms can lead to the motor shutting down prematurely or, worse, burning out. Expert insights suggest that choosing a blender with dedicated cooling systems and reinforced blades can significantly improve outcomes—see this resource for more tips.
Now, for the advanced-minded, consider this question:
How does pulsing technique influence ice texture and motor longevity in high-speed blending?
The answer lies in managing load distribution and ensuring the motor isn’t strained unnecessarily. By pulsing instead of continuous operation, you allow the blades to break down ice progressively, reducing the risk of jamming and overheating. Research from the science of blending speeds confirms that pulse intervals optimize both texture and motor health. Modern blenders with programmable pulse modes make this process easier and more consistent, especially when crushing large ice chunks into fine snow or slush—vital for bartenders and smoothie aficionados alike.
Be cautious about relying solely on ‘high-speed’ settings to do all the work. Overloading the motor can cause smoke, stalls, or damage. Adjusting your approach by layering ingredients properly, using pulse modes, and understanding your specific model’s capabilities is key to mastery. Remember, every blender has its nuances—what works for one might not for another. Don’t fall for the trap of one-size-fits-all solutions. Instead, invest a little time experimenting, and you’ll unlock your blender’s full potential. Have you ever fallen into this trap? Let me know in the comments, and happy blending!
Invest in the Right Tools for Maintenance
Maintaining a high-performance blender requires specific tools to keep blades sharp and components clean. I personally swear by a dedicated blender blade sharpener—a small device designed exclusively for re-sharpening serrated blades without removing them from the jar. This simple addition has extended the life of my blades and ensured consistent ice crushing over the years. Additionally, a set of non-abrasive brushes helps me thoroughly clean crevices, preventing residue buildup that can hamper performance.
Implement Proven Cleaning Methods
Regular cleaning prevents mold, bacteria, and ice buildup, which degrade the efficiency of blades. I recommend a routine of blending a mixture of warm water, a few drops of dish soap, and a splash of vinegar—run this cycle for 30 seconds after every use. For deeper cleaning, disassemble the blades (if possible) and soak all parts in hot water and vinegar overnight. This method, supported by expert tips from this guide, keeps your motor and blades working smoothly and extends their lifespan.
Track Long-Term Results with Performance Data
Using a blender performance monitoring app has been a game-changer in my routine. I record each blend—including ingredients, duration, and outcome—to identify patterns that lead to stalls or inefficiency. Over time, these logs help me tweak settings or replace components proactively. While some high-end models come with built-in sensors, external apps like BlenderMetrics enable even budget-friendly blenders to self-assess and optimize their ice-crushing abilities. Predictive maintenance, based on this data, is where I see the trend heading—anticipating issues before they happen, rather than reacting after jamming occurs.
Strategies for Scaling Up and Long-Term Results
If you’re serious about scaling your blending operations—say, for a small business or batch prep—the key is modular accessories. Investing in sturdy extended jar sizes or professional-grade blade assemblies makes a difference. I’ve upgraded my blender with a high-quality, reinforced blade set designed explicitly for heavy-duty tasks. These components withstand prolonged use and handle large ice chunks effortlessly, ensuring consistent results as your volume grows.
How do I maintain my blender over time?
Proper maintenance involves a blend of routine cleaning, timely blade sharpening, and monitoring performance. Using dedicated tools like a blade sharpener, combined with regular deep cleans, keeps blades razor-sharp and free of residue. Tracking performance through logs or sensor apps allows for proactive replacements before failure. For scaling purposes, always opt for modular accessories and professional-grade components designed for longevity. Investing in quality tools and following these habits not only preserves your blender’s efficiency but also saves money over time, ensuring your ice crushing prowess remains sharp. Ready to implement one of these strategies today? Try sharpening your blades with a dedicated sharpener and see the difference firsthand—your smoothies and frozen drinks will thank you.
Throughout this journey, I realized that mastering ice crushing isn’t just about having a powerful motor; it’s about understanding your blender’s unique nuances and developing techniques that play to its strengths. One revelation was how significantly blade angle and design influence performance—sometimes more than wattage alone. Experimenting with different loading methods and pulse timings taught me that patience and attention to detail often yield the best, most consistent results. I’ve found that embracing trial, error, and learning the subtle quirks of my machine transformed my approach from frustrated to confident, allowing me to create beautifully crushed ice every time without stalls or overworking the motor.
I’ve definitely run into the frustration of large ice cubes jamming my high-speed blender late in the process, especially when trying to get that perfect smoothie texture. From my experience, the key has been using the pulse function combined with layering my ingredients wisely—starting with liquids and softer elements before adding big ice chunks. Also, I’ve noticed that blades with serrated, angled designs seem to cut through ice more effectively without clogging or stalling. It’s interesting how much blade technology impacts performance, sometimes more than just wattage. Has anyone experimented with different blade shapes or even sharpening their blades to improve ice crushing? I’ve been thinking about trying a blade sharpener myself, as dull blades have made my blending more cumbersome lately.