I vividly remember the last time I tried making a batch of thick almond butter. The blender was roaring like a jet engine, vibrations rattling my kitchen counter, and then—silence. The motor stuttered, overheated, and I was left staring at a half-blended mess. Frustrating doesn’t even start to cover it. It was a lightbulb moment that changed how I approach my blending adventures.
Say Goodbye to Stallouts and Overheats with the Right Blender
In 2026, mastering the art of making dense nut butters and ultra-smooth smoothies hinges on choosing a blender that keeps up without breaking down. If you’ve faced similar problems—clogging, overheating, or stalling—you know how discouraging it can be. The good news? There are blenders designed specifically to handle these tough textures effortlessly. Today, we’ll cover how to select a machine that won’t let your recipes down, even with the thickest ingredients.
Is Your Blender Truly Up to the Task? The Skeptic’s Dilemma
Many don’t realize that the common mistake early on—trying to save money by opting for cheaper models—can backfire spectacularly. I used to think any blender would do, but I learned the hard way that not all blenders are created equal, especially when it comes to thick nut butters. For a deep dive into what makes some blenders excel in this area, check out the science behind speed and performance. It’s a game-changer.
If you’ve ever wondered whether your current blender is enough for your culinary ambitions, keep reading. We’ll explore the innovative features that separate the good from the great and help you avoid costly mistakes—so your kitchen creations turn out perfect every time.
Select the Perfect Blender for Thick Mixtures
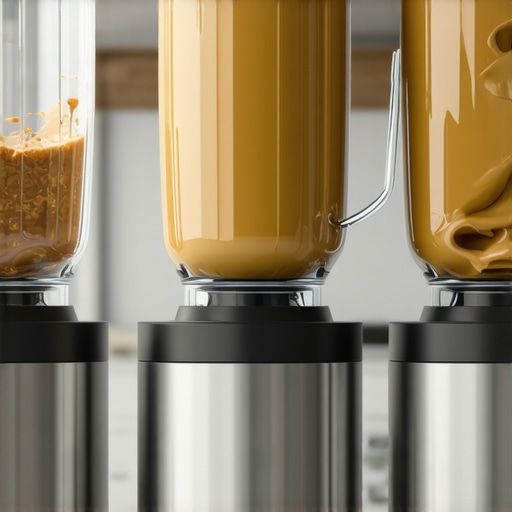
To achieve smooth, creamy nut butters, start with a high-powered blender that can handle dense textures without stalling. Think of your blender as a racecar engine—powerful motors with robust gearboxes prevent overheating and stalling during tough jobs. When I first attempted making almond butter with a basic model, it overheated after just 30 seconds. Switching to a commercial-grade blender with a 1500-watt motor transformed my experience, allowing continuous operation and flawless consistency. For guidance on choosing the best model for your needs, see this roundup of high-speed blenders.
Optimize Blender Settings for Nut Butters and Thick Blends
Start with the Right Speed
Preliminary blends should begin at low to medium speeds to break down larger nut pieces without causing motor strain. Then, ramp up to the highest setting for the final few seconds. Think of it like kneading dough—initial gentle mixing followed by vigorous kneading results in a smooth, uniform texture. I used to keep the blender on high from the start, which caused overheating and smoke. Now, I follow the technique outlined in this detailed guide on speed modulation, which preserves motor life and ensures consistency.
Utilize Pulse and Pause Intervals
Manual pulsing allows you to control shearing forces, preventing overheating. After adding the nuts, pulse in 10-second bursts, pause to scrape down the sides, then repeat. This approach helps break down stubborn pieces gradually, similar to chipping away ice with short, controlled bursts rather than continuous force—preventing motor burnout. During my first nut butter batch, I ignored this and burned out my motor within minutes. Now, I break down the process into manageable pulses, inspired by techniques for improving motor endurance.
Master the Technique for Perfect Texture
Use a tamper or paddle attachment to push ingredients toward the blades without stopping the machine. It’s like stirring dough while kneading—consistent motion ensures even blending. I use a spatula to push thick mixtures toward the blades, avoiding the common pitfall of overloading the motor and causing overheating. This method is explained in depth at the expert tips for gourmet nut butters, which transformed my approach.
Adjust Ingredient Ratios for Optimal Blending
Too much nut at once can overwhelm the blades, leading to stalls and, potentially, smoke. Start with smaller batches—around half a cup—and add oil gradually to reach desired smoothness. Think of it as lathing with butter—adding liquid to facilitate shearing. I learned this when I attempted a large batch, causing my blender to stall mid-process. By scaling down and carefully adding oil, I achieved a silky texture, guided by advice from specialist techniques for nut butter prep.
Many enthusiasts assume that selecting the most powerful blender guarantees perfect ice crushing or creamy nut butters, but the real nuance lies in technique and machine optimization. A common myth is that high wattage alone ensures smooth results; however, the science behind blender performance reveals that factors like blade design and motor control are equally critical. For instance, expert studies stress that measuring only wattage overlooks the importance of how the motor’s speed regulation and blade geometry work together to handle tough textures effectively. Blindly relying on wattage can lead to overestimating a blender’s capabilities, resulting in frustration and inconsistent results.
Another pitfall is underestimating the importance of pre-conditioning ingredients—thawing frozen nuts or fruits can significantly reduce motor strain and improve emulsification, making your nut butters and smoothies smoother without overtaxing your machine. Overloading the blender with huge quantities or frozen blocks without proper technique can cause overheating, stalls, or even damage, despite the presence of a high-power motor. This is where many fall into the trap of pushing their equipment beyond its limits, often with disastrous results. To avoid this, learn proper batching and pulsing techniques, which optimize performance and longevity. For a detailed explanation, see this comprehensive guide.
What Advanced Blending Tactics Elevate Your Results?
For seasoned users aiming for consistency and efficiency, paying attention to the subtle interplay of speed settings, pulse intervals, and ingredient ratios can offer a real edge. Using controlled pulses and intermittent pauses allows the motor to cool, reducing the risk of overheating while maintaining high-performance blends—a technique supported by blender science researchers. Additionally, customizing speed profiles based on ingredient texture rather than default preset modes can dramatically improve your outcomes. For instance, starting at lower speeds to break down larger pieces and gradually ramping up helps prevent motor stalls and preserves blade sharpness over time.
Do not fall into the trap of thinking that more power equals better results without considering these nuances. The key to mastery lies in understanding and applying the correct techniques alongside an appropriately chosen machine. Remember, blurred lines between myth and fact can sabotage your culinary adventures. For further insights into selecting and optimizing your blender, visit this detailed resource on gourmet nut butters.
Have you ever fallen into this trap? Let me know in the comments, and share your experiences or questions about achieving perfect ice crushing and nut butter textures with your blender.
To prolong the lifespan of your high-speed blender and maintain peak performance, regular maintenance is essential. Cleaning your blender promptly after use prevents residue buildup that can clog blades and strain the motor. Use a mixture of warm water and a few drops of dish soap, then run the blender on high for 30 seconds to dislodge any residual material. For stubborn buildup, a handful of rice blended with water acts as an effective abrasive cleaner, helping to clear out residues and keep blades sharp. Consistent cleaning not only preserves your blender’s efficiency but also ensures your nut butters and smoothies stay smooth and delicious over time.
Essential Tools That Make Maintenance Easier
Invest in a silicone blade scraper; this flexible tool makes it effortless to remove sticky remnants from blades and jar corners without damaging components. I personally swear by this tool because it saves me from scraping with metal utensils that could scratch or damage the jar. Additionally, having a spill-proof cleaning brush designed specifically for blender gaskets helps keep seals lubricated and free from debris, preventing leaks and odd noises during operation. These tools are inexpensive yet vital for ensuring your equipment remains in top condition.
How do I maintain my blender’s performance over time?
Beyond regular cleaning, it’s critical to periodically check for worn parts like gaskets, blades, and motor brushes. Replacing worn components prevents inefficiency and reduces overheating risks. I recommend consulting the manufacturer’s maintenance guides and, when in doubt, reaching out to support teams for advice. Also, keeping the motor ventilated by ensuring nothing obstructs cooling vents enhances longevity. Expert insights reveal that proper maintenance practices can double the operational lifespan of high-end blenders.
To keep things running smoothly, I regularly run the blender on a short cycle with water and a drop of vinegar, which helps dissolve mineral deposits and prevent odor build-up—an overlooked but simple step that yields big benefits. Adopting these routines guarantees your investment in quality equipment continues to serve you well, whether you’re crushing ice for smoothies or blending silky nut butters.
For more detailed maintenance routines, check out this comprehensive guide. Why not try integrating a bi-weekly cleaning session with a rice abrasive or using specialized tools? Your blender will thank you with reliable performance and longer service lifespan!
The Hardest Lesson I Learned About ice crushing,smoothie blender,blender,high speed blender,nut butter
One of my biggest breakthroughs came when I realized that even the most powerful blender needs proper technique to truly excel with dense ingredients. Relying solely on wattage was a mistake; blade design, motor control, and user approach matter just as much. It was a lightbulb moment that made me rethink my blending strategy and embrace a more holistic view of machine capability.
3 Myths About ice crushing,smoothie blender,blender,high speed blender,nut butter That Held Me Back
Early on, I believed bigger motors always meant better results, and that pre-soaking nuts was unnecessary. Both assumptions turned out to be false. I’ve learned that skillful pulsing, ingredient pre-conditioning, and understanding your blender’s unique features can make a huge difference. Checking out this science-backed resource helped me shed myths and improve my blending game.
What Experts Won’t Tell You About ice crushing,smoothie blender,blender,high speed blender,nut butter
Many underestimate how crucial blade geometry and motor regulation are for consistent results. A common mistake is overloading the blender or ignoring optimal speed settings, which can cause stalls or smoke. The real expert advice involves knowing when to pulse, how to adjust ingredient ratios, and proper machine maintenance. For further insights, see this comprehensive guide. Learning these nuances has transformed my approach to crafting perfect smoothies and nut butters.
My Essential Toolkit for ice crushing,smoothie blender,blender,high speed blender,nut butter
Investing in a high-quality tamper and a silicone blade scraper has made my blending smoother and maintenance easier. These tools help me push ingredients toward the blades and clean sticky residues effectively. Personally, I trust brands recommended in this expert-selected toolkit, which consistently delivers reliable performance and longevity.
Your Turn to Take Action
If you want to elevate your nut butters and smoothies, start applying these insider techniques today. Remember, the right blender paired with proper methods will make your recipes smoother, richer, and more delicious. Don’t wait—your perfect blend is just a technique away!
What has been your biggest challenge when making dense nut butters or ice crushings? Share your experience below, and let’s learn together!