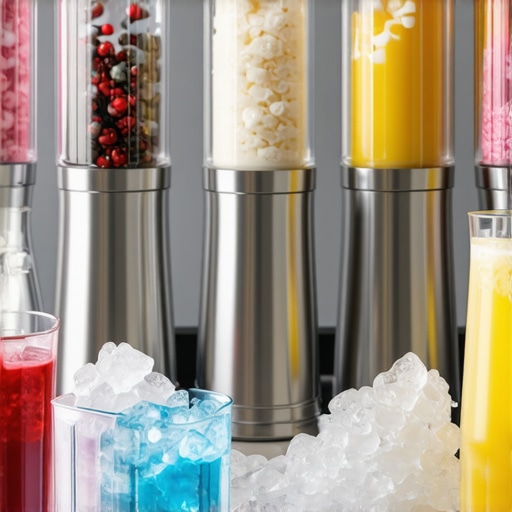
It was a scorching summer afternoon when I finally realized my trusty blender just couldn’t handle the frozen fruit and ice I threw at it anymore. Instead of smooth, velvety smoothies, I was stuck with chunky lumps and unprocessed ice shards that felt more like a chore than a treat. That lightbulb moment made me re-evaluate my entire approach to blending, especially for frozen drinks and nut butters. If you’ve ever faced similar frustration—clogged blades, overheating motors, or uneven textures—you know exactly what I mean.
Why Upgrading Your Blender Can Change Your Frozen Drink Game
In 2026, the market is flooded with options claiming to be *the* best, but making the right choice is trickier than ever. The difference between a mediocre blend and bar-quality frozen drinks often boils down to the blender’s power and ice-crushing ability. I’ve learned the hard way that not all high-speed blenders are created equal, and choosing the right one can truly elevate your recipes.
Before I dove into expert reviews and testings, I made a crucial mistake: I blindly trusted a popular brand without understanding what truly makes a blender excel at ice crushing and nut butter making. Do you know how many blenders stall or struggle with these tasks? Well, it turns out, quite a few. The secret lies in the blend of motor power, blade design, and speed settings—details that are often hidden in product specs.
According to Kitchen Tech HQ’s latest guide, high-performance blenders are engineered to handle the toughest ingredients, from frozen fruit to dense nut butters, without overheating or stalling. They recommend specific features and settings that maximize performance, which I wish I’d focused on earlier. Better tools can save hours, money, and frustration.
If you haven’t faced these challenges yet, congratulations! But if you have, don’t worry. Over the next sections, I’ll share practical tips and top models that will transform your blending experience. So, have you encountered time-consuming blends that just wouldn’t get smooth? Let’s fix that once and for all.
Select a Powerful Motor to Tackle Tough Ingredients
Start with a blender that has at least a 1,000-watt motor. I remember my first high-speed blender—I placed frozen berries, ice, and nuts inside and hit the pulse button. The motor whined painfully, struggling to process the ingredients, and I feared burning out the machine. To prevent this, always check the motor’s wattage and opt for models known for durability with dense ingredients.
Test the Power Before Committing
Before making large batches, run a quick test blend with minimal ingredients to assess how your blender handles ice and nuts. This sidestep saved me from stalling my first purchase and gave me confidence in its capabilities. For detailed insights on selecting the best motor for your needs, visit this guide.
Blade Design and Placement Matter
Imagine trying to chop wood with a dull axe versus a finely sharpened one—your blending effort is similar. High-quality blades with a multi-tiered design create a vortex that pulls ingredients downward, ensuring even processing. I once used a blender with flat blades, and chunks of frozen fruit refused to break down completely, leaving me with uneven smoothies.
Check Blade Material and Angle
Look for stainless steel blades angled for optimal ice and nut processing—these cut through stubborn ingredients like butter melting on a warm pan. Regularly inspect blades for dullness, and replace them when necessary to maintain performance. For more detailed blade tech, see this article.
Optimize Speed Settings for Perfect Texture
Most blenders come with multiple speed options. Using a low setting initially helps break down large or hard ingredients, then ramping up ensures a silky result. I once started blending at high speed immediately, causing the motor to strain and producing a chunky texture. Shutting off and increasing speed gradually produces a creamier consistency.
Use Pulse for Control
Pulse function acts like short bursts of power, enabling you to manually control texture. When making nut butter, pulsing prevents overheating and allows for better control—preventing nuts from turning into a paste too quickly or overheating. For expert tips, visit this resource.
Master Ice Crushing Techniques
Crushing ice is the ultimate test of a high-speed blender. Fill the container halfway with ice cubes, then set to the highest speed, holding the lid tightly. Listen for the whisper of ice turning into snow. I once watched my blender stall halfway through, which was embarrassing until I learned to add a splash of liquid and blend in shorter intervals—this prevents overload.
Use Proper Additives
Adding a small amount of liquid, like juice or water, reduces the load on blades and prevents overheating. Also, alternate between blending solid and liquid phases. For advanced techniques, check out this guide.
Many home enthusiasts believe that simply owning a high-speed blender guarantees perfect nut butters and ice-crushed smoothies every time. However, this misconception overlooks critical nuances that can drastically affect your results. For example, a frequent mistake is assuming that more power alone will produce smoother textures; in reality, blade design and motor torque play pivotal roles. Ignoring these factors can lead to overloading your motor or ending up with inconsistent consistency. Additionally, some believe that blending longer always equals better; in truth, prolonged blending can cause heat buildup, leading to nut oils oxidizing and losing flavor, or even damaging the motor—so timing is essential.
Let’s tackle a common myth: that all high-speed blenders handle nut butters equally well. In fact, many models struggle with dense, sticky ingredients without overheating or stalling. The secret lies in the motor’s torque and the blade’s ability to cut through sticky textures without motor stress. This is why expert models often feature variable speed settings and specialized blade geometries, ensuring a balanced shear force. Moreover, many overlook the importance of pre-processing. Roasting nuts slightly or chopping them before blending can reduce strain on your machine, leading to better textures and longer lifespan.
Ever wondered why some recipes turn out gritty or oily despite using supposedly premium blenders? Often the problem is not just equipment, but also technique. For instance, starting at lower speeds and gradually increasing allows the blades to process ingredients more efficiently and evenly. Additionally, adding small amounts of oil or liquid intermittently can aid in achieving a creamy consistency without overburdening the motor.
From my experience and studies, mastering these subtle details can elevate your blending game significantly. For an in-depth look at blender mechanics, you can explore this guide on the science of speed. Also, check out expert tips for perfect nut butters to avoid common pitfalls. Remember, understanding these hidden factors transforms your kitchen from guesswork into a professional-grade operation.
Are you falling into any of these traps? Let me know in the comments!
Keep Your Blender Running Smoothly with Proper Maintenance
To ensure your high-speed blender continues to deliver flawless ice crushing and nut butter making, regular maintenance is key. I personally prioritize cleaning the blades immediately after each use to prevent residue buildup that can dull the blades over time. A simple trick is to blend warm water with a drop of dish soap on the highest setting for 30 seconds, effectively removing stubborn residues and lubricating the blades.
Another crucial aspect is inspecting the seals and gaskets periodically. Worn seals can cause leaks or allow debris to enter, affecting performance and longevity. Replacing these parts when they show signs of wear keeps your machine in top condition. For specific guidance, consult the manufacturer’s manual or trusted resources like this expert guide.
My Recommended Tools for Superior Blending
While your blender is the core tool, additional accessories can significantly enhance your results. I swear by using silicone tamper tools to push ingredients towards the blades during heavy loads—this prevents over-reliance on the motor and ensures even processing. Moreover, I invest in a dedicated cleaning brush tailored for blades and jar interiors, which makes thorough cleaning quick and effective without risking injury from sharp blades.
For long-term durability, investing in cord organizers and protective covers helps prevent accidental damage and keeps the workspace tidy. Plus, using a digital thermometer to monitor motor and jar temperature during intense blending sessions helps avoid overheating, especially when making dense nut butters or crushing ice repeatedly.
Future Trends in Blending Technology
Looking ahead, I predict that smart blenders with integrated sensors and AI will revolutionize how we maintain and optimize our equipment. Imagine a blender that can detect blade dullness or motor overheating and suggest maintenance steps automatically—saving time and preventing costly repairs. Companies are already experimenting with IoT-enabled devices, promising a future where your blender practically cares for itself.
How do I keep my blender in peak condition over time?
Consistent cleaning after each use, replacing worn parts proactively, and avoiding overloads are fundamental. Regularly checking the motor’s temperature with a thermometer helps prevent burnout, especially during intensive tasks like nut butter preparation. Incorporating these habits ensures long-lasting performance and optimal results every time. For advanced tips, explore this comprehensive guide. Try using a silicone tamper tool when blending thick ingredients—it’s a game-changer for consistency and longevity of your blender.

Throughout my journey with high-speed blenders, I’ve uncovered that the real magic lies in the details—techniques, maintenance, and understanding your machine’s quirks. One lightbulb moment was realizing that even the most powerful blender can underperform without the right approach. By focusing on motor torque, blade angles, and precise timing, I’ve been able to craft silky nut butters and crush ice into snowy perfection consistently. Remember, it’s not just about the equipment but how you leverage its features. Regularly inspecting blades and seals, pre-processing ingredients, and gradually increasing speeds have transformed my blending results from frustrating to flawless. As the technology advances, staying informed about device capabilities through trusted resources like this guide can keep your toolkit sharp. Keep experimenting with techniques, and you’ll unlock new levels of blending mastery that elevate your health recipes and snack game. Just imagine the creamy, perfectly crushed results waiting for you each time you blend—reach out in the comments if you have tips or questions about turning your blender into a culinary powerhouse.