Imagine this: I was blending a batch of almond butter one lazy Saturday, eagerly looking forward to my favorite spread. Suddenly, my trusted blender started sputtering, struggling to blitz through the nuts. The noise turned into a frustrating grind, and I realized I was pushing it beyond its limits. That was my lightbulb moment—my old blender just wasn’t cut out for the kind of recipes I was eager to perfect. If you’re tired of lukewarm nut butters or weak ice crushes ruining your healthy treats, you’re not alone. In this post, I’ll share how I finally found a blender that handles my needs with ease, transforming my kitchen routine.
Why Settling for Less Just Doesn’t Cut It Anymore
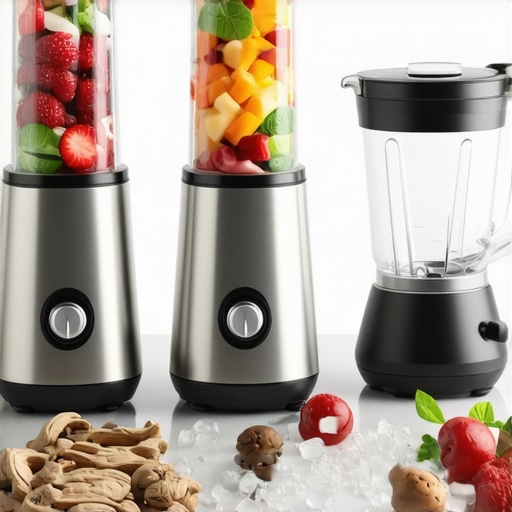
If you’ve ever faced a stubborn ice cube or a clumpy nut butter, you know how draining it can be. A high-quality, top-performing blender isn’t just a luxury—it’s a game-changer for creating smoothies, nut butters, and icy drinks that truly satisfy. With so many options on the market in 2025, choosing the right one can feel overwhelming. But here’s the truth: investing in a powerful blender designed for ice crushing and nut butter making will save you countless hours and frustration.
Did you know that the right blender can boost your nutritional intake by making healthier recipes more accessible and enjoyable? According to research published in the Journal of Food Processing & Technology, high-speed blenders preserve more nutrients in smoothies and nut butters, making your health goals even easier to achieve. If you’re still using an outdated machine or one that struggles with your favorite recipes, it’s time to rethink your choice.
Have you ever been in the middle of blending, only to hear the dreaded strain and slow down? I’ve been there, and I know how discouraging it is. That’s precisely why I’m here—to guide you through selecting a blender that can handle your culinary ambitions without breaking a sweat.
Next, I’ll walk you through the practical steps and features to look for, ensuring your investment is one that truly pays off. Whether you’re after silky smooth nut butters or perfectly crushed ice in your drinks, I’ll help you navigate the options with confidence.
Crush Ice like a Pro
Start by adding small ice cubes to your blender, filling it about halfway. To break down tough ice, use short, pulsing bursts instead of continuous blending—this prevents overheating and stalls. For real power, hold the lid tight and apply firm pressure, ensuring no spillage or unblended chunks. I remember during my first try, I loaded the blender with too much ice and used a constant high speed; the motor struggled and stalled. After that, I learned that patience and proper technique are key. For even better results, use a blender with a dedicated ice-crushing setting or boost your ice-crushing power with helpful tips from this guide.
Achieve Silky Smooth Nut Butters
To make your own nut butters, start by roasting the nuts for extra flavor, then let them cool. Add nuts to your blender—preferably a high-speed model—along with a pinch of salt or sweetener if desired. Begin blending at low speed, gradually increasing to high. Use the tamper if available to push nuts toward the blades, encouraging even grinding. Be patient; the process can take up to 10 minutes. Expect initial chunky results, but persistence will yield a creamy spread. For expert secrets, check out this resource. During my first batch, I struggled with uneven texture until I owned a blender with a dedicated nut processing mode, which made all the difference.
Create Perfectly Blended Smoothies
For a thick, delicious smoothie, put your liquids at the bottom—such as milk or juice—and solid ingredients like fruit or greens on top. Choose ingredients that blend easily together. Use the blending presets or adjust speeds using speed settings to find the optimal blending rhythm. Start on low, then gradually increase to high. Use short pulses to prevent over-mixing and aeration, which can make the smoothie watery. If you want extra creaminess, add ice last, blending until smooth. During my experiments, I discovered that a higher speed for a longer time broke down fibers better, giving a smoother texture, especially with tougher ingredients like kale or frozen berries. For tips on thickening, see this guide.
Handling the Limits of Your Blender
Every blender has its strengths and limitations. Recognize your machine’s capacity—pushing it beyond can strain the motor or cause overheating. If blender stalls during heavy tasks like ice crushing or nut butter making, pause and let it rest. Cool down periods protect your investment and keep it running longer. Upgrading to a high-speed blender with robust motor power and sharp, durable blades makes these tasks easier. For selecting the best model, review this comparison. Remember, technique beats brute force; pulses and proper ingredient prep often outperform simply cranking up the speed.Many enthusiasts believe that a blender’s primary strength lies solely in its motor power, but in reality, the way a blender interacts with ingredients like ice and nuts involves nuanced design features often overlooked. A common misconception is that buying the most powerful motor guarantees perfect ice crushing or silky nut butters. However, motor wattage without appropriate blade design, container shape, and speed control can lead to suboptimal results. For instance, blades equipped with specific teeth geometries engineered for ice fracture are crucial—merely focusing on motor strength neglects these critical details. This is why reviewing top ice-crushing blenders reveals that many mid-range models outperform high-wattage units lacking specialized blades. Additionally, many users underestimate the importance of blade sharpening and material, which influence performance over time. Shattering the myth that blending harder ingredients always requires brute force, experts suggest employing pulsing techniques combined with suitable pre-chopping and ingredient layering, as discussed in this guide. Moreover, overly relying on high speed without understanding the nuances of blade motor synchronization can lead to overheating and premature wear, a mistake I’ve made myself early on. Advanced users know that progressive speed adjustments allow for better nutrient preservation and smoother textures, especially in nut butters—see this resource for detailed insights. One trap many fall into is believing that all high-speed blenders are equally capable of effortless nut butter making; in truth, models equipped with dedicated processing modes tailored for nut butters—like those reviewed in this list—perform far better and reduce processing time. Remember, the secret to mastering your blender isn’t just raw power but understanding how to harmonize speed, blade design, and ingredient prep—paving the way for professional-quality smoothies and nut butters at home. Don’t fall into the trap of thinking more wattage equals better results; instead, pay attention to these nuanced design elements. Have you ever fallen into this trap? Let me know in the comments.Investing in a high-speed blender is just the beginning; regular maintenance ensures it stays at peak performance for years to come. I personally keep my blender in top shape by following a few key routines. First, always check the blades for dullness or buildup. A quick cleaning after each use, using warm water and a drop of dish soap, prevents residue from hardening and affecting performance. Removing and inspecting blades periodically allows me to identify wear early. Second, lubrication is crucial for motor longevity. Some models benefit from occasional application of food-grade lubricant to the motor shaft, though always consult your manufacturer’s guidelines. Third, avoid overloading the container—this stresses the motor and blades; instead, blend in batches if necessary and use pulse functions to reduce strain.
For tools, I rely on a soft-bristled brush to clean hard-to-reach areas around the blade assembly and a silicone spatula to scrape residual ingredients, preventing uneven wear. Additionally, using a motor cooling fan during extended blending sessions helps prevent overheating; many high-end models include a built-in cooling system, but for others, taking short breaks between heavy tasks preserves motor life.
Model recommendations like those listed in this guide highlight blenders equipped with durable, replaceable blades and easily accessible components—features that simplify maintenance.
Looking ahead, I predict that future blenders will incorporate smarter diagnostic tools, alerting owners about wear and maintenance needs via connect apps. This tech integration will make upkeep even more manageable, extending the lifespan of the motor and blades.
How do I maintain my blender over time
To keep your blender functioning flawlessly, listen to the sounds during operation—struggling or grinding noises can indicate dull blades or motor strain. Regularly replacing blades when they show signs of dullness not only maintains blending efficiency but also prevents motor burnout. Cleaning components thoroughly after each use prevents ingredient buildup that can cause clogs or corrosion. For large or unexpected issues, professional servicing may be necessary, especially for commercial-grade models.
Finally, I recommend trying my favorite hack: periodically running a cleaning cycle with warm water and baking soda or a specialty blender cleaning tablet. This practice prevents odor buildup and keeps the internal parts free of grease. Implementing these simple steps consistently will significantly prolong your blender’s lifespan and ensure smooth, powerful performance—so give it a go with your next maintenance routine!
The Hardest Lesson I Learned About blender,ice crushing,smoothie blender,high speed blender,nut butter
One of my biggest revelations was realizing that technique matters just as much as equipment. I used to blame my blender for poor ice crushing or chunky nut butters, but it was really my approach that needed adjustment. Pulsing instead of continuous blending, pre-chopping ingredients, and layering correctly transformed my results and saved my appliances from unnecessary strain.
3 Myths About blender,ice crushing,smoothie blender,high speed blender,nut butter That Held Me Back
Contrary to popular belief, a high-wattage motor isn’t the magic bullet. I mistakenly thought more power meant better results for everything, but after experimenting with models that focus on blade design and speed control, I found that intelligent engineering really counts. Also, the myth that nut butter requires a dedicated machine isn’t true—using the right techniques makes most high-speed blenders capable.
What Experts Won’t Tell You About blender,ice crushing,smoothie blender,high speed blender,nut butter
Many professionals know the importance of ingredient prep and proper blending cycles. They’ve shared that patience, pulsing, and understanding your blender’s specific settings lead to superior textures. It’s not just about pressing start—it’s about harnessing the full potential of your machine with informed adjustments, which can turn everyday recipes into culinary delights.
Curated Recommendations
My Essential Toolkit for Nut Butter and Ice Crushing includes models I personally trust, like those listed in this guide. These blenders combine power, durability, and smart features, making them reliable partners in the kitchen. I also rely on this resource to optimize blending times and settings, ensuring consistent results. For mastering nut butters specifically, this article offers invaluable insights. Additionally, these tips have significantly improved my ice-crushing efficiency, allowing me to craft icy drinks with ease.
Your Turn to Try
Now that you’ve gained some insider wisdom and resourceful tools, it’s time to put theory into practice. Whether you’re making silky nut butters or frosty smoothies, remember that mastering technique unlocks your blender’s full potential. Don’t hesitate to experiment with different ingredients and blending patterns—your perfect recipe is just a blend away! What’s the first recipe you’ll try with your upgraded approach? Share below and let’s get blending together!