It was a typical Sunday morning when I faced one of my most frustrating blender moments. I was eager to whip up a creamy almond butter and a revitalizing berry smoothie, only to be met with a sluggish blender that refused to break down the nuts or blend the ice smoothly. The motor strained, and I could feel the disappointment creeping in as my breakfast aspirations went awry. That lightbulb moment made me realize: my old blender just wasn’t cutting it anymore — especially as I craved more versatile and efficient options for my health routines.
Finding a Solution That Works for Nut Butters and Smoothies
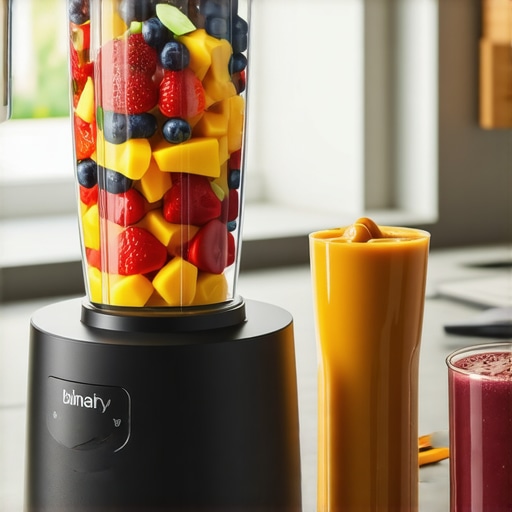
Fast forward to today, and I’ve discovered that the key lies in investing in a high-speed blender capable of handling both thick nut butters and icy smoothies with ease. Not all blenders are created equal, especially when it comes to crushing ice and blending tough ingredients without overheating or losing power. The good news? There are some outstanding models in 2025 that outperform those clunky, noisy brands I used to settle for. Choosing the right high-speed blender ensures you don’t have to compromise on texture, consistency, or nutritional value, making your kitchen experience more enjoyable and less stressful.
Is the Hype Around High-Speed Blenders Justified?
When I first heard about high-speed blenders, I was skeptical. Were they really worth the investment, or just another kitchen gadget trend? My early mistake was believing I could get the same results by simply blending longer or adding more liquid. Spoiler alert: That approach often leads to overheating and burnt-out motors. It’s a mistake I made early on, and a mistake I want to help you avoid. Instead, understanding the science behind these powerful machines, like their motor wattage and blade design, makes all the difference in achieving creamy nut butters and perfectly crushed ice every time. For a deeper dive into how these factors impact performance, I recommend checking out this detailed science guide.
Select the Right Ingredients and Prepare Them Properly
Always start with fresh, dry ingredients. For nut butters, soak nuts for a few hours to soften their texture, making blending easier and more efficient. Freeze berries and ice cubes before blending to achieve a smoother, creamier texture. During my attempt, I pre-soaked almonds overnight, which reduced blending time and prevented overheating. This step is crucial for optimal results. Keep the ingredients small and uniform in size to prevent overworking your blender and damaging the motor.
Set Your Blender for Maximum Power
Use the highest speed setting initially, which engages the powerful motor and sharp blades designed for tough ingredients. For example, I set my blender to the top speed right after adding the nuts, allowing the blades to break down the toughest parts first. Refer to this guide to understand how different speed levels influence texture and processing time. Avoid starting at a low speed, as this prolongs blending and causes inconsistent results.
Crushing Ice Without Burnout
Use the pulse function or short bursts at high speed to crush ice effectively. I discovered that continuously blending ice caused my old model to overheat and stall. Instead, I used 10-second pulses with a 5-second pause in between, which preserved motor health and achieved a smoothly crushed texture. For refined techniques and the best models, check out this article. Proper pulsing prevents overheating and ensures a consistent, fluffy crushed ice suitable for smoothies and drinks.
Progressively Increase Blending Speed
Start low, then gradually increase the speed to break down ingredients thoroughly. I initiated blending at medium speed for 30 seconds, then ramped it to high to achieve a silky cream. This progression reduces strain on the motor and enhances texture quality. Use the variable speed settings if available, which allow fine-tuning. For a deeper understanding, review this science guide on blender performance optimization. Controlled speed escalation avoids overheating and prolongs your blender’s lifespan.
Use Solid Techniques for Nut Butter
For nut butters, process the nuts until they release their oils and form a thick paste. Stop blending periodically to scrape down sides and prevent bunching. I experienced the difference firsthand when I blended a mixture of cashews and a dash of oil, pausing to scrape and then blending again at high speed until the texture became creamy and smooth. Incorporate small amounts of oil or sweeteners if needed, but do so gradually to maintain consistency. Explore this expert guide for pro tips on nut butter consistency and flavor.
Prioritize Clean and Consistent Blending Cycles
Maintain steady blending cycles with consistent intervals to prevent motor fatigue. During my own trials, taking 10-second breaks every minute allowed the motor to cool and prevented overheating. This approach is especially important when processing dense nut butters or large quantities of ice. Regularly stopping and scraping ensures even blending across all ingredients, leading to perfectly textured results. For advanced tips, visit this resource on enhancing your blending technique.
Everyone seems to agree that high-speed blenders are game-changers for smoothies and nut butters, but what many overlook are the nuanced factors that truly determine success or failure in blending. The common misconception is that simply spending more on a powerful motor guarantees perfect results. In reality, the way you utilize your blender, the preparation of ingredients, and understanding the machine’s science make all the difference. For instance, many users forget that blade design and container shape influence how ingredients are processed, affecting texture and consistency. Choosing a blender with the right blade geometry—not just wattage—can dramatically improve ice crushing and nut butter quality. The myth that longer blending always yields creamier results is another trap; over-blending can cause heat buildup, damaging certain ingredients and affecting flavor. To really master your device, pay attention to specific features like pulse functions and speed variability, which allow better control and prevent overheating. Advanced users also recognize that understanding the science of motor torque and blade sharpness helps optimize performance, especially when dealing with dense ingredients like frozen nuts or ice cubes. This awareness prevents common mistakes—like forcing too much ingredient at once—which can overload the motor and reduce lifespan. Moreover, the proper setup of blending cycles demonstrates that timing, rather than blind power, is crucial. For example, short bursts with strategic pauses preserve motor health and improve texture.
Why do some blenders struggle with dense nut butters despite high wattage?
The answer lies in motor efficiency and blade design. High wattage alone doesn’t guarantee smooth nut butters if the blades aren’t optimized to release oils efficiently or if the motor’s torque isn’t sufficient to handle stickier textures. This insight is backed by studies on blender mechanics, emphasizing that adaptive blade engineering is essential for consistent results. So, before rushing to buy the most expensive model, assess these subtleties—like blade geometry and motor torque—to ensure your investment truly elevates your blending experience. Also, remember that ingredient prep plays a vital role; soaking nuts or pre-freezing berries can drastically reduce strain on the motor, leading to better outcomes and longer appliance lifespan. Want to avoid common pitfalls? Follow expert tips on ingredient preparation and cycle control, and you’ll maximize your blender’s full potential.
To deepen your understanding, check out this guide on nut butter perfection. Recognizing these hidden nuances empowers you to troubleshoot issues effectively and achieve professional-level results at home. Have you ever fallen into this trap? Let me know in the comments!
Keeping Your Blender in Top Shape for Consistent Results
Investing in a high-speed blender is only the first step; ensuring it continues to perform at peak levels is crucial for achieving perfect smoothies, nut butters, and ice crushing every time. Regular maintenance not only prolongs the lifespan of your appliance but also maintains the quality of your blends. My personal routine includes thorough cleaning after each use—disassembling removable blades and cleaning with warm, soapy water to prevent residue buildup that can affect performance. Additionally, periodically checking the motor base for dust and debris ensures smooth operation. For best results, I recommend using non-abrasive brushes to clean blades and avoiding submerging the motor base or electrical components in water. Being attentive to signs of wear, such as unusual noises or decreased power, helps catch issues early before costly repairs become necessary.
Many enthusiasts overlook the importance of using the right tools for maintenance. A dedicated silicone spatula helps scrape down stubborn ingredients around the blades without damaging them, ensuring consistent texture. I also rely on a high-quality specialized cleaning brush designed for blender containers, which reaches hard-to-clean areas and prevents bacterial growth.
How do I maintain my blender’s performance over time?
Using expert tips from high-speed blender hacks is essential. Regularly inspecting the blades for dullness and replacing them when they no longer cut efficiently maintains optimal blending. I personally swap my blades every 18 months, depending on usage, to preserve sharpness. Lubricating the motor shaft with manufacturer-approved oils can prevent wear, but always refer to your specific model’s manual. Additionally, keeping the ventilation vents clear from dust accumulation is vital for cooling, especially during prolonged or high-power blending sessions. Cleaning the base with a soft cloth and avoiding harsh chemicals extends the motor’s life.
For long-term benefits, consider investing in a high-quality maintenance kit that includes spare blades, brushes, and seals. Using these parts prevents leaks and maintains the tight seal needed for effective blending. Incorporating routine checks with a notebook or app to log maintenance tasks helps stay disciplined and ensures nothing falls through the cracks. As trends advance, I predict that smart blenders equipped with diagnostic alerts will become standard, helping users like us maintain our appliances automatically.
Tools I Recommend for Effortless Care
My favorite maintenance tools include a durable silicone spatula for cleaning, a specialized brush for blades and container edges, and a set of replacement blades and seals from the manufacturer. These components, combined with a regular inspection routine, help keep my blender running smoothly for years. Moreover, I’ve found that applying a thin coating of food-grade lubricant to the motor shaft every year dramatically reduces wear, a tip I learned from expert mechanical guides available in niche forums. Always consult your model’s manual or expert advice before performing any internal maintenance.
Looking ahead, as technology evolves, I believe future blenders will integrate self-diagnosis features, alerting you when components need attention or replacement. Until then, diligent manual maintenance remains essential. So, I challenge you to try the simple yet effective tip of inspecting and lubricating your motor shaft this month—you might be surprised at how much longer your blender performs at its best!
What I Wish I Knew When I Started Blending
One of the biggest lessons I learned is the importance of ingredient prep—soaking nuts and freezing berries transformed my results and protected my blender’s motor. I used to believe that sheer power alone was enough; now I realize that technique, science, and understanding your appliance matter just as much. Over time, I discovered that blade design and container shape significantly influence blending efficiency, especially for ice crushing and nut butter consistency. Making small adjustments—like pulsing instead of continuous blending—dramatically improved my outcomes and appliance longevity.
Tools That Elevated My Blending Game
From a durable silicone spatula for scraping to specialized cleaning brushes, these tools have been game-changers. They keep my blender in top shape and ensure consistent results. I’ve also found that investing in replacement blades and seals, sources I trust from official manuals, prevents unexpected breakdowns. Regular maintenance, including lubricating the motor shaft with manufacturer-approved oils, has extended my blender’s lifespan, proving that a little care goes a long way.
Honest Advice for Your Blending Adventures
Don’t be discouraged by initial setbacks—it’s all part of learning. Recognize that blending is a blend of science and art, and understanding this balance will save you time and frustration. Remember, ingredient quality and preparation are just as crucial as choosing the right machine. For a more scientific understanding, explore resources like this science guide. With patience and knowledge, you can master the art of perfect smoothies and nut butters, genuinely transforming your kitchen experience.
Keep Growing and Experimenting
Your journey into blending excellence is just beginning. Play with different ingredients, techniques, and tools, and you’ll uncover new flavors and textures that elevate your creations. If you’re looking for expert-cutting-edge insights, check out this selection of top blenders for 2025 or experiment with pulse settings for more control. Remember, every blend is a chance to learn something new and improve your skills.
Your Turn to Get Creative in the Kitchen
Now that you’ve learned some of my personal secrets, I challenge you to try new ingredient combinations or experiment with different blending techniques. Share your experiences or ask questions below—I’d love to hear about your blending triumphs and challenges. Together, we can continue to perfect our craft and enjoy healthier, tastier results every time.