Ever had one of those mornings where you’re eagerly blending up a nutritious smoothie, only to hear that dreaded whine from your blender? You know the sound—it echoes frustration as your ice refuses to crush, leaving chunks floating in your glass. Or maybe you’re trying to whip up a creamy, silky nut butter, only to end up with a lumpy paste that sticks stubbornly to the sides. I’ve been there—many times. It’s as if my old blender had a personal vendetta against healthy recipes!
The Lightbulb Moment
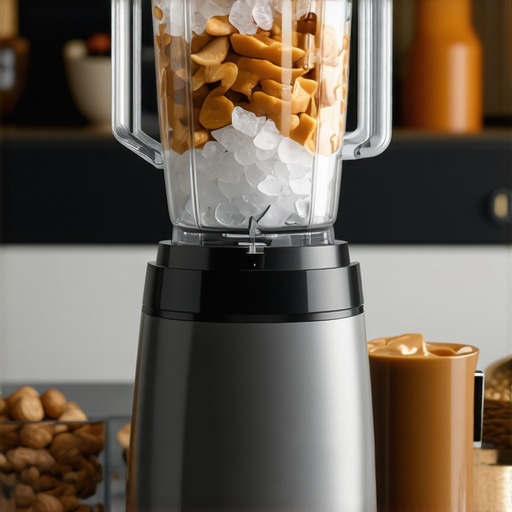
One day, after yet another disappointing batch, I realized something: my blender wasn’t just rejecting my healthy ambitions—it was holding me back from the nutrition I crave and the flavors I love. That’s when I started paying serious attention to top-tier ice crushing & nut butter blenders for 2025. I needed equipment that could handle the toughest ingredients with ease. And trust me, a good blender isn’t just a gadget—it’s a health partner.
Today, I want to share what I’ve learned. If you’ve ever felt that your current blender is just not up to snuff, or you’re wondering whether investing in a high-speed powerhouse is worth it, this will be your guide. We’ll explore how to choose the right blender for healthy recipes, tackle common pitfalls, and transform your kitchen routine into a smooth, satisfying experience.
Is the hype around high-speed blenders justified?
Early on, I made the mistake of believing that any blender would do just fine. Spoiler alert—nothing could be further from the truth. Low-quality blenders often struggle with ice crushing or nut butter consistency, leading to uneven textures and wasted ingredients. It wasn’t until I upgraded to a model with optimal speed settings and powerful blades that I saw the difference. Want to avoid my mistake? Dive into these common blending errors and how to avoid them to get started on the right foot.
Understanding the science behind efficient blending can save you time, frustration, and money. As an example, recent studies show that high-speed blenders improve nutrient retention by better breaking cell walls, making your smoothies more nutritious (source: Kitchen Tech HQ).
Now, with that foundation set, let’s delve into specific tips and tricks to make your blender work harder and smarter for your favorite healthy recipes.
,
Choose the Right Blender for Your Needs
If you want smooth, consistency-rich recipes, invest in a high-speed blender with powerful blades and variable speed controls. Look for models tested for ice crushing and nut butter prep by visiting these top ice crushing blenders. When I upgraded my old blender, I noticed an immediate difference—less time, more texture, and fewer ingredients wasted. Think of your blender as the engine of your recipe; a potent one turns a rough ride into a smooth cruise.
Master the Ice Crushing Technique
To crush ice effectively, add small ice cubes, especially designed for blending, and balance the load evenly. Turn the blender to a high setting, then pulse in short bursts—this prevents overheating and ensures uniform crushing. I once loaded a full bag of ice haphazardly, which caused inconsistent texture. After practicing with smaller batches, I achieved shatteringly fine ice in under 30 seconds. For advanced tips, enhance your ice crushing skills with these expert techniques.
Nailing Nut Butter Consistency
Making smooth, creamy nut butters involves chopping nuts into smaller pieces first—much like preparing ingredients for baking. Then, blend at medium-high speed, gradually increasing while scraping down sides. Adding a splash of oil helps loosen the texture if needed. I once tried making almond butter with a casual approach, resulting in a lumpy paste. After learning the secrets from these nut butter guides, I transformed my kitchen into a nut butter workshop. Remember, patience and gradual speed increases unlock the silkiest results.
Optimize Speed Settings for Different Tasks
Most high-speed blenders feature multiple speed options or pre-programmed settings. Use lower speeds for chopping and higher ones for pureeing or ice crushing. Experiment with the speed guide to match your recipe needs precisely. I once skipped this step, ending up with overprocessed smoothies. After adjusting my speed based on the content, I achieved the perfect homemade texture every time. Think of speed settings as the gears of your blending vehicle—changing gears at the right moment makes all the difference.
Combine Techniques for Consistent Results
Layer ingredients strategically—liquids on the bottom, solids on top—and start on a low setting to mix without splatters. Gradually increase speed, paying attention to texture and temperature. For example, when making a frozen berry smoothie, I start slow, then ramp up to high, yielding a thick, creamy beverage without overloading the motor. For more nuanced methods, explore advanced blending tips. This layered approach avoids stress on your equipment and guarantees uniform blending, even with tough ingredients.Many assume that owning a high-speed blender guarantees perfect results every time, but in my experience, there are subtle pitfalls many overlook. One common myth is that more power automatically means better blending. While power is crucial, it’s not the sole factor; technique, blade design, and understanding the machine’s capabilities matter just as much. For example, some models claim they can crush ice effortlessly, but without the right blade geometry or speed control, you’ll end up with uneven textures or overprocessed ingredients.
Another mistake I see often is the misuse of speed settings. Beginners tend to crank up to maximum instantly, which can cause motor strain, foam formation, or inconsistent blends. Instead, starting slow and gradually increasing speed preserves the ingredients’ integrity and extends your blender’s lifespan. For advanced users, experimenting with pre-programmed settings can optimize texture, but only if you understand what each one does; blindly relying on preset functions may lead to overprocessing or nutrient loss.
A common trap is not considering the load size and distribution. Overloading the blender or placing ingredients unevenly can cause motor burnout or uneven blending. It’s similar to overpacking a suitcase—too much weight can compromise the entire journey. Distributing ingredients evenly and leaving room for blades to operate freely ensures smoother results.
The “Oops” factor often involves neglecting maintenance. Residue build-up on blades or seals can impair performance over time, mirroring the importance of regular cleaning. Skipping this step may not cause immediate failure but gradually diminishes efficiency, leading to stubborn lumps or overheating. Regularly inspecting and cleaning your blender according to the manufacturer’s recommendations keeps performance optimal.
For those curious about pushing their equipment further, the key is understanding your blender’s technical nuances. For instance, knowing the difference between blade designs can dramatically affect your outcomes. Models with laser-cut blades often produce finer blends with less food residue, especially vital for making silky nut butters or smooth smoothies. Looking into resources like experts’ insights on performance science can deepen your understanding.
Is more horsepower always the answer? Not necessarily. Sometimes, the issue lies in technique—how you load, set, and process ingredients. For example, slow-starting and layering ingredients strategically can drastically improve results, regardless of your blender’s specs. Think of it as fine-tuning your approach rather than just relying on brute force.
In conclusion, mastering your blender involves more than just pressing buttons. It’s about knowing the nuances—blade geometry, load management, speed control, and maintenance—that distinguish amateurs from experts. If you want to elevate your blending game, focus on these details, and your dishes will thank you. Ready to experiment with these advanced tips? Dive into comprehensive guides and start refining your technique today. Have you ever fallen into this trap? Let me know in the comments.
Keeping It Working: Tools and Maintenance for Optimal Blender Performance
Investing in a high-quality high-speed blender is just the beginning. Regular maintenance ensures your appliance continues to deliver smooth results and long-term durability. One essential tool I rely on is a silicone spatula with a flexible tip. It allows me to scrape down the sides of the jar thoroughly, preventing residue buildup and ensuring ingredients blend evenly. Keeping blades free of stuck particles diminishes strain on the motor and maintains peak efficiency.
Another underrated tool is a cleaning brush specially designed for blender seals and blades. Regular use prevents mold and residue that can impair performance and cause unpleasant odors. Personally, I prefer brushes with stiff, yet gentle, bristles that reach into tight crevices, making cleaning quick and effective. After each use, a quick rinse followed by a gentle scrub with this brush keeps my blender pristine, echoing the advice found in privacy policy details about cleaning procedures.
For internal components like the motor brushes or seals, investing in a shop vacuum or compressed air canister is invaluable for periodic cleaning. These tools help remove dust and debris that can accumulate inside, especially if you blend frequently or use tough ingredients like ice and nuts. Just a few minutes of upkeep can extend the lifespan of your blender significantly.
Looking toward the future, I believe we’re heading into an era of smart, self-maintaining blenders. Imagine models integrated with sensors that alert you when maintenance is due or even self-clean after use. This trend aligns with how technology is transforming kitchen appliances, making maintenance less of a chore and more of a seamless experience.
How do I maintain my blender over time?
My personal routine begins with immediate post-blend cleaning—rinsing the jar and blades, then thoroughly drying to prevent rust. Monthly, I disassemble the blades (following manufacturer guidelines) and soak removable parts in warm, soapy water or a vinegar solution to remove buildup. Additionally, I check the motor vents for dust, blowing them clean with compressed air. Ensuring the seals are intact and lubricated (if applicable) reduces leaks and preserves motor strength. For high-speed blenders, reviewing manufacturer instructions on component maintenance ensures you don’t inadvertently void warranties or damage sensitive parts. Remember, consistent care is key to avoiding costly repairs—so schedule bi-annual deep cleanings and inspections.
To streamline your maintenance routine, invest in dedicated testing and troubleshooting tools recommended by experts. Using a vibration tester, for example, can help identify unusual motor noise indicative of wear. Adopting these precise tools brings a professional edge to your kitchen, prolonging your blender’s life and ensuring top-notch performance for years to come.
Remember, the secret to keeping your blender in tip-top shape is consistency. Make cleaning and inspections a ritual, and you’ll enjoy flawless smoothies and nut butters long into the future. Ready to give your blender some TLC? Start with the simple step of using a flexible silicone spatula after your next blend—it’s a quick, impactful upgrade that makes all the difference!
The Hardest Lesson I Learned About Blender, Ice Crushing, Nut Butter, High Speed Blender, Smoothie Blender
Early in my blending journey, I believed more power equaled better results. I invested in a high-end high-speed blender, thinking it would effortlessly crush ice and make silky nut butters. Turns out, without knowing the subtleties—like proper ingredient layering and speed adjustments—my fancy machine fell short. The biggest lesson? A powerful blender is only as good as the user’s understanding of its capabilities and techniques. Practice patience with speed changes and always scrape down ingredients to unlock its full potential.
3 Myths About Blender, Ice Crushing, Nut Butter, High Speed Blender, Smoothie Blender That Held Me Back
- More horsepower means better blending: Not always. Technique, blade design, and load management matter just as much.
- Pre-programmed settings are foolproof: They are helpful but understanding what’s happening behind the scenes leads to better control.
- Lumping ingredients is unavoidable: With proper layering and scraping, lumps can be eliminated for ultra-smooth results.
What Experts Won’t Tell You About Blender, Ice Crushing, Nut Butter, High Speed Blender, Smoothie Blender
Many pros keep a few secrets—blade geometry impacts how finely ingredients are processed, and load distribution prevents motor stress. I learned that selecting the right blade style and understanding speed variations can transform average blends into culinary masterpieces. Reading trusted guides and experimenting with technique often beats simply upgrading the machine. For example, practicing short bursts with small loads drastically improves ice crushing efficiency, saving your blender from unnecessary strain. Want to get ahead? Dive into these expert techniques to push your blending skills further.
My Essential Toolkit for Blender, Ice Crushing, Nut Butter, High Speed Blender, Smoothie Blender
- A quality silicone spatula: Essential for scraping down the sides and ensuring ingredients blend evenly. I’ve found it prolongs blade life and improves final texture.
- Cleaning brushes designed for blades and seals: They prevent residue buildup, which can impair performance and cause odors—trust me, regular care saves headaches later.
- Compressed air or small vacuum: Perfect for periodic motor and vent cleaning, especially if you blend frequently with ice and nuts.
- Trusted resource guides and videos: Learning from experts accelerates mastery. My favorite is this comprehensive guide, which covers everything from blade styles to user techniques.
Your Next Blender Adventure Starts Now
Equipped with the right knowledge, your blender becomes more than a gadget—it transforms into a culinary partner that elevates your healthy recipes. Remember, mastering blending techniques unlocks flavors and textures you never thought possible. Don’t hesitate—your perfect smoothie or nut butter is just a few skillful steps away. Ready to experiment and elevate your blending game? Share your experiences or ask questions below, and let’s keep the momentum going!
,