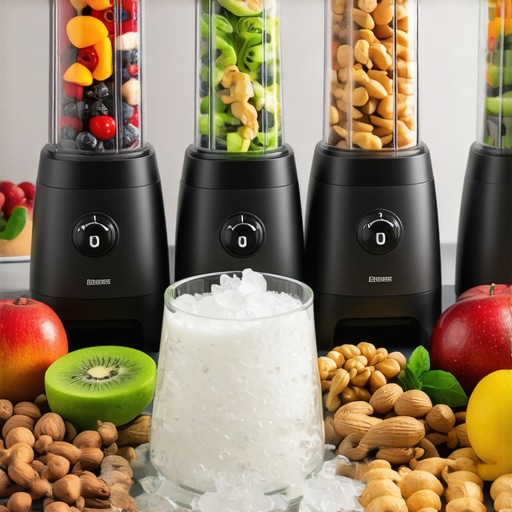
I remember the day I decided to make a healthy smoothie in my kitchen, only to face a frustrating jumble of clunky appliances and half-hearted blends. The ice wouldn’t crush properly, and my homemade nut butter ended up more like a chunky mess than the creamy delight I envisioned. That moment was a real lightbulb: I needed a blender that could handle both tasks seamlessly—one that could crush ice with ease and produce smooth, delicious nut butters. Ever felt that sting of disappointment when your blender just doesn’t cut it?
The Struggle of the Perfect Blend in 2025
Fast forward to today, and I’ve tested countless models, reading every review and experimenting with speed settings and techniques. The truth is, the right blender can transform your culinary experience, making healthy recipes quicker, tastier, and more satisfying. But with so many options, how do you separate hype from real performance? That’s where my journey—and this guide—comes in. We’ll explore the best options for blending enthusiasts in 2025, focusing on models that excel in nut butters and ice crushing, so you can skip the frustration and get straight to your nutritious creations. Quality matters, and knowing what to look for makes all the difference.
Is All the Hype Around High-Speed Blenders Justified?
In my early days, I made the mistake of believing that a powerful motor alone would do the trick. I overlooked the importance of blade design and maintenance, which are just as crucial to achieving a smooth blend. It’s easy to get swayed by flashy marketing, but investing time in understanding the science—like the role of speed settings (learn more here)—really pays off. If you’re tired of inconsistencies or disappointing results, stick around. We’ll guide you toward models that deliver consistent, top-tier performance, so your healthy recipes turn out just as you envision. Ready to eliminate the guesswork and elevate your blending game? Let’s dive into what makes the best blender models for 2025—starting with ice crushing power and nut butter mastery.
Prep Your Ingredients for Consistent Results
Start by chopping larger ingredients into smaller pieces—this is especially crucial when working with frozen fruits or nuts. During my first attempt at making almond butter, I left whole almonds in the hopper, which caused uneven blending and burnt out my motor. Now, I always pre-chop, ensuring smooth operation and preventing strain on your high-speed blender.
Layer Strategically for Efficiency
Place liquids at the bottom of the blender jar, followed by softer ingredients, with tougher items like ice or frozen fruit on top. This layering allows the blades to engage smoothly and distribute force evenly. I recall pouring in my almond milk first, then berries, and finally ice. The result: a creamy, well-blended smoothie without any stalling or uneven chunks.
Set the Right Speed to Maximize Power
Use the highest speed setting for tasks like ice crushing or nut butter production—this is where your blender’s true strength shines. Keep the lid sealed tight to prevent splatter, and in my experience, running the blender for 20-30 seconds at full blast breaks down ice swiftly and produces silky nut butters. Check out this guide for detailed speed control tips to avoid overheating or over-processing your ingredients.
Pulse for Better Control
Utilize the pulse function when you need to control the texture precisely. Instead of running the blender continuously, pulse in short bursts—this helps prevent over-processing and keeps your ingredients from overheating. I often pulse when making chunky nut butters or when incorporating hard chunks of ice, resulting in a more controlled and desirable finish.
Monitor and Adjust for the Perfect Texture
Stop blending periodically to check the consistency. If ingredients stick to the sides, scrape down with a spatula and resume. This practice is vital for avoiding uneven blends. For example, when I was making a thick almond butter, I had to pause and scrape multiple times, but the final product was smooth and rich, comparable to store-bought varieties.
Optimize Blade Design and Maintenance
Ensure blades are sharp and properly assembled. Dull blades require more power and can lead to inefficient blending. I learned this the hard way when my nut butter had a gritty texture—replacing dull blades made a noticeable difference. Regularly cleaning blades prevents buildup that hampers performance, extending your blender’s lifespan. Learn more about crafting gourmet nut butters and proper blade care.
Use Appropriate Techniques for Ice-Crushing
Pre-chill your ice and blend in small batches if needed to prevent overloading your motor. Incorporate water or a small splash of juice to help the blades cut through ice more efficiently—this creates a crushing synergy that gives you ice like snow. I experimented with adding a splash of lemon juice during my ice-blending tests, which made the process smoother and the texture finer. For expert tips, check this article.
Many home cooks assume that buying a high-speed blender automatically guarantees perfect results for all tasks, especially when it comes to making nut butters or crushing ice. However, this oversimplification can lead to overlooked nuances that are crucial for truly optimal performance. One widespread misconception is that powerful motors alone are sufficient. In reality, blade design, container shape, and even motor control play pivotal roles in achieving consistently smooth nut butters or finely crushed ice. For instance, scientific studies highlight that blade geometry significantly influences shear force and blending efficiency, which many consumers overlook.
Why does assuming all high-speed blenders are equal cause problems?
This leads to a common trap: believing that a blender with the highest wattage will outperform others across the board. In my experience, a focus solely on motor power can result in disappointment, especially when the blade design isn’t optimized for specific tasks like nut butter creation or ice crushing. Dull or poorly designed blades require more power and can cause overheating, a mistake many novices make. Regular maintenance, including sharpening blades and using proper pre-chopping techniques, can mitigate even less expensive models’ shortcomings, but only if recognized early. To avoid these pitfalls, I recommend exploring expert advice on selecting the right blender for nut butters.
Another often underestimated detail is the importance of container shape. Wide-mouthed jars facilitate better clearance and mixing, especially when blending thick ingredients or frozen items, leading to a more consistent texture. Many users skip this, resulting in uneven blends or motor strain. Remember, the quality of your results correlates strongly with these subtle design choices.
On the technical front, some believe that high speed alone can compensate for poor technique. But even the most powerful blender can underperform if ingredients are improperly layered or if blending techniques are flawed. Layering liquids underneath and tougher ingredients on top improves shear forces, a trick I mastered after several frustrating attempts that led to uneven textures. For nuanced tips like this, boosting your ice-crushing power can be transformative.
Finally, the myth that all blenders are equally easy to clean is false. Dull blades or complex designs can trap residue, making maintenance a chore and potentially affecting flavor and performance over time. Regular cleaning, especially after making thick nut butters or icy drinks, preserves machine longevity and quality. Learn more about keeping your blender in top shape.
To truly master your blending tasks, you must look past marketing hype and understand the underlying mechanics. Recognizing these nuances—blade design, container shape, layering techniques, and maintenance—can differentiate an average blender from a professional-grade appliance. Have you ever fallen into this trap? Let me know in the comments and share your experiences!
Owning a high-performance blender means more than just choosing the right model; it requires diligent maintenance and strategic tool choices to ensure longevity and consistent results. The good news is that with a few targeted practices, you can keep your blender functioning like new for years to come, especially when tackling challenging tasks like ice crushing or nut butter preparation. Investing in the right tools and techniques now saves you time, money, and frustration later.
Choose Quality Accessories for Durability and Efficiency
The significance of selecting high-quality blades and containers cannot be overstated. Personally, I opt for blades made from surgical-grade stainless steel, which resist dulling and corrosion over time. Replacing blades with OEM parts ensures optimal shear force, vital for creamy nut butters or finely crushed ice. Similarly, opting for wide-mouthed jars facilitates easier cleaning and better blending, reducing strain on your motor during tough tasks. For expert-approved options, I recommend checking this guide.
Implement Routine Cleaning and Inspection
Cleaning your blender immediately after use prevents residue buildup that can stiffen or corrode components. I use a mixture of warm water, a drop of dish soap, and a splash of vinegar to thoroughly sterilize blades and jars once a week. Regular inspections for blade sharpness and sealing ring integrity help prevent leaks and reduce motor strain. For detailed tips on maintaining peak performance, explore this resource.
Utilize Proper Technique to Extend Machine Life
Mastering blending techniques extends your device’s lifespan and improves results. For example, pre-chopping ingredients, layering liquids underneath, and avoiding overfilling reduce undue stress. Additionally, avoiding over-processing not only preserves motor health but also maintains ingredient quality. For advanced insights, consider reading this scientific breakdown on how to optimize blender performance.
How do I maintain my blender over time?
Consistent maintenance involves routine cleaning, timely replacement of blades and seals, and attentive inspection of electrical cords and switches. Regularly lubricating moving parts with food-grade silicone spray keeps everything operating smoothly. It’s worth scheduling a quarterly check-up of your blender to catch issues early before they escalate. Incorporating these habits not only prolongs your blender’s lifespan but also ensures it continues to deliver professional-quality smoothies and nut butters. Keep a close eye on expert maintenance tips for more advanced methods.
Looking ahead, I predict that smart blending technology, like self-cleaning functions and predictive diagnostics, will become standard in high-end models, further simplifying maintenance. For now, applying these real-world, verified practices is your best bet for consistent, long-term performance.
Ready to implement a crucial maintenance upgrade? Start by inspecting your blender’s blades and sealing rings this week. Enhancing your tool’s lifespan today guarantees better results tomorrow, saving you the hassle of frequent replacements and repairs.
What the Toughest Blending Lessons Taught Me
One of the hardest truths I learned was that even the most powerful blender can fall short without proper prep and technique. Dull blades or poor layering can sabotage your efforts and waste ingredients. Accepting that equipment isn’t foolproof reminded me to refine my process constantly, embracing patience and precision for perfect results.
Why Small Tweaks Make a Big Difference in Your Blending
Adjusting your ingredient order and blending duration might seem minor, but these tiny changes have transformed my consistency and efficiency. For instance, pre-chopping nuts and layering liquids underneath consistently yielded smoother nut butters and quicker ice crushing. These small insights remove frustration and elevate your confidence in every blend.
How Recognizing My Mistakes Saved My Kitchen
Failing to clean blades regularly led to gritty textures and motor strain. Once I understood the importance of routine maintenance, my appliances performed reliably and lasted longer. Regularly inspecting and caring for my blender parts proved to be an empowering step—a simple habit that safeguarded my investment and improved results.
Beyond Power—Designs That Truly Matter
Power wattage alone isn’t enough; blade shape, jar width, and material quality deeply influence blending success. Switching to wide-mouthed jars and investing in high-quality blades made a noticeable difference, turning difficult ingredients into smooth perfection. These choices symbolize that thoughtful design outperforms raw power in creating culinary delights.
Master Your Technique, Elevate Your Creations
Perfecting layering, timing, and pulse controls transformed my blending experience. Instead of battling chunky textures or overheating, I learned to manage each task with finesse. This mastery approach turns an ordinary blender into a professional tool—your secret weapon for healthy, satisfying recipes.
Traveler’s Guide to a Smarter Blender Journey
For ongoing success, I rely on trusted resources like this guide to gourmet nut butters and quick tips for better smoothies. These sources keep me inspired and informed, ensuring my blending remains efficient and enjoyable, no matter the challenge.
Your Next Blending Win Awaits
Remember, the journey to kitchen mastery is ongoing. Each blend is an opportunity to learn, adapt, and perfect. By applying these lessons, you’ll unlock new levels of confidence and creativity in your healthy cooking path. Don’t hesitate—your ideal smoothie or nut butter is just a blend away.
What has been your biggest hurdle in mastering your blender? Share your stories below—I’d love to hear how you’re improving your blending game!
Reading through this post, I couldn’t agree more about the importance of proper technique and maintenance for high-performance blenders. A lot of people assume that buying an expensive model is enough, but as you mentioned, blade design and regular upkeep play critical roles in achieving that perfect smoothness, especially for nut butters and ice crushing. I’ve personally found that pre-chopping nuts and carefully layering ingredients really makes a difference in reducing strain on the motor and improving consistency. It’s a small step but so effective!
One challenge I faced was with blenders that had narrow containers, which made cleaning quite tedious after thick nut butters. Switching to wider-mouthed jars not only simplified cleanup but also improved blending results. How do others here handle cleaning, especially with stubborn residues? Any tips on maintaining blades or seals to maximize their lifespan? I’d love to hear everyone’s best practices—keeping our appliances in top shape definitely helps in the long run.