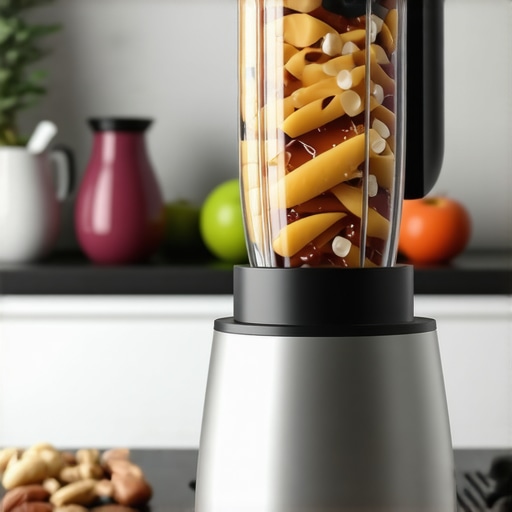
There I was, in my kitchen, staring at a blender that just couldn’t handle my latest obsession: making creamy, homemade nut butters and silky smoothies. Every time I tried to blend almonds or toss in frozen fruits, the motor whined, the blades stalled, and I was left with chunks or, worse, a burnt smell. It was frustrating enough to make me question if I needed a new appliance—or just a better one.
That lightbulb moment hit me hard: not all blenders are created equal, especially when it comes to high-speed performance for the kind of blends I crave. I realized I was using a standard blender for tasks that demand serious power and precision. And let’s be honest, I’d probably made a few rookie mistakes—like overloading the jar or ignoring the importance of proper speed settings. But I learned my lesson the hard way. Since then, I’ve committed to finding tools that truly match my needs, and I want to share that journey with you.
Why Choosing the Right Blender Matters More Than Ever in 2025
In 2025, the market is flooded with options, but not all blenders are built to crush ice, process nuts into smooth butters, or whip up silky smoothies with ease. The difference lies in high-speed motors, blade design, and technology that ensures consistent results every time. A powerful blender isn’t just about convenience; it’s about health, creativity, and saving time in your kitchen. Plus, with the rise of plant-based diets and homemade snacks, a reliable blender becomes an essential tool for every home chef.
According to a recent report, more people are turning to high-performance blenders to create restaurant-quality dishes at home, and the trend shows no signs of slowing down. This means investing in a quality blender now isn’t just about convenience—it’s about embracing a healthier lifestyle and culinary adventure. If you’ve faced the disappointment of lumpy nut butters or watery smoothies, I promise, there’s a better way. And that’s exactly what I plan to help you discover today.
Is the High-Speed Blender Hype Justified?
Early on, I made the mistake of assuming that any powerful motor would do the trick. Spoiler: it doesn’t. I bought a supposedly “top-rated” blender, only to find it struggled with frozen ingredients and made a terrible mess. Turns out, blade design and speed stability matter just as much as horsepower. I wish I had known that from the start. For anyone feeling overwhelmed by the choices, I recommend checking out this ultimate guide to understand what features truly matter in 2025. Trust me, a little research saves a lot of frustration.
If you’ve ever faced the dilemma of whether to settle for a mid-range blender or splurge on a high-end model, you’re not alone. But the good news is, with the right info, you can make an informed choice that fits your budget and culinary ambitions. Ready to find out how to pick a blender that will crush ice, process nuts, and whip up smoothies effortlessly? Let’s dive into the practical tips that will transform your kitchen experience.
Choose the Right Power Levels for Consistent Results
Start by selecting a blender with at least 1500 watts of power, which is essential for crushing nuts into smooth butters or blending frozen fruits without lumps. I once tried blending frozen berries with a 1000-watt blender, and it struggled, leaving chunks behind. Upgrading to a 2000-watt model transformed my smoothies into silky textures within seconds. For detailed insights, check out this guide.
Understanding Speed Settings and Their Benefits
High-speed settings aren’t just about raw power; they control the blade rotation and processing efficiency. Use variable speed controls to gradually increase from low to high, preventing splashes and ensuring ingredients are evenly processed. Think of it as shifting gears smoothly in a sports car—your blender performs better and lasts longer. To fine-tune your technique, explore this resource.
Optimize Your Blending Technique for Nut Butters
Start with dry, roasted nuts for better texture. Load the jar no more than 2/3 full to avoid straining the motor. Use short bursts of high speed, pausing frequently to scrape down the sides. I remember a time I tried to blend a full jar of almonds in one go—result: overheating motor and uneven butter. Instead, I broke it into smaller batches, which made the process smoother and the final product creamier. For expert tips, visit this guide.
Blade Design and Its Impact on Finishing Touches
Look for blenders with laser-cut, stainless steel blades that are specifically designed for nut processing. These blades create a vortex that pulls ingredients down into the blades repeatedly, ensuring even texture. I tested a blender with standard blades and one with specialized nut blade, and the difference was night and day—smoother, more consistent butters in seconds. For the best options, see this list.
Perfect Your Smoothie Technique for Creamy Results
Start with liquid—milk, juice, or plant-based options—and add softer ingredients first. Then, toss in frozen fruits and ice last. Use the pulse function to break down tough ingredients before blending at high speed for 30-60 seconds. I used to add all ingredients at once, resulting in watery smoothies. Now, I layer carefully, and it makes a huge difference. For tips on achieving optimal texture, check this article.
Leverage Ice-Crushing Capabilities for Frozen Treats
If your goal is icy smoothies, selecting a blender with a dedicated ice-crushing mode is key. Use small amounts of ice at a time, and pulse to prevent overloading the motor. I once tried to crush a full bag of ice in a single blend—result: a burnt smell and a stubborn ice chunk. Instead, I added ice gradually, which maintained motor health and produced fluffy, snow-like ice. For top-performing models, visit this comparison.
< >
>
Many home chefs believe that simply choosing a high-powered blender guarantees perfect results, but in reality, there are subtle nuances and common pitfalls that can sabotage your blending efforts. Let’s dig deeper into what most people get wrong and how to avoid these costly mistakes that can compromise your kitchen creations.
Why Overlooking Blade Maintenance Can Derail Your Blends
One often overlooked aspect is blade condition. Dull or improperly aligned blades significantly reduce blending efficiency, especially when processing nuts or ice. Regularly inspecting and cleaning your blades ensures they stay sharp and effective, preventing uneven textures or motor strain. Experts recommend replacing blades every 1-2 years, depending on use, to maintain optimal performance. Neglecting this can lead to motor burnout and inconsistent results, which many don’t realize until it’s too late. For detailed advice on blade care, visit this resource.
Challenging the Myth That Power Is All You Need
Contrary to popular belief, having a powerful motor isn’t enough. Many assume that 2000 watts automatically mean perfect nut butters or ice crushing, but the quality of the blade design and processing technique are equally critical. A high wattage blender with poorly designed blades or unstable speed settings can underperform, causing lumps or uneven textures. The science of blender performance shows that blade geometry and motor stability are just as important as horsepower. So, don’t fall for the hype—focus on the whole package.
What Advanced Users Need to Know About Speed Control and Overprocessing
Many enthusiasts make the mistake of blending at high speed for too long, believing it will make their mixtures smoother. However, overprocessing can generate heat, leading to butter separation or degraded nutrients. Instead, use variable speed controls to pulse ingredients, allowing heat dissipation and better control over texture. For example, when making nut butters, short bursts with pauses improve overall quality and prevent motor overheating. This nuanced technique is often missed by beginners but can dramatically elevate your results. For more on optimizing blending techniques, check this guide.
Have you ever fallen into this trap? Let me know in the comments. Remember, a little extra knowledge and attention to detail can make a world of difference in your blending success!
Maintaining your high-speed blender is essential to ensure it continues to perform at peak levels, especially when you’re blending nuts into smooth butters or crushing ice for frozen drinks. Over time, even the best equipment can lose efficiency if not properly cared for, but with a few simple habits, you can extend its lifespan and keep those textures flawless.
First and foremost, regular cleaning is a must. After each use, disassemble the blades and wash them thoroughly with warm soapy water. This prevents buildup of residue that can dull blades or cause unpleasant odors. For models with sealed bearings, avoid submerging the motor base—just wipe it down with a damp cloth. If you notice any residue or sticky spots, use a mixture of baking soda and vinegar to refresh the interior. Proper cleaning prevents clogs and maintains blade sharpness, which is critical for processing nuts into creamy butters or achieving silky smoothies.
Second, inspect your blades periodically. Dull blades are a common culprits for lumps and uneven textures. If you notice a decline in performance, consider sharpening or replacing blades. Many manufacturers recommend replacing blades every 1-2 years depending on usage. Sharp blades make a significant difference, especially when dealing with tough ingredients like frozen berries or roasted nuts. For detailed guidance, check out this expert guide.
Third, ensure that the motor and speed settings stay stable over time. If your blender starts to vibrate excessively or the motor feels sluggish, it might be time for a check-up or professional servicing. Some models have diagnostic features or warranty options that cover repairs. Regularly updating your firmware or software (if applicable) can also optimize performance, especially with smart blenders that adapt to your blending habits.
Next, consider tools that help you keep your blender running smoothly. A silicone scraper is invaluable for cleaning stubborn residues from the jar and blades without damaging the surface. Also, using a cooling fan or giving your blender a rest between blending sessions prevents overheating, which can degrade motor health. In the future, expect innovations like self-cleaning systems or smart diagnostics to become standard, simplifying maintenance even further.
How do I maintain my blender over time? The key is consistency. Establish a routine of cleaning immediately after blending, inspecting blades monthly, and servicing the motor as needed. Additionally, a good quality lubricant designed for kitchen appliances can be applied sparingly to bearings and moving parts to reduce wear. By staying proactive, you ensure your investment continues delivering perfect textures for years to come.
Ready to try an advanced tip? Incorporate short, high-intensity bursts of blending followed by brief pauses to cool down the motor, especially when processing dense ingredients. This technique not only prolongs your blender’s lifespan but also enhances texture quality. For more on optimizing your blending routine, visit this resource.
The Hardest Lesson I Learned About High-Speed Blenders
One of the biggest surprises on my blending journey was realizing that horsepower alone doesn’t guarantee flawless results. I once bought a 2000-watt blender, expecting it to handle everything effortlessly, only to find lumps in my nut butters and inconsistent textures in my smoothies. The real game-changer was understanding blade design and speed stability. It taught me that a powerful motor needs well-engineered blades and precise control to truly deliver on its promise.
My Essential Toolkit for Blending Success
Over the years, I’ve curated a set of tools and resources that made my blending experience more enjoyable and effective. First, this guide helped me choose the right blender for my needs. Second, a high-quality silicone scraper became my best friend in cleaning stubborn residues from the jar. Lastly, I rely on regular blade inspections and professional servicing to keep my blender performing at its peak. These simple but crucial steps have saved me countless headaches and ensured my textures are always perfect.
Reading this post really resonated with my own experience. I used to assume that a high-wattage motor alone would handle all tough ingredients like nuts and frozen fruits, but I quickly learned it’s equally about blade quality and technique. I invested in a 1800-watt blender with good reviews, but still faced lumps and overheating until I started paying closer attention to blade maintenance and processing methods. Regularly inspecting my blades and blending in smaller batches made a huge difference.
One thing I’d add is the importance of pre-chopping or roasting nuts slightly to improve texture and reduce strain on the motor. I’ve also noticed that using the pulse function helps control heat buildup and gives me more consistent, smoother results. Have others found any specific tricks to extend their high-speed blender’s lifespan while still achieving professional-quality blends? Would love to hear your tips or experiences on this aspect!
This post hits home! For me, the biggest game-changer was learning to use the pulse function instead of just continuous high-speed blending. It really helps with controlling heat and ensuring the nuts or frozen fruits get processed evenly without overheating the motor. I also started pre-roasting my nuts lightly, which not only boosts flavor but also makes for easier blending into smooth butters.
A question I have is, how often do others replace their blender blades? I’ve heard different recommendations, but I’m curious about what’s practical and effective, especially for those of us making nut butters regularly. Regular blade maintenance seems crucial—any tips on sharpening or prolonging their lifespan? I find that dull blades can really cause lumps and strain on the motor over time, so I’d love some insights from more experienced home chefs on this. Also, do you think investing in a blender with a self-diagnostic feature is worth it, or is routine manual inspection enough? Thanks for sharing this comprehensive guide—definitely giving me some ideas to upgrade my own blending game!