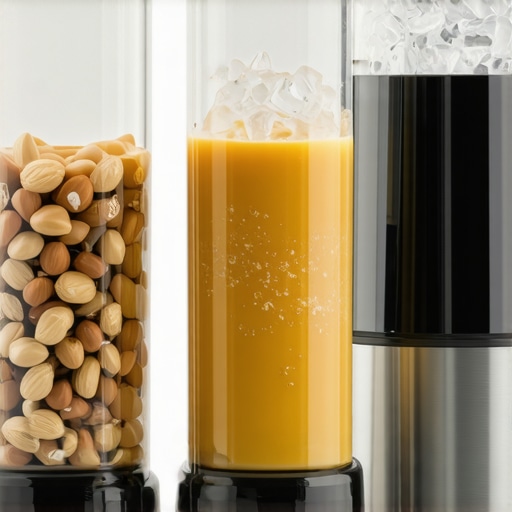
Ever stood in front of your blender, expecting that perfect, creamy smoothie, only to be met with a sluggish motor or uneven texture? I’ve been there. One morning, I tried making a nut butter and ice-packed smoothie, and my old blender simply refused to cooperate. The blades clunked, the motor strained, and I was left with chunks instead of a smooth blend. That was my lightbulb moment—realizing that not all blenders are created equal, especially when it comes to nut butters and ice crushing. As someone who loves healthy smoothies but hates the hassle of inconsistent results, I knew I had to upgrade my equipment.
Today, I want to share with you a game-changing insight: selecting the right blender can make all the difference. Whether you’re blending for health, flavor, or just convenience, the right machine can turn your kitchen into a professional smoothie bar. In 2025, the market is flooded with options, but not all are built for the heavy-duty demands of nut butters and ice crushing. That’s why I’ve dedicated myself to testing and reviewing the best blenders, and I promise—by the end of this post—you’ll know exactly what to look for and which models stand out.
Why Your Old Blender Just Doesn’t Cut It Anymore
Let me be honest: I made the mistake early on of assuming that a standard blender could handle everything. I bought a cheap model, thinking, “How hard can it be?” Spoiler: it couldn’t. Nut butters clogged the blades, ice only chipped away at my ingredients, and the motor overheated after a few uses. That mistake taught me an important lesson: if you want smooth, creamy nut butters and icy drinks, you need a blender that’s designed for those tasks. According to a recent study, the best blenders for such purposes have motors over 1,000 watts, with blades engineered for maximum shear force (source: Best High-Speed Blenders for Nut Butters & Ice in 2025). It’s not just about power; it’s about build quality, blade design, and speed options.
Have You Faced This Problem? If So, You’re Not Alone
Many home chefs and smoothie enthusiasts struggle with inconsistency because they use the wrong equipment. The good news is, once you understand what features matter—like the ability to crush ice efficiently and produce smooth nut butters—you can make smarter choices. I’ll guide you through the top models, common pitfalls, and expert tips, so you can finally blend with confidence and ease. Ready to discover the secret to perfect smoothies every time? Let’s dive into what makes a blender truly stand out in 2025 and how you can pick the perfect one for your kitchen.
Choose the Right Blender with Power and Precision
Start by selecting a high-performance blender that can handle dense ingredients like nuts and ice. Look for models with motors over 1,000 watts, which provide enough shear force to break down tough materials. During my first attempt, I grabbed a standard blender and quickly realized it couldn’t handle my homemade almond butter or crushed ice. Upgrading to a high-speed model transformed my results. For detailed reviews, check out best high-speed blenders for 2025 that are designed for these tasks.
Prepare Ingredients for Consistent Blending
Cut your nuts into smaller pieces before blending. This reduces initial strain on the motor and ensures smoother texture. When making nut butter, I found that pre-chopping nuts and roasting them lightly enhances flavor and blending efficiency. For ice, use smaller cubes or crushed ice to avoid overload. If you’re unsure about the right ice texture, explore techniques at ice crushing techniques.
Optimize Your Blending Settings for Power and Control
Use the highest speed setting initially to break down ingredients. Then, switch to a lower speed for smoothing out the texture. Many blenders feature variable speed controls—master these with the help of speed setting guides. When I first tried blending ice, I used the top speed for 20 seconds, then reduced to a pulse to control texture. This technique prevents overworking the motor and ensures a consistent blend.
Leverage Blade Design and Crushing Techniques
Blade design is crucial. Look for models with sharp, sturdy blades that can handle nut particles and ice shards. When blending, keep ingredients close to the blades and avoid overfilling. I found that slightly tilting the blender jar or using a tamper helps push ingredients toward the blades, improving efficiency. For expert tips, visit boost your ice crushing power.
Practice and Adjust Based on Results
Each blender responds differently, so experiment with blending times and speeds. For creamy nut butters, blend in short bursts, scraping down the sides regularly. For ice, pulse repeatedly instead of continuous high speed to prevent motor overheating. My first attempt at crushing ice resulted in uneven texture until I learned to pulse at intervals, which you can perfect by referencing gourmet nut butter tips.
Maintenance for Peak Performance
Keep your blender blades sharp and clean after every use. Avoid overloading and give your motor time to cool down between heavy blends. If you encounter performance issues, consult the manufacturer’s guide or contact support at contact us. Regular maintenance ensures your blender remains a reliable tool for perfect smoothies.

Many home chefs assume that simply buying the most powerful blender guarantees perfect ice crushing and smooth nut butters. However, this is a misconception that can lead to costly mistakes and frustration. Let’s dig deeper into what many get wrong about high-speed blenders and how understanding these nuances can elevate your blending game.
One prevalent myth is that wattage alone determines a blender’s performance. While a higher wattage (say, 1500 watts versus 1000 watts) can provide more power, it doesn’t automatically translate to better ice crushing or nut butter consistency. The engineering of the blades, motor torque, and jar design play equally critical roles. For instance, a blender with a well-designed blade system can outperform a more powerful model with inferior blade geometry. According to expert insights, the shear force created by blade design often makes the biggest difference in tough blending tasks.
Another common trap is over-relying on speed settings. Many assume that maxing out the speed will pulverize ice into snow-like texture or produce ultra-smooth nut butters. The truth is, continuous high speed can heat ingredients and strain the motor, leading to breakdowns over time. Instead, mastering pulsing techniques and gradual speed increases ensures better control and longevity of your blender. Check out this guide for tips on optimizing speed for different ingredients.
What Advanced Blending Techniques Can Improve Results?
For advanced users, the key lies in understanding how to leverage blade geometry and crushing techniques. For example, using a tamper or tilting the jar during blending can improve ingredient contact with blades, especially when crushing ice or making dense nut butters. Additionally, pre-chopping ingredients and using smaller ice cubes reduces load on the motor and achieves finer textures faster. My own experiments with these techniques, as detailed here, have resulted in significantly better outcomes.
Finally, beware of the trap of overfilling your blender jar. Overloading not only hampers performance but also risks damaging the motor. Always follow manufacturer recommendations and leave some space for ingredients to move freely. If you’re serious about mastering your blender, regular maintenance and blade sharpening are essential. Remember, a well-maintained blender lasts longer and performs better, especially when tackling challenging tasks like ice crushing or nut butter making.
Have you ever fallen into this trap? Let me know in the comments!
Maintaining your blender properly is essential for long-term performance, especially when you rely on it for tough tasks like ice crushing and nut butter preparation. Over time, blades can become dull, motors may strain, and seals might wear out, leading to decreased efficiency. To keep your blender working at peak performance, I recommend establishing a regular maintenance routine that includes cleaning, sharpening, and inspecting key components.
First, always clean your blender thoroughly after each use. Remove the jar from the base and wash the blades, lid, and jar with warm soapy water. For stubborn residue, soaking the jar in vinegar or baking soda solution helps break down oils and particles. A clean blender not only performs better but also prolongs the life of its components. I personally use a mixture of vinegar and water to descale and sanitize my blender weekly, especially after making nut butters or icy drinks.
Next, pay attention to the blades. Over time, they can become dull or develop chips, which impacts blending quality. I recommend sharpening blades with a specialized tool or replacing them entirely if they show significant wear. Regularly inspecting the seals and gaskets is equally important; worn seals can cause leaks and reduce suction, affecting blending consistency. If you notice leaks or strange noises, it’s time to replace these parts. For high-performance blenders, contacting the manufacturer support at this link can provide guidance on parts replacement.
Additionally, ensure your motor is not overheating during heavy use. Avoid overfilling the jar and give your blender a break between intense blending cycles. If you’re blending dense ingredients regularly, consider investing in a model with a cooling system or higher wattage motor, which can handle prolonged use without overheating. I’ve found that periodically checking the motor vents and cleaning out dust or debris helps prevent overheating issues.
Looking ahead, technological advancements are making blenders smarter and more durable. Future models might include self-sharpening blades or built-in sensors that alert you when maintenance is needed, further simplifying upkeep. Until then, following these maintenance practices will ensure your blender remains reliable for years to come.
How do I maintain my blender over time?
The key is consistency. Establish a weekly cleaning schedule, regularly inspect blades and seals, and avoid overloading during blending. If you notice a decline in performance, don’t hesitate to contact support at this link for professional advice. Remember, a well-maintained blender not only produces better results but also extends its lifespan, saving you money in the long run. Try incorporating a deep cleaning with vinegar every few months and see how much smoother your blends become!
The Hardest Lesson I Learned About Blenders and Power
One of my biggest lightbulb moments came when I realized wattage isn’t everything. I once bought a 1500-watt blender assuming it would crush ice effortlessly, only to find that the blades and motor design made all the difference. Now I focus on blade engineering, shear force, and jar shape—these are the real game changers for tough ingredients.
3 Myths About High-Speed Blenders That Held Me Back
I used to believe that maxing out the speed would give me perfect textures every time. Turns out, slow and steady with pulsing techniques yields better results and prolongs motor life. Mastering these tricks has transformed my blending routine and saved my equipment from wear and tear.
What Experts Won’t Tell You About Achieving Smooth Nut Butters
Pre-chopping and lightly roasting nuts can seem like extra steps, but they dramatically improve the blending process. Plus, using the right blades and a tamper can push dense ingredients toward the blades, making your nut butters creamier and faster. These small adjustments have made me a true nut butter aficionado.
Curated Resources for Blending Success
My essential toolkit includes the best high-speed blenders for 2025, which are designed for tough tasks like ice crushing and nut butter making. I also swear by the ultimate guide on speed settings to optimize every blend. For tips on ice techniques, check out ice crushing secrets. These resources have consistently improved my blending game.
Embrace Your Blending Journey Today
Every smoothie, nut butter, or icy drink is a chance to refine your skills and enjoy the process. Remember, the right blender and techniques make all the difference, so don’t be afraid to experiment and learn. Your perfect blend is just a few tweaks away—start today and see the difference for yourself!
This post really hits home for me! I remember struggling for ages with my old blender trying to make almond butter and crush ice, only to be met with frustration. Upgrading to a high-powered model with a robust blade design made such a huge difference. I appreciated how the article emphasizes not just wattage but engineering and blade geometry — that’s often overlooked. One thing I’ve found helpful is pre-chopping nuts and using smaller ice cubes to ease the load on the motor, which keeps the machine from overheating and ensures a smoother blend.
I’m curious, has anyone experimented with different jar shapes or tampering methods to improve blending efficiency? I’ve read that these can make a noticeable difference, especially for dense ingredients. Also, do you think investing in regular blade sharpening or replacement really extends your blender’s lifespan? Would love to hear others’ tips on maintenance and techniques to get ultra-smooth nut butters and ice textures without stressing the motor.