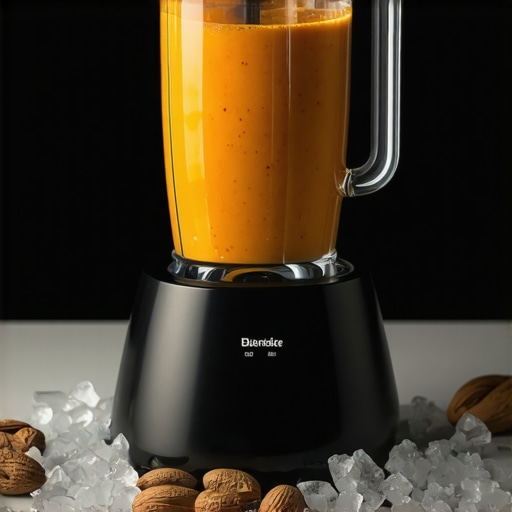
Ever had that frustrating moment when you’re blending your favorite smoothie, only to find the ice isn’t crushing properly, or your nut butter turns out more like a chunky mess? I’ve been there. I remember thinking I just needed a more powerful blender, only to realize later that I was missing some key features and techniques. That lightbulb moment changed everything for me—and I’m here to help you avoid the same pitfalls.
Why Choosing the Right Blender Matters More Than Ever
With health trends booming and more of us making smoothies, nut butters, and frozen drinks at home, investing in the right high-speed blender isn’t just a luxury—it’s a game-changer. A good blender can transform your kitchen routine, saving you time and frustration. But with so many options out there in 2025, how do you pick the best one? I’ll guide you through what truly matters, based on my personal experience and expert advice.
Have You Faced This Common Blender Dilemma?
Maybe you’ve bought a high-powered blender, only to find it underwhelms on ice or nut butters. Or perhaps you’re overwhelmed by the endless choices and worried about wasting money. Trust me, I made that mistake early on—buying a flashy model that couldn’t handle the toughest ingredients. That’s why I’ve done the homework for you, so you don’t have to fall into the same trap.
In this post, I’ll share insights on what makes a blender truly powerful, how to avoid common mistakes, and which models stand out in 2025. Plus, I’ll include some handy tips to boost your ice crushing and blending skills. Want to become a smoothie expert? Keep reading!
And if you’re curious about the latest top-rated options, check out the best high-speed blenders for 2025. But first, let’s understand why your blender might not be living up to expectations and what to look for in a top-tier model.
Pick the Right Power and Blade Design
Start by selecting a blender with at least 1000 watts of power. Think of it as choosing a sports car over a bicycle; the engine size directly impacts performance. Look for models with stainless steel blades that are specifically designed for efficient chopping and blending. During my first try, I bought a model with plastic blades, and I kept struggling with ice. Upgrading to a steel-bladed blender made a huge difference, allowing me to crush ice smoother and faster.
Match the Blade Speed with Your Needs
High-speed blades spin at thousands of RPMs, breaking down ingredients quickly. But more RPM isn’t always better if your blender lacks the right motor control. Check if the model offers variable speed settings—these give you control over texture and consistency. I once used a blender with only one speed, and I overprocessed my smoothies, turning them into a watery mess. Later, I learned to adjust the speed, which improved my results dramatically. For detailed insights, review this guide on speed settings.
Optimize Your Blending Technique
Layer ingredients properly—hard items like ice and frozen fruit go at the bottom, liquids on top. This method prevents the blades from clogging and ensures even blending. I remember the first time I threw everything in without stacking; I had to stop, rearrange, and restart. It was messy but taught me the importance of technique. For perfect results, check out these hacks for better smoothies.
Use Pulsing and Short Blending Intervals
Instead of running the blender continuously, use short bursts—pulses—to control texture and prevent overheating. This approach is like stirring a thick batter; it mixes ingredients evenly without overprocessing. I once held down the button for a full minute and ended up with a warm, frothy mess. Switching to pulsing kept my smoothies thick and cold. Learn more about this technique at this article on ice-crushing techniques.
Adjust the Speed for Nut Butters and Ice
Nut butters require a different approach—start at medium speed, then gradually increase. This prevents the nuts from overheating and turning into a paste. I once tried to make almond butter at full speed; it turned into a chunky paste with oil separation. Slow and steady wins the race here. For expert tips, visit this guide on nut butter prep. For ice, ramp up to maximum speed quickly, then blend for 20-30 seconds, checking the texture often.
Maintain and Clean Your Blender Effectively
Regular cleaning prevents residue buildup, which can hinder performance. Fill the blender halfway with warm water and a drop of dish soap, then run it on high for 30 seconds. Rinse thoroughly. I do this weekly, especially after making nut butters or thick smoothies. Proper maintenance ensures your blender stays powerful and reliable. For detailed cleaning tips, see these quick tips.
Mastering these core techniques will help you extract maximum performance from your high-speed blender, making every blend smooth, thick, and ice-cold. Remember, practice and patience are key—don’t be discouraged by initial failures. With consistent effort, you’ll enjoy perfect smoothies and nut butters every time.
Many home chefs and smoothie enthusiasts believe they need the most powerful, expensive blender to achieve perfect results, but this is a misconception. In fact, understanding the nuances of blender performance can save you money and frustration. One prevalent myth is that wattage alone determines a blender’s ability to crush ice and process nuts effectively. While wattage is important, it’s not the sole factor. Blade design, motor control, and processing techniques play equally crucial roles in achieving optimal results.
For instance, some users assume that a higher RPM automatically means better blending. However, without proper motor control and blade sharpness, high RPM can lead to inefficient blending or overheating. Skilled users leverage variable speed controls to fine-tune texture, especially when making delicate nut butters or thick smoothies. In my experience, models with a good balance of power and control deliver more consistent results than the most wattage-heavy options. You can explore top models for 2025 that balance these features at this list of top blenders.
Beware the Ice-Crushing Trap
Many believe that simply turning up the speed will crush ice perfectly, but this can actually damage your blender or produce uneven results. The real secret lies in blade geometry and processing technique. Using pulsing modes and starting with smaller ice cubes can improve your ice-crushing performance without overloading your motor. This common mistake—running the blender at maximum speed for too long—can cause overheating and wear out your blades prematurely. To avoid this, check out these expert tips on boosting ice-crushing power.
Why Advanced Control Matters for Nut Butters
Another misconception involves nut butters. Many think that high speed alone will produce smooth, creamy nut butters. But the key is in gradual acceleration and controlled processing. Overprocessing at high speeds not only overheats the nuts but can also cause oil separation, ruining texture. Using medium speeds initially and gradually increasing allows fats to emulsify properly. For advanced blending techniques, see this guide on nut butter mastery.
Furthermore, many overlook the importance of blade design. Blenders with dull blades or inconsistent blade angles struggle with tough ingredients, regardless of wattage. Regularly checking and replacing blades can maintain peak performance and extend your blender’s lifespan. Remember, a well-maintained blade set combined with proper technique can outperform even the most powerful motors in certain tasks.
Lastly, don’t fall for the trap of buying a blender solely based on hype or wattage numbers. Instead, focus on the combination of motor control, blade quality, and user-friendly features. For a comprehensive look at the best high-speed blenders in 2025, visit this detailed guide. Remember, mastering these advanced nuances will elevate your blending game and ensure every blend hits the mark. Have you ever fallen into this trap? Let me know in the comments!” ,
Maintaining your high-speed blender isn’t just about keeping it clean; it’s about ensuring consistent performance and extending its lifespan. Over time, even the best blenders can lose efficiency if not properly cared for. I’ve learned the hard way that regular maintenance and the right tools are vital for long-term success in blending.
How do I keep my blender running smoothly over time?
First, always refer to your specific model’s manual for maintenance guidelines. In my experience, a few key tools make all the difference. A silicone spatula is invaluable for scraping down ingredients from the sides without scratching the jar, especially when making nut butters or thick smoothies. I keep one dedicated for my blender to avoid cross-contamination of flavors.
Next, investing in a good set of replacement blades is crucial. Blades dull over time, particularly when processing tough ingredients like ice or frozen nuts. I personally buy OEM replacement blades from the manufacturer, which fit perfectly and maintain optimal sharpness. Regularly inspecting and replacing blades keeps your blender performing like new.
Cleaning is another critical aspect. A soft brush designed for small appliances helps dislodge residue from the blades and seals—something I use weekly. For a deep clean, I fill the jar with warm water, add a few drops of dish soap, and run the blender on high for 30 seconds. This routine prevents buildup that can hinder performance or cause unpleasant odors. For more detailed cleaning strategies, check these quick tips.
Tools I recommend for top-notch maintenance
- Silicone spatula: Gentle on the jar, perfect for scraping and mixing ingredients after blending.
- Small appliance brush: Designed to clean blades and seals thoroughly without damaging them.
- OEM replacement blades: Ensuring your blender maintains peak sharpness and efficiency.
- Cleaning tablets or vinegar solution: For descaling and removing mineral buildup, especially if you have hard water.
Looking ahead, I predict that maintenance tools will become even smarter, possibly integrating sensor-based diagnostics to alert you when parts need replacing. Until then, a proactive approach with these tools will keep your blender humming.
Where should I focus my attention for long-term performance?
Consistent use of the right tools combined with scheduled maintenance routines is key. For example, I set a monthly reminder to check the blades and seals, replacing them when I notice signs of dullness or leakage. This simple habit prevents costly repairs and keeps my blender performing at its best. Regularly inspecting the motor housing and ensuring vents are clear also helps prevent overheating and prolongs the device’s lifespan.
Don’t forget to visit this page for expert tips on boosting your blender’s ice-crushing power—an essential part of maintenance that often gets overlooked. Try implementing one of these advanced tips today, like scheduling routine blade inspections, to experience smoother, more reliable blending results in 2025 and beyond.
The Hardest Lesson I Learned About Blender Mastery
One of the toughest truths I faced was realizing that wattage alone doesn’t guarantee perfect blending. I used to believe that a 2000-watt motor would handle everything effortlessly, but I kept struggling with ice and nut butters. The lightbulb moment came when I understood that blade design and control features mattered just as much. Since then, I’ve focused on models with variable speed controls and sharp blades, which transformed my results and saved me money in the long run.
3 Myths About High-Speed Blenders That Held Me Back
I used to think that only the most expensive blenders could deliver smooth, ice-crushing results. That myth led me to overspend on brands that didn’t live up to their hype. I also believed that blending for longer than a minute always gives better results—until I learned that pulsing and short intervals produce thicker, creamier smoothies. Lastly, I assumed that cleaning was optional, which caused buildup and performance issues. Breaking these myths opened my eyes to more effective, affordable blending techniques.
What Experts Won’t Tell You About Maintaining Your Blender
Many people overlook the importance of regular blade inspections and proper cleaning tools. I discovered that replacing dull blades and using the right brushes extends my blender’s lifespan dramatically. A simple weekly routine of descaling and checking seals prevents overheating and breakdowns. These small habits, shared by top blender pros, keep my device performing like new and save me costly repairs.
My Essential Toolkit for Blender Success
- Silicone spatula: Perfect for scraping ingredients without scratching the jar. I use it after every blend to maximize efficiency.
- Small appliance brush: Helps clean blades and seals thoroughly, especially in tight corners.
- OEM replacement blades: Ensures my blender stays sharp and effective. I keep a spare ready just in case.
- Vinegar or descaling tablets: Keeps internal components free of mineral buildup, especially in hard water areas. I do this monthly for peace of mind.
Your Turn to Try
Now that you know some of the hidden lessons and essential tools, it’s time to elevate your blending game. Remember, mastering technique and maintenance can turn any blender into your kitchen hero. Whether you’re making smoothies, nut butters, or ice-cold drinks, these insights will help you achieve perfect results every time. Don’t be afraid to experiment and find what works best for you—your future blends will thank you.
What’s the biggest blending challenge you’ve faced, and how did you overcome it? Share your story below—I’d love to hear!
I agree, selecting the right blender is crucial, but I think mastering the technique can really elevate your results without necessarily breaking the bank. I used to struggle with getting smooth nut butters or well-crushed ice until I learned to layer ingredients properly and use pulsing instead of continuous running. It made a noticeable difference. I’ve also found that regularly checking and replacing blades keeps the blades sharp and performance consistent. Have any of you tried multi-speed models with variable controls? I’d be curious to hear how that impacts your blending process.
This post really hits home for me, especially the part about technique. I used to think that having a powerful blender was all I needed, but I learned the hard way that proper layering and pulsing make a huge difference. The tip about starting with smaller ice cubes and using pulse mode really helped me improve my ice crushing results without stressing my motor. I recently upgraded to a model with variable speed controls, and honestly, being able to adjust speed on the fly has transformed my blending routine. It allows for better control, especially when making delicate nut butters or smoothies with frozen fruit. Has anyone else found that variable speed models help refine their results? I’d love to hear some personal success stories or tips from fellow readers—sometimes small adjustments make all the difference. Plus, keeping blades sharp and well-maintained has extended my blender’s lifespan significantly. It’s amazing how much of a difference maintenance and technique can make, isn’t it? Looking forward to trying some new tricks I learned here! Cheers to smoother blends!
This post really resonates with me because, like many, I used to believe that more wattage was the ultimate solution for all blending challenges. But I quickly learned that blade design and control features are just as important, especially for tasks like making nut butters or crushing ice with precision. I’ve recently upgraded to a model with variable speed controls, and the difference it makes is astonishing. Being able to fine-tune the speed during blending allows me to achieve smoother textures without overloading or overheating my motor. Also, I’ve started paying attention to my blending techniques—layering ingredients properly and pulsing instead of continuous blending has improved my results immensely. Have any of you experimented with pulse functions or different blade geometries? I’d love to hear how these features have impacted your blending experience and if they’ve helped you avoid common pitfalls like overheating or uneven consistency. It’s clear that investing in a versatile blender with good control options is more beneficial than just focusing on wattage alone. Looking forward to hearing your tips and experiences!