Ever had that frustrating moment where your blender just couldn’t handle that tough nut butter or refused to crush ice into a fine snow? I’ve been there. I remember buying a supposedly powerful blender, only to find it sputtering and overheating after just a few minutes of blending. It was a lightbulb moment for me—clearly, not all high-speed blenders are created equal. The disappointment of investing in a machine that underdelivers is real, and honestly, it can derail your healthy eating plans faster than you can say “smoothie.”
Why Choosing the Right High-Speed Blender Matters in 2025
As we step into 2025, the demand for versatile, powerful blenders has skyrocketed. Whether you’re into making silky smoothies, creamy nut butters, or crushing ice for that perfect frozen drink, your blender needs to keep up. The good news? Technology has evolved rapidly, giving us access to models with impressive power, durability, and smart features that make blending easier and more effective. But with so many options flooding the market, how do you know which one truly stands out? That’s where I come in, sharing my honest experiences and expert tips to help you make an informed choice.
Is the Hype About High-Speed Blenders Justified?
Early in my journey, I made a classic mistake—believing that all high-speed blenders are essentially the same. I bought a popular model based solely on reviews, only to find it struggled with tougher ingredients like frozen berries or dense nut butters. It was a waste of money and time. Trust me, understanding the science behind these machines makes a huge difference. For instance, knowing about the science behind speed settings can help you select a blender that performs consistently. Today, I’ll guide you through the top features to look for and share practical tips to get the most out of your investment.
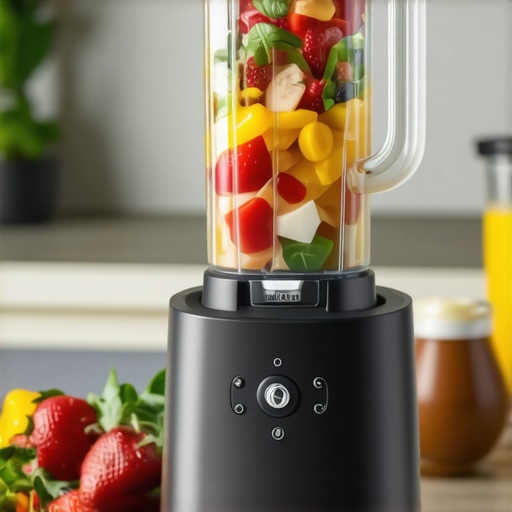
Choose the Right Blender for Your Needs
Start by identifying your primary blending tasks. Are you making smoothies, nut butters, or crushing ice? Knowing this helps narrow down your options. For example, if crushing ice is a priority, focus on models with proven ice-crushing capabilities, like the ones discussed in top ice-crushing blenders. I remember when I first selected a blender based only on wattage; it turned out to be underpowered for nut butters, leading to frustration. By assessing your needs first, you ensure your investment pays off.
Master the Speed Settings
Modern high-speed blenders come with multiple speed options. Understanding how to utilize these settings effectively is crucial. For instance, start blending at a low speed to break down large chunks, then gradually increase to high for smooth textures. I once attempted to make almond butter by jumping straight to maximum speed, which caused splattering and uneven texture. After reading this guide, I learned to gradually ramp up speed, resulting in a creamy, uniform nut butter.
Optimize Ice Crushing Techniques
If crushing ice is your goal, the technique is just as important as the blender. Fill the jar halfway, then pulse multiple times rather than holding the button down continuously. This prevents overheating and delivers smaller, more uniform ice particles, perfect for smoothies. I experimented with a new ice-crushing method on my blender, following tips from this article. The result? Frozen drinks that rival professional bars, with no chunks left behind.
Perfect Your Nut Butter Preparation
Nut butters require a different approach. First, toast your nuts lightly to enhance flavor, then add them to the blender with a pinch of salt. Use the tamper if available to push nuts toward the blades. Start with a medium speed, then increase gradually. I once overworked a batch of cashew butter at high speed, resulting in overheating and a burnt taste. Learning to control the speed and using the nut butter tips made my creations smooth and delicious every time.
Utilize Effective Blending Hacks
Small tricks can elevate your blending game. For example, add liquids first, then solids, to prevent clumping. Use the pulse function for better control over texture. For smoothies, I always pre-chop ingredients and layer them strategically in the jar, which reduces blending time and stress on the motor. These hacks, detailed in this resource, help you achieve professional results at home.
Regular Maintenance for Longevity
Lastly, keep your blender in top shape. Clean the blades immediately after use to prevent residue buildup. Occasionally run a cleaning cycle with warm water and a drop of dish soap. Check the seals and blades periodically for wear. Proper maintenance ensures your high-speed blender remains powerful and reliable, whether you’re blending smoothies or nut butters. For detailed maintenance routines, visit our privacy policy for tips.

Many enthusiasts believe that simply choosing the most powerful blender will solve all their blending problems. However, this is a common misconception that can lead to costly mistakes and subpar results. The truth is, **power alone doesn’t guarantee performance**. Factors like blade design, motor control, and container shape play crucial roles in achieving smooth textures and efficient ingredient processing.
Are High Wattage Blenders Always Better?
Not necessarily. While a high wattage can help, it often results in higher energy consumption and noise without guaranteeing perfect blending. For example, some top-rated blenders leverage advanced motor technology and blade configurations to outperform models with higher wattage but poorer design. This means that focusing on the quality of components and engineering can be more effective than just chasing wattage.
Moreover, many users overlook the importance of the **speed control system**. Precise control over blending speed allows for better handling of different ingredients, leading to smoother results and less wear on the motor. Skipping this nuance can result in overworking the motor, reducing its lifespan over time.
The Hidden Trap of Overconfidence in Your Blender’s Capabilities
One of the most overlooked mistakes is assuming your blender can handle all tasks without proper adjustments. For instance, trying to blend dense nuts or large ice chunks at high speed without pre-processing or pulsing can cause overheating and motor burnout. A common trap is relying solely on the preset functions instead of actively managing your technique, like pulsing for ice or gradually increasing speed for nuts. This oversight often leads to inconsistent textures and potential damage.
Advanced users often ask: “How can I optimize blending for the toughest ingredients without risking my machine?” The answer lies in understanding the **science of blending**. Slow, steady acceleration combined with techniques like pre-chopping ingredients and using pulse functions dramatically improves results and extends your blender’s life. For instance, mastering ice-crushing techniques can prevent overheating and ensure uniformly crushed ice without overtaxing the motor.
According to a study by blender scientists, motor control and blade design are more critical to performance than raw power. This insight emphasizes the importance of choosing a model with sophisticated engineering, not just high wattage, to achieve consistent, professional-quality results.
Have you ever fallen into this trap? Let me know in the comments!
Keeping your high-speed blender in top condition isn’t just about occasional cleaning; it’s a dedicated process that ensures consistent performance and longevity. One of my favorite tools for maintenance is a high-quality silicone blade brush. Unlike traditional brushes, silicone brushes can get into the nooks and crannies of the blades without damaging them, making cleanup after tough blends like nut butters or ice crushing much easier. I use mine weekly, especially after blending sticky ingredients that tend to cling to the blades.
Another indispensable tool is a motor cooling fan. While most modern blenders are equipped with built-in ventilation, I’ve found that placing a small external fan nearby during extended blending sessions helps prevent overheating. This is especially useful when I’m preparing large batches of smoothies or nut butters. Over time, consistent overheating can degrade motor components, so proactive cooling extends the lifespan of your machine.
For the internal maintenance, I recommend a monthly cleaning cycle using a mixture of warm water, a few drops of dish soap, and a splash of white vinegar. Simply run this cycle with the blender empty, and it will dissolve any residue buildup inside the container and blades. This routine not only keeps your blender hygienic but also prevents unpleasant odors and ensures smooth operation.
To monitor ongoing performance, I rely on a performance tracking app. While not all blenders come with smart technology, I’ve invested in a Bluetooth-enabled device that connects to my phone. It logs motor temperature, run time, and power usage, giving me insights into when my blender needs a rest or a thorough check-up. As technology advances, I predict more manufacturers will integrate these features directly into their models, making maintenance easier and more precise.
How do I maintain high-speed blender performance over time? The key is to follow a consistent routine of cleaning, monitoring, and proper usage techniques. For example, always avoid blending ingredients directly from the freezer without pre-chopping or pulsing, as this puts unnecessary strain on the motor. Instead, give your ingredients a head start with smaller chunks and use pulse mode, which reduces heat buildup and motor stress. Additionally, periodically replacing the blender seals and gaskets ensures that your machine remains airtight and prevents leaks that can damage internal components.
Looking ahead, I believe that smart maintenance tools will become standard. Imagine a blender that automatically detects its internal temperature and alerts you when it needs a break or a deep clean. For now, combining manual checks with smart tools like performance tracking apps will give you the best results.
Don’t forget to try out the advanced tip of using a pre-cooling your ingredients before blending. This simple trick can significantly reduce motor heat and improve overall performance, especially when tackling dense ingredients like frozen fruit or thick nut butters.
What I Wish I Knew Before Diving Deep Into High-Speed Blenders
One of the most eye-opening lessons I learned was that not all high-speed blenders are created equal. Initially, I believed that wattage alone determined performance, but I quickly discovered that blade design, motor control, and container shape play equally vital roles. This realization transformed my approach, leading me to select models with better engineering rather than just higher power ratings.
Another insight was the importance of technique over brute force. Rushing ingredients into the blender at maximum speed often resulted in overheating or uneven textures. Gradually increasing speed and pulsing instead of continuous blending saved my motor and improved the quality of my creations. This simple adjustment made a huge difference in my results and the lifespan of my blender.
Furthermore, I underestimated the value of regular maintenance. Deep cleaning the blades with a silicone brush and monitoring motor temperature with smart tools kept my blender performing at its peak. These small habits extended the life of my machine and ensured consistent, professional-quality smoothies and nut butters.
My Go-To Arsenal for Blender Mastery
For anyone serious about elevating their blending game, these tools and resources are indispensable. I trust this guide on ice crushing techniques for perfecting my frozen drinks, and these hacks for smoothies help me save prep time and motor stress. When I want to perfect my nut butters, this resource on nut butter preparation offers crucial tips.
Additionally, I’ve invested in a performance tracking app that logs my blender’s run time and temperature, giving me real-time insights and warning signs. Combining these tools with routine cleaning routines, like running a vinegar solution inside the jar, keeps my blender reliable and efficient.
Embrace Your Blender Journey — The Future Is Bright
Remember, mastering your high-speed blender isn’t just about making smoothies; it’s about understanding your equipment and pushing its limits responsibly. With the right knowledge and tools, you can unlock new culinary possibilities and create healthier, tastier treats every day. Don’t shy away from experimenting and learning — your perfect blend awaits!
Reading through this comprehensive guide really resonated with my own experience trying to find a high-speed blender that can handle tough ingredients like dense nut butters and ice without overheating or struggling. What I’ve learned is that blade design and motor control can make a significant difference, often more so than wattage alone. I recently upgraded to a model with variable speed control and a better blade configuration, and the results have been noticeably better, especially when making homemade almond butter. I appreciate the tip about pre-cooling ingredients—cooler ingredients tend to blend more smoothly and reduce motor heat. One thing I’d love to hear from others is how they set up their blending routines—do you follow certain pre-processing steps or specific techniques to preserve your blender’s longevity while getting perfect textures? I think paying attention to these details can really elevate our blending game and avoid common pitfalls.
This post really resonated with my recent experience upgrading my blender. I used to think wattage was the main factor in picking a high-speed model, but I’ve found that blade design and motor control are actually more crucial for tough ingredients like frozen berries and nut butters. I recently moved to a blender with variable speed and a precision control system, and it’s made a noticeable difference in texture and motor longevity.
The tip about pre-cooling ingredients is so true—working with cooled nuts and fruits definitely reduces strain on the motor and helps achieve smooth results. I also started pre-chopping tougher ingredients and using pulses instead of continuous blending, which has extended my machine’s life.
What tricks do others here use for pre-processing? Do you find certain methods or ingredient preparations work best to maintain your blender’s performance over time? I’d love to hear everyone’s routine—especially for blending dense nuts or ice—since proper prep seems to make all the difference.